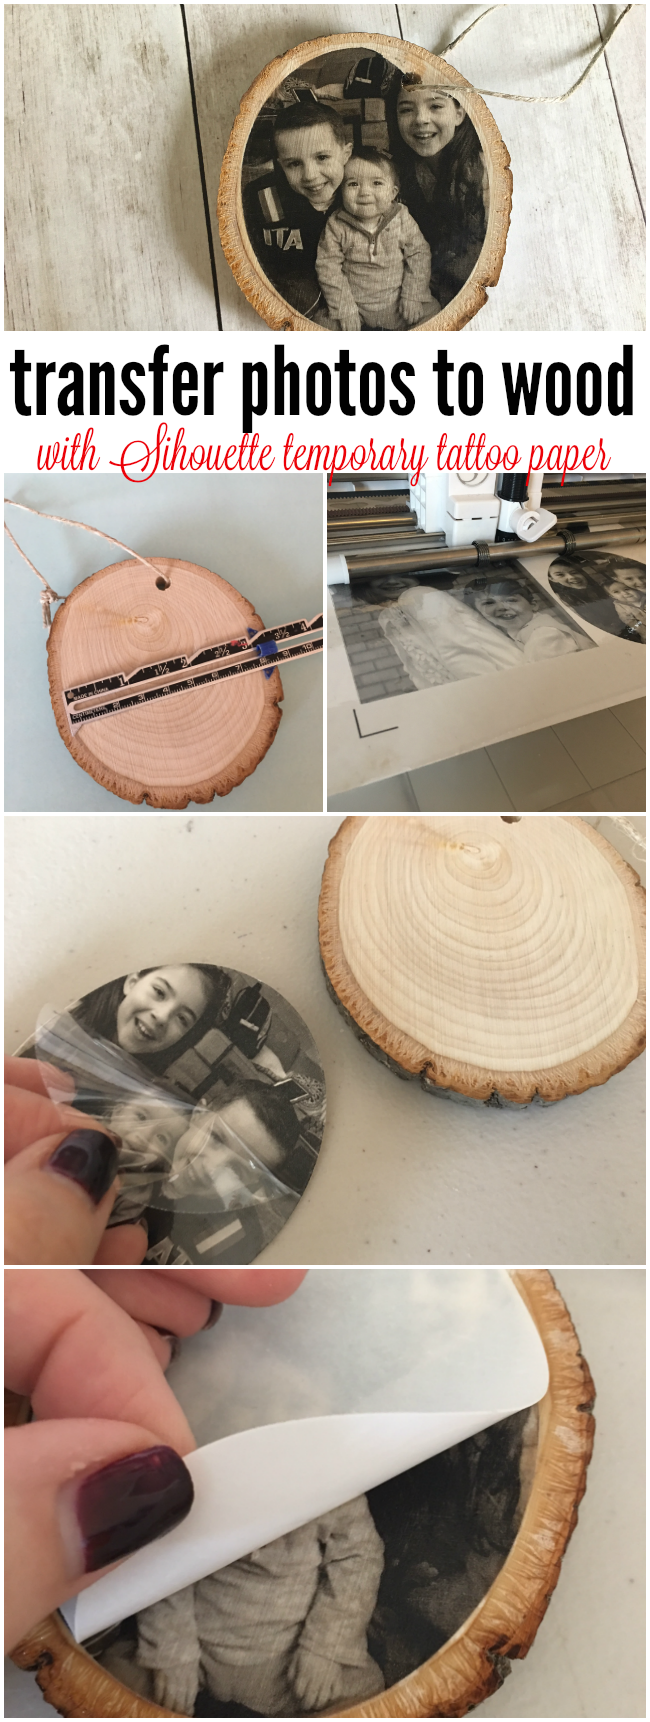
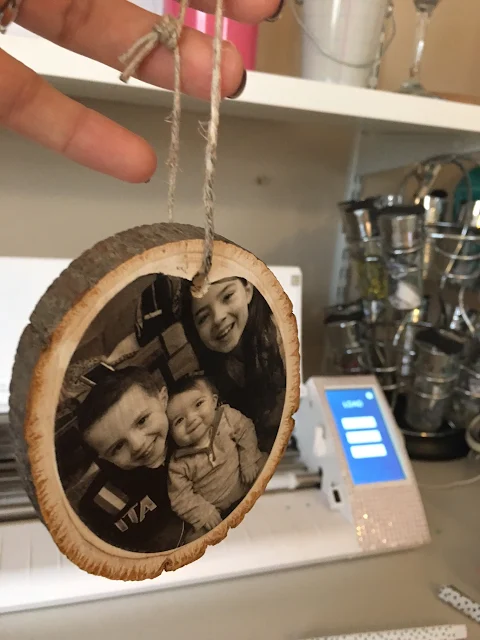
So I'm back...and I'm happy to report you can in fact use Silhouette Temporary Tattoo paper to transfer photos to wood!
These are so fun and easy and make great gifts for Mother's Day or Christmas. I think they'd even make cool gift tags if you get the right size wood slice.
How to Put Photo on Wood
The first thing you want to do is measure the surface of your piece of wood. I decide to use a wood slice, but this process would work the same with any piece of unfinished wood.
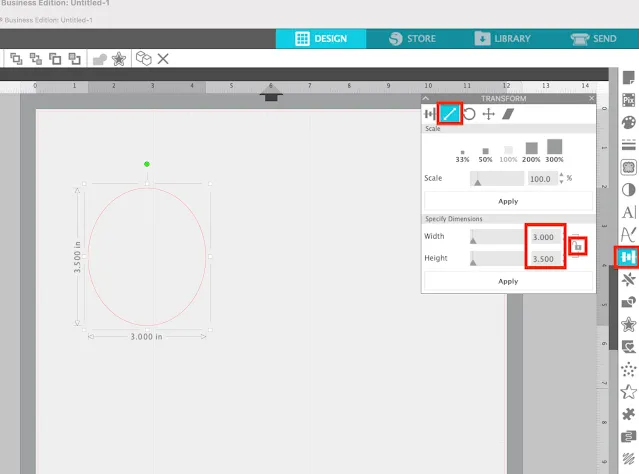
With your dimensions go into Silhouette Studio and use the basic shape tools to draw out the same in the same dimensions. I wanted the photo to fit inside the natural ring on the wood slice so I made the oval in Silhouette Studio 3" x 3.5".
With your dimensions go into Silhouette Studio and use the basic shape tools to draw out the same in the same dimensions. I wanted the photo to fit inside the natural ring on the wood slice so I made the oval in Silhouette Studio 3" x 3.5".
By using the Scale tool you can manually enter the dimensions of your shape.
How to Fill a Shape with a Photo in Silhouette Studio
Now you need to fill that circle with a photo. There are several ways to get the photo inside the shape in Silhouette Studio.
The easiest is by adding the photo to the Patterns fold in the Silhouette Studio library. However you can only add custom patterns to the patterns folder if you have Silhouette Studio Designer Edition. If you don't have Designer Edition you can still fill a shape with a photo in Studio you just need to use the Modify tools instead. That method is explained in step by step detail here.
The easiest is by adding the photo to the Patterns fold in the Silhouette Studio library. However you can only add custom patterns to the patterns folder if you have Silhouette Studio Designer Edition. If you don't have Designer Edition you can still fill a shape with a photo in Studio you just need to use the Modify tools instead. That method is explained in step by step detail here.
Once your shape is filled with the photo, you have the option to change the photo to black and white or sepia if you want by using the Image Effects tool. It's a great way to edit photos in Silhouette Studio.
How to Print and Cut Temporary Tattoos with Silhouette CAMEO
With the Silhouette Temporary Tattoo Paper you need to mirror the design so that it goes onto the piece of wood correctly oriented. So select the shape > right click > flip horizontally.
Now you can set up the page for the print and cut. Go to the Page Setup panel and make sure you have selected "Printer" from the Media Size drop down. You also want to check the boxes to show the print border and the cut border.
Turn on the registration marks as well from the Registration Marks window or by clicking the keyboard shortcut "M."
Make sure all of your designs are safely inside the hashed areas as well as the print and cut borders.
How to Use Silhouette Temporary Tattoo Paper
Place a piece of the white temporary tattoo paper into your printer so it's oriented so it will print on the more smooth/shiny side.Click the Printer icon along the top toolbar of Silhouette Studio to send the design to print.
After it prints, wait a few minutes so the ink can fully dry. Grab the green sheet with the clear cover. Peel the clear piece away (the back side of it is what will transfer the adhesive to the printed sheet) and carefully place it over your printed paper with the sticky side down. Smooth it down and then put the printed sheet now with the clear cover onto your Silhouette Cutting mat.
Load the cutting mat into the Silhouette CAMEO or Portrait. In Silhouette Studio's Send Panel select Silhouette Temporary Tattoo Paper as the material type. Note the recommended cut settings and adjust the blade if necessary.
When you're ready, send the design to cut.
After the photos are finished cutting you should be able to weed away the excess tattoo material leaving just the photos behind on the cutting mat.
Carefully remove the photo tattoos from the cutting mat.

Peel away the clear backing leaving the photo transfer with a sticky adhesive on top.
How to Transfer Photos to Wood
Flip the photo transfer onto the piece of wood, photo side down, and place it exactly where you want the photo to be positioned.
Place a wet washcloth over the entire tattoo and apply firm and even pressure for 30 seconds.
After the 30 seconds you should be able to see through the paper backing slightly revealing your photo.
Carefully peel away the paper backing, leaving the temporary tattoo photo transfer on the piece of wood.
Let the temporary tattoo dry for a few minutes. Until it dries the tattoo material will be slightly stretchy so try not to touch it - especially around the edges.
Once the temporary tattoo/photo transfer has completely dried you may want to protect the finish by sealing it with a layer or two of mod podge.
Want to make your own wood slice photo ornaments? Grab what you need for this Silhouette project..

Note: This post may contain affiliate links. By clicking on them and purchasing products through my links, I receive a small commission. That's what helps fund Silhouette School so I can keep buying new Silhouette-related products to show you how to get the most out of your machine!
Place a wet washcloth over the entire tattoo and apply firm and even pressure for 30 seconds.
After the 30 seconds you should be able to see through the paper backing slightly revealing your photo.
Carefully peel away the paper backing, leaving the temporary tattoo photo transfer on the piece of wood.
Let the temporary tattoo dry for a few minutes. Until it dries the tattoo material will be slightly stretchy so try not to touch it - especially around the edges.
Once the temporary tattoo/photo transfer has completely dried you may want to protect the finish by sealing it with a layer or two of mod podge.
Want to make your own wood slice photo ornaments? Grab what you need for this Silhouette project..

Note: This post may contain affiliate links. By clicking on them and purchasing products through my links, I receive a small commission. That's what helps fund Silhouette School so I can keep buying new Silhouette-related products to show you how to get the most out of your machine!
Get Silhouette School lessons delivered to your email inbox! Select Once Daily or Weekly.


.png)


Thanks for your explanation on how to use the tattoo paper.
ReplyDeleteThis looks much better then using Mod Podge to transfer the picture because when drying my pictures always gets a bit wavy (wrinkling). This method gives a more flat result I think.
Question? Do I need a Silhouette to cut the photo in shape? Can I also do it by hand? I have no Silhouette but like to use the paper only.
Thanks for your answer.
I don't have a Silhouette either, but I don't see why you couldn't hand cut it. I think I am going to give it a try
Delete