I've figured out a way to print any design multiple times on a single sheet of Oracal 651 vinyl and then cut out each of the designs to create individual decals. Whether you run a Silhouette business or not, this is a huge time, material, and money saver for anyone who needs to create multiple copies of the same custom vinyl decals.
Think about if you had a large order of tumblers, mugs, or shirts that all had the same decal design which required a lot of layering. Or perhaps you have a popular seller that slows you down because it's time consuming to cut and layer each one. With this hack you could have several custom vinyl decals printed on the same sheet of vinyl and then you could just cut them all at the same time and apply the personalization quickly.
Combining the power of Sparkle Berry Ink's Custom Design Upload tool to create custom printed vinyl, Pixscan, and Silhouette CAMEO or Portrait I think we can all agree this is a real game changer.
Alright before we start I want you to keep in mind that this is a rather advanced Silhouette tutorial that will assume you know how to: save designs from Silhouette Studio as JPEGs, upload custom designs to the Sparkle Berry Design Tool, and use the Silhouette Pixscan mat.
The first thing you want to do is create your design in Silhouette Studio. I made this striped state shape and then added some flowers from another design I had.
Save the .Studio design to your Silhouette Studio library or hard drive - you'll need the shape for later!
Save Silhouette Studio Design as JPEG
In addition to saving the .Studio file, you also need to save the design as a JPEG from Silhouette Studio so you can upload it to Sparkle Berry's Design Tool.If you using Silhouette Studio V4.1 (which currently remains in open Beta) Business Edition you can Select the Design > File > Save Selection > Save to Hard Drive > change the file type to JPEG.
If you do not have Silhouette Studio 4.1 or the Silhouette Studio Business Edition upgrade you can take a screen grab of the design in Silhouette Studio. MAC users can use the keyboard shortcut COMMAND + SHIFT + 4 and draw out a box around the area to be screen grabbed. To take a screen grab on a PC with Windows use the Snipping tool.
Upload to Sparkle Berry Ink's Design Tool
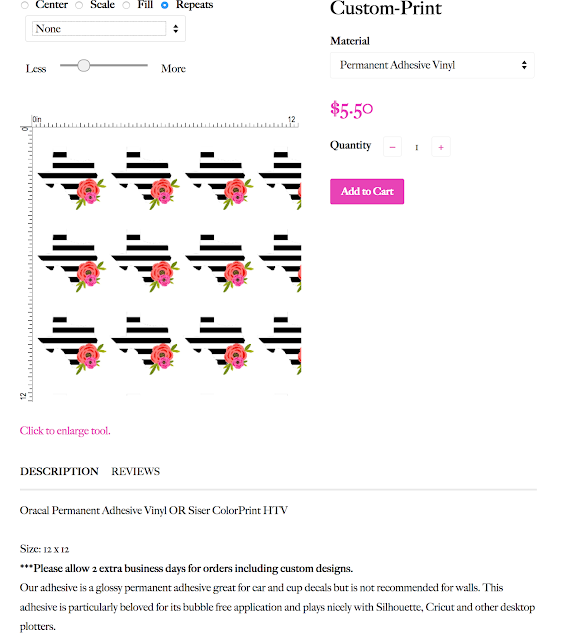
Go to the Sparkle Berry Ink website and click on the Design tab. Log into your account and then upload the JPEG version of the design you just created in Silhouette Studio.Decide how large you want the final custom vinyl decal or heat transfer vinyl design to be and use the "Repeat" option and adjust the scale. This will determine how many copies of your design can fit on one 12x12 sheet of custom printed vinyl. If some get cut off, don't worry - just fit as many full size designs on the sheet as possible by playing with the horizontal and vertical drops. I was able to fit between 9 and 12 decals on one sheet.
Select whether you want Sparkle Berry to print your design on Oracal permanent adhesive vinyl or Siser Heat Transfer vinyl and place your order.
Cutting Custom Printed Vinyl and HTV Decals with Silhouette Pixscan
When the custom printed vinyl sheets arrive - be prepared - because this is where the magic happens.
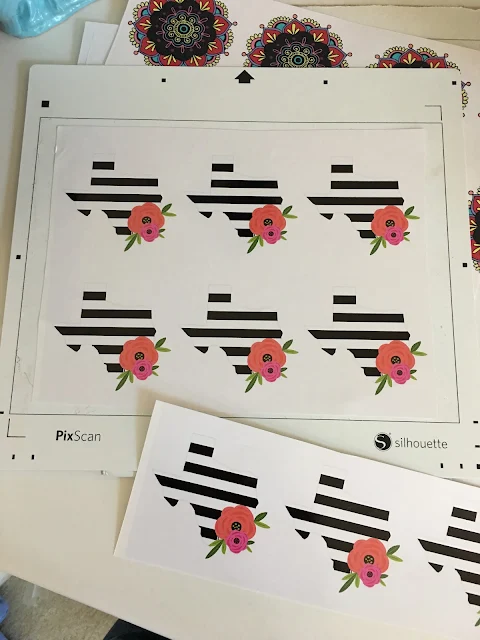
First, grab your Silhouette Pixscan mat. You will likely need to cut the sheets between the printed decals so you can place parts of the sheet on the Pixscan mat.
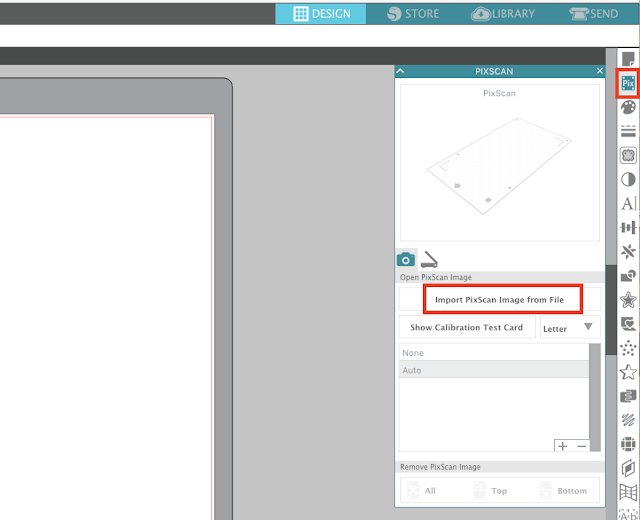
Take a picture of your Pixscan mat with the custom printed vinyl decals on it and bring it into Silhouette Studio.
If the design can be traced easily, you can trace it to create an outer edge cut line quickly.
If your design is like my striped state design and can't easily trace in Silhouette Studio because of the white stripes up against the white of the negative space on the vinyl - don't worry.
Go to your Silhouette Studio library and find the saved .Studio copy of the design. Right click > Merge to open the design in the same space as the Pixscan image.
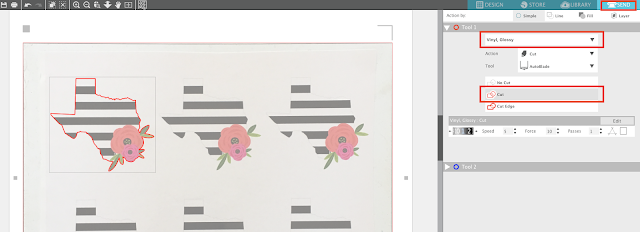
Select the Silhouette Studio design you just opened and change the fill color to "Transparent" and the line color to red.
Now line up the cut line with the shapes on the Pixscan image of the printed vinyl.
Replicate the cut lines and line them all up all full size copies of your decal design. (I would recommend cutting one custom vinyl decal first to make sure the Pixscan line is accurate then adjusting SLIGHTLY if necessary. I had to nudge my cut line about two or three tabs in one direction.)
Move to the Send panel and from the material list select "Vinyl, Glossy". Increase the blade to a 2 and increase the Thickness/Force setting slightly (about 14).
Load the Silhouette Pixscan mat into the vinyl cutting machine and begin cutting.
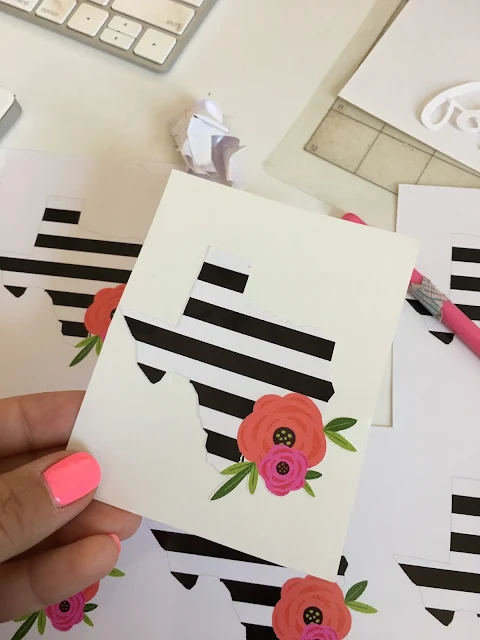
When the cutting is finished, weed away the excess vinyl and/or cut apart the individual decals. From one sheet of vinyl and one single you have just created multiple custom vinyl decals - none of which require any layering!
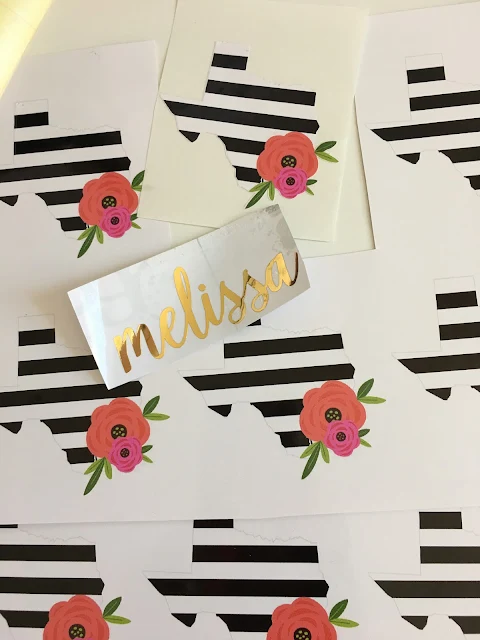
You can now use transfer tape to pick up the individual vinyl decals and place them OR you can customize them further by adding a name or monogram.
Customizing Bulk Custom Printed Vinyl Decals
Return to the Silhouette Studio work area where your Pixscan image is loaded. If you want to add a name to your vinyl decal open the text tool, pick your font style, and type out the text. Size the text based on the size of the decal in Silhouette Studio.
Copy the text and move it to another Silhouette Design Studio work area and then cut it on a coordinating vinyl.
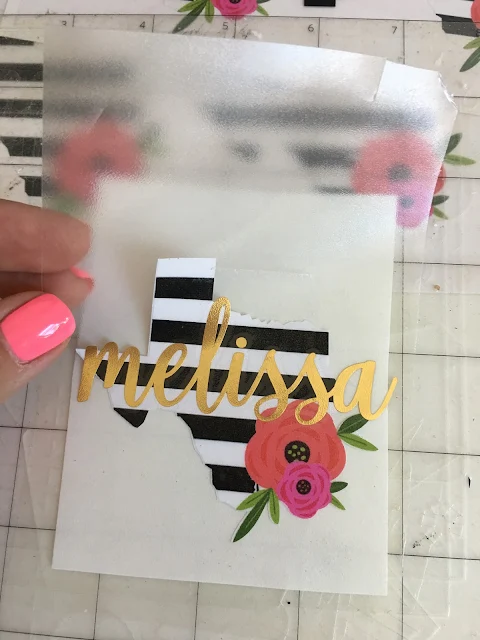
Once it's weeded you can use transfer tape to pick it up and then lay it on top of the custom printed vinyl decal.
When it comes to customizing a large order or high volume seller it doesn't get much faster or more efficient and cost effective than this! The one sheet of custom printed vinyl cost me $5.50, required no layering, and only took me a few minutes to cut, but left me with nine multi color vinyl decals!
If you enjoyed this Silhouette tutorial, why not pin it?!
Note: This post may contain affiliate links. By clicking on them and purchasing products through my links, I receive a small commission. That's what helps fund Silhouette School so I can keep buying new Silhouette-related products to show you how to get the most out of your machine!
Get Silhouette School lessons delivered to your email inbox! Select Once Daily or Weekly.









.png)


Perhaps I am misunderstanding something... but why couldn't you just print the designs on printable vinyl yourself?
ReplyDeleteThat's what I was wondering, I don't see why you cant if you have a decent printer... (the better the printer the better the quality of decal) and printable oracle that you can order off of Amazon
ReplyDelete