I'm so excited to have the very talented Gina from Twinklefarts on the blog today to show us how to use ProCreate with Silhouette Studio
Hi there, Silhouette School readers! My name is Gina (or Twinklefarts, if you prefer) and I too am a Silhouette addict... just like you. Today I'm have the pleasure of teaching you how to utilize Procreate in your Silhouette Studio workflow!
Back when I got my Silhouette Cameo for Christmas, I had no idea the power that it held. I'm a web and graphic designer and all-around tech guru, so being able to use my everyday tools with my Silhouette has been a blessing! Today I'm going to teach you how to use something that I just recently added to my arsenal-- an iPad Pro.
The iPad Pro comes with the ability to use pressure sensitivity for apps like the one I'll show you today (Procreate), but even older generations of iPads can use Procreate to create designs that you can later cut in Silhouette Studio.
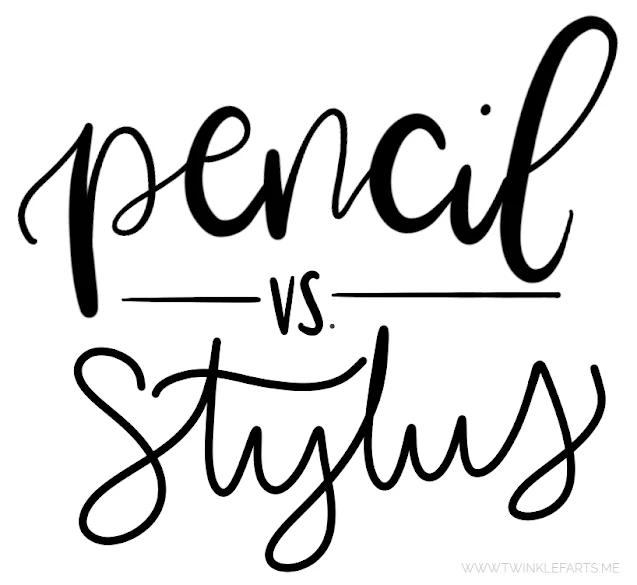
The one true perk to an iPad Pro + an Apple Pencil is the variation in line weight (see below), but any iPad can do what I'm about to show you.
For the techniques in this tutorial, you'll need the following:
- iPad of any generation (a Pro is necessary for Apple Pencil use, but you can use a compatible stylus of your choice as well)
- Procreate app (found here, $9.99 but well worth the investment if you're doing this daily like I have been)
- Apple Pencil (optional, but I love mine and would buy it over and over again)
- A basic understanding of Procreate (YouTube is a great resource for learning the basics)
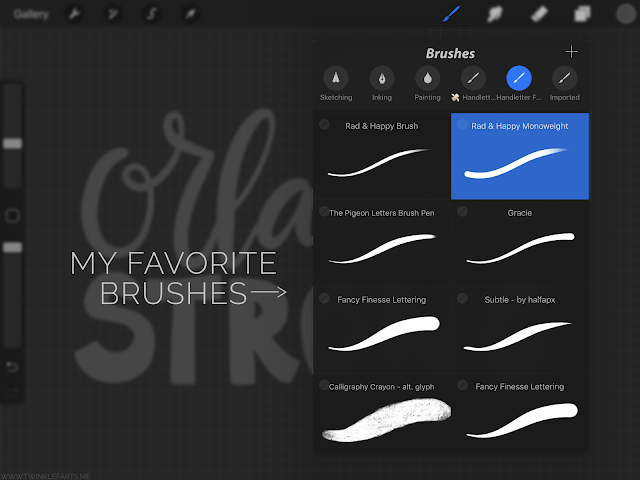
Spend some time getting to know Procreate and all its tools! Download some brushes, doodle a bit, and explore. Keep in mind that for this tutorial, you'll want to use a solid dark colored brush. I love the "Fancy Finesse" brush, which you can find here.
Note: See the Calligraphy Crayon brush I have in my brush tray? That's not a good choice for this technique. It'll give too many holes and create a distressed disaster in Silhouette Studio.
Once you have created a design in ProCreate that you want to cut with your Silhouette, the first step is to turn off the background layer in Procreate. Tap the layers button to show all the layers and uncheck the checkmark next to the layer titled "Background color."
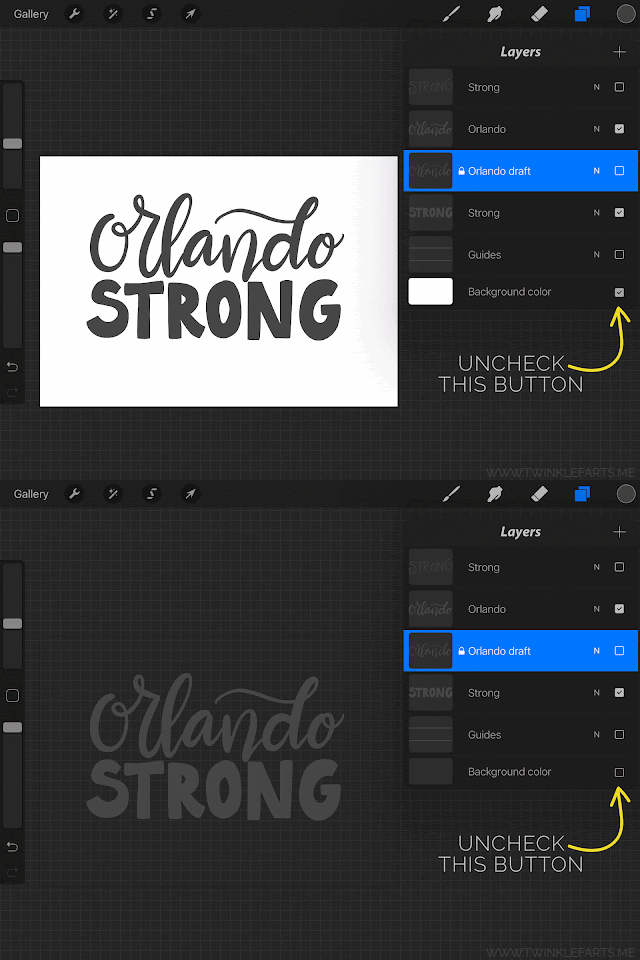
Doing this will make the "background" of your document a dark grid, but don't panic-- when you export it as a .PNG later, that background will be transparent.
Once your background layer is turned off, it's time to send your design to yourself so that you can cut it in Silhouette Studio. Tap the wrench in the top left corner and go to the "Share" button. In there, you'll want to "Share Artwork" and use the options to move it to your computer.
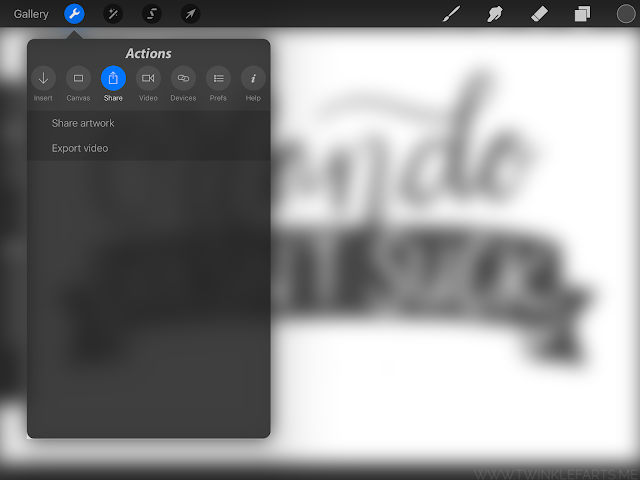
The important part here is to make sure you select PNG for your export! This is the key to getting a frustration-free trace in Silhouette Studio.
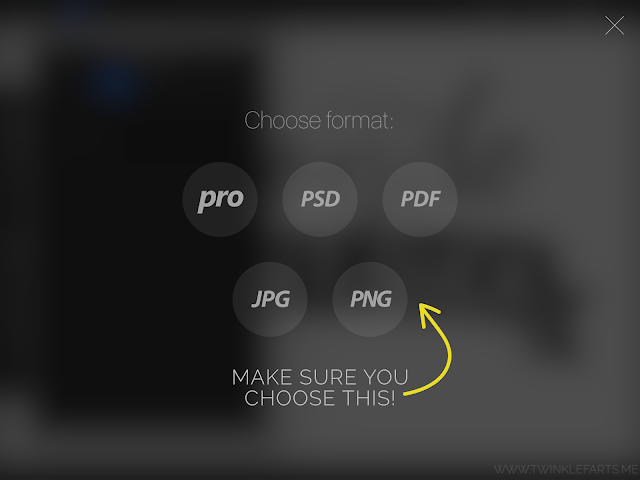
For the next step, I use Airdrop because it makes things easy peasy between my iPad and Mac computer. You can also opt to email the file to yourself, or use Dropbox or a similar cloud-based drive.
Once you have your design on your computer, drag it into a new document in Silhouette Studio. If you did the PNG export successfully, you'll notice that there's no white background behind your design... yay! That's what we want.
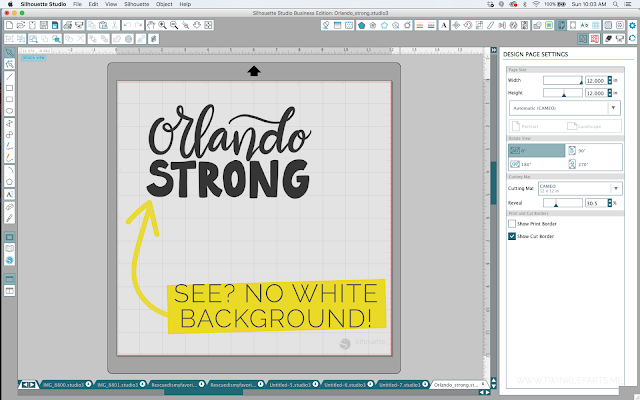
Go ahead and trace as you normally would, making sure to move the tracing box so that it covers all of your design.

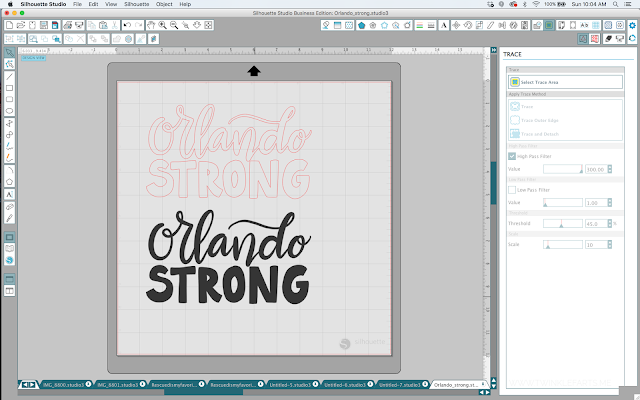
Once you've traced your design, you can move around elements that aren't touching. Select your traced design, right click, and click "Release Compound Path." Then, drag a selection box around the elements you want to group together, right click, and "Make Compound Path." This will also allow you to fill your designs with colors, gradients, or patterns.

I ended up opting for a rectangle and solid sans serif font instead of a hand-lettered "strong." Since I didn't overlap my two lines of letters, I was able to separate out "Orlando" from "strong" to achieve this effect!
Procreate has definitely upped my designing game with Silhouette Studio, and I no longer find myself hunting through SVGs and the Silhouette Design Store to find specific things-- I just make them myself! I hope this tutorial helps you utilize your iPad Pro to its fullest potential with Silhouette Studio.
-Gina from Twinklefarts
Note: This post may contain affiliate links. By clicking on them and purchasing products through my links, I receive a small commission. That's what helps fund Silhouette School so I can keep buying new Silhouette-related products to show you how to get the most out of your machine!
Get Silhouette School lessons delivered to your email inbox! Select Once Daily or Weekly.


.png)


Thank you for this tutorial! An iPad Pro is at the top of my wish list for just this reason! I've recently gotten really into hand lettering, and I'm looking forward to being able to cut my own hand lettered designs. I was under the impression that Procreate is only available for IPad Pros. Has that changed?
ReplyDeleteWonderful instructions! Thank you!
ReplyDeleteAny suggestion on stylus for a regularl iPad?!! :)
ReplyDeleteIf you have 6th gen. iPad or above, you can use Procreate. Use 1st gen Pencil. I just upgraded to Pro (2020) with more space and power because I use the iPad almost exclusively for art work. I use the send gen Pencil.
DeleteAny tips on something similar for windows users?
ReplyDeleteWhy cant studio be downloaded onto the ipad pro?
ReplyDeleteThey (Silhouette) has a beta version they are working on now.
DeleteAre they ever going to make a studio app that works? I have a Ipad Pro all the making in one computer to transfer to a different computer is a pain.
ReplyDeleteI just happened to have done this right before I read this. I have an ipad pro 12.9 2020 and apple pencil. I saved as a layered png and opened/merged each layer. When I brought them into Silhouette Business Edition they were automatically traced. This tutorial shows an older version of Procreate also. Thank you for posting this though!
ReplyDeleteSome really superb info , Sword lily I found this. tablet mockup
ReplyDeleteSome really quality blog posts on this site, saved to fav. ipad psd
ReplyDeleteI really love the theme on your web site, I run a website , and i would love to use this theme. Is it a free vogue, or is it custom? website design firms san francisco
ReplyDeleteSuperb read, I just passed this onto a colleague who was doing a little study on that. And he actually bought me lunch because I located it for him smile So let me rephrase that: Thanks for lunch! website design company san francisco
ReplyDeleteJust a clarification…the newest iPads can use an Apple Pencil. It’s not just the iPad Pro. I own an 8th gen iPad, and the 1st gen Apple Pencil. Just be sure you confirm compatibility. But it is a significant cost savings if you can’t spring for a Pro yet. And yes, you can use Procreate as well.
ReplyDeleteIf you are having issues with using a PC and iPad together, just email the file to yourself so you open and then import to Studio... I email myself a lot :)
ReplyDelete