 |
| This is a sponsored post, but all opinions are my own. |
The first thing you'll want to do is gather your supplies. You'll need:
• Liquid fabric starch in spray bottle (or Melissa's favorite: Terial Magic)
• Freezer paper
• CB09 blade holder loaded with 60 degree blade (or a fabric blade)
• Fabric scraps
• Iron with pressing cloth
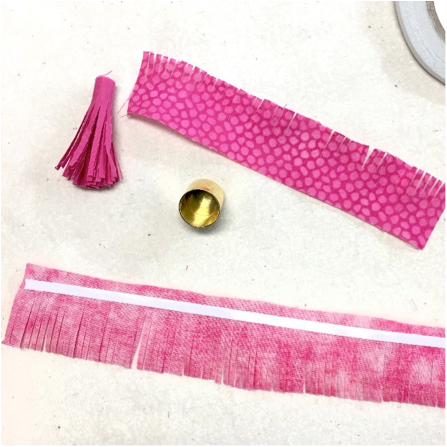
• Double sided tape from Craft Chameleon
• Scissors
• Tassel top from Craft Chameleon
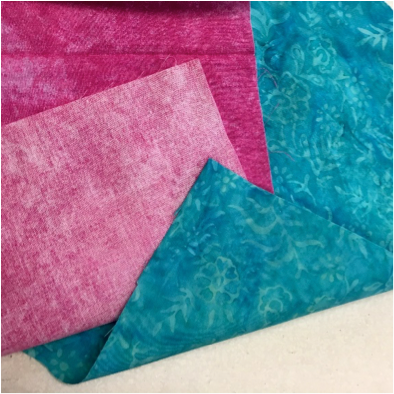
I used quilting cottons and a cotton broadcloth. Looser woven fabrics do not hold up as well to this high density of cut lines. One other quick note on fabrics, try to find a dyed fabric for the longest portion of the tassel, it is the fabric where the back side is most likely to be seen.
 Being a crafter I had a large bottle of starch which I decanted into a small spray bottle (add no water). You could also use Terial Magic - Melissa has a tutorial on using Terial Magic to cut fabric with Silhouette here.
Saturate your fabric by spraying the starch or Terial Magic on one side. Place your pressing cloth over and iron the fabric until it is dry. Peel fabric off pressing cloth and turn to the opposite side of the fabric to repeat this process. Once your strip is completely dry, it will feel a bit like a paper.
In order for the starch to work it needs to be applied on both sides - so just make sure you have both sides starched before moving on.
The next step is to iron a piece of freezer paper on top of the fabric taking care to place the shiny side towards the fabric (it will melt to your iron if you don’t). Make sure the entire portion of the fabric you are going to use is covered with freezer paper. Iron using the setting above linen/cotton.
Keep your iron hot while you trim the excess paper away from the fabric. It needs to be like one unit in order to get the thin lines cut. Once it is cut, iron again to reseal any edges that might have started to peel up while trimming. Repeat for all three pieces of your fabric.
Place your fabric, freezer paper side down, on a clean, very sticky mat. Burnish with your hand to make sure it is secure on the mat.
Open up Silhouette Studio and open the free Silhouette cut file for the tassels which you can download here.
In Studio, position each file on the virtual mat so that it will cut on the fabric. From the Cut Settings window select Fabric - Thin Cotton from the material list. My recommended Silhouette cut settings for cutting the fabric tassels are: CB09 60 Degree Blade (you can set it to a 5 in the software), Speed 5, Depth 33.
I can hear you now, can’t I use my Silhouette Fabric Blade? The answer is yes, however because the angle of the blade is different the fabric responds with slight notches when cutting the thin strips. But in case you want to try, the settings are blade 5, speed 5 and thickness 31.
Once the tassels are finished cutting, remove the fabric from the cutting mat and peel the paper off the fabric.
Slowly, roll up the tassel tightly keeping the top of the fringe area level. If you used fabric glue, let it dry completely before applying the tassel top.
Continue the process with the next two sections of fabric fringe. The shortest tassel should be added last so it's on top.
The last step is to glue on the tassel top! I like to use E6000. Spread the glue covering the entire inside of the cap. Let the adhesive in the cap cure for 24 hours before using.
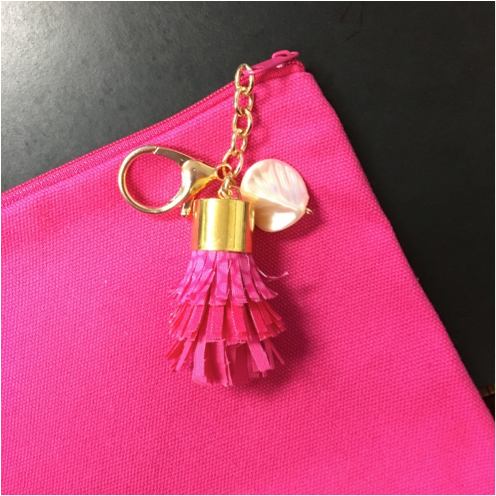
Fluff, accessorize and add to your fabric tassel to your favorite bag and enjoy!
Note: This post may contain affiliate links. By clicking on them and purchasing products through my links, I receive a small commission. That's what helps fund Silhouette School so I can keep buying new Silhouette-related products to show you how to get the most out of your machine!
Get Silhouette School lessons delivered to your email inbox! Select Once Daily or Weekly.


.png)


No comments
Thanks for leaving a comment! We get several hundred comments a day. While we appreciate every single one of them it's nearly impossible to respond back to all of them, all the time. So... if you could help me by treating these comments like a forum where readers help readers.
In addition, don't forget to look for specific answers by using the Search Box on the blog. If you're still not having any luck, feel free to email me with your question.