Having written now 13 Silhouette beginner guides (some have even called them the Silhouette Books for Dummies) I know the struggles that newbies face when they first get their cutting machine. It's overwhelming!
You don't know what 651 or 631 or weeding or compound path or Silhouette Studio or any of that lingo means. You're fascinated by the possibilities, but they stall you at the same time because there are just.so.many. Heck, you don't even know what's considered a Silhouette CAMEO beginner project.
For that reason now 11 years after when I received my first Silhouette cutting machine, I'm sharing 10 Silhouette CAMEO beginners tips for getting started whether you have a Silhouette CAMEO 5, CAMEO 4, Plus, Pro, Silhouette CAMEO 3, CAMEO 2, 1 or Silhouette Portrait.
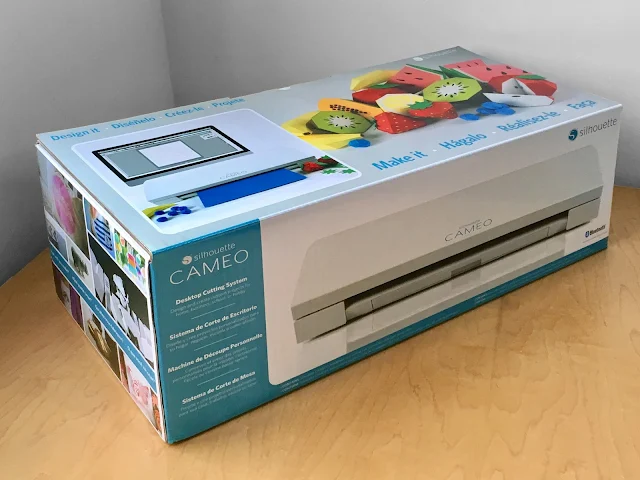
1. Get It Out of the Box
2. Get to Know What's in that Box
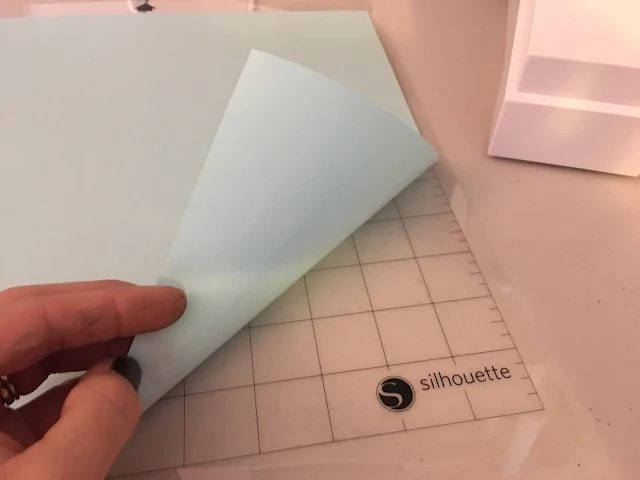
Every Silhouette cutting machine comes with a cutting mat. When the blue protective cover sheet is removed the sticky surface of the cutting mat is exposed. The sticky-ness is what will hold the material you are cutting in place.
The Silhouette cutting mats are known to be a little 'over' sticky when they're brand new which can cause vinyl and paper to rip or curl when they are being removed after cutting. To avoid this, de-stick the mat somewhat with a clean cotton t-shirt or pillow case before your first cut.
Every machine also comes with a cutting blade. The depth of the cutting blade is adjustable depending on the thickness of the material you are cutting.
If you have a CAMEO 5, CAMEO 4, CAMEO 4 Plus, CAMEO 4 Pro or a Portrait 3/4, your machine came with an Automatic Blade which is self-adjusting as long as you tell the software and machine that is the blade you are using. The Silhouette Auto Blade can ONLY fit in the left/tool 1 carriage of the CAMEO 4 or 5.
If you have a CAMEO 5, CAMEO 4, CAMEO 4 Plus, CAMEO 4 Pro or a Portrait 3/4, your machine came with an Automatic Blade which is self-adjusting as long as you tell the software and machine that is the blade you are using. The Silhouette Auto Blade can ONLY fit in the left/tool 1 carriage of the CAMEO 4 or 5.
Your machine may also have come with some adapters for older-model tools.
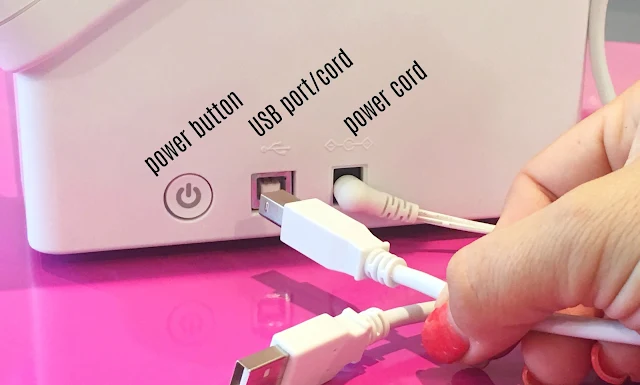
Every Silhouette cutting machine also comes with a power cord. The CAMEO 4 also includes a USB cord. The CAMEO 5 does not include a USB cord, but can connect to the computer through a USB (standard printer cable) as an alternative to Bluetooth (and I recommend it!)
Setting up your Silhouette CAMEO is easy. The power cord is plugged into the right side of the Silhouette CAMEO machine and also into a power source. The USB cord connects your computer to the Silhouette CAMEO machine. It is optional if you are cutting with a Silhouette CAMEO 4/5 that has Bluetooth enabled.
3. Register Your Machine and Create an Account
Registering your Silhouette machine will activate the warranty and will also ensure you get the free Silhouette designs that came with your machine. If you're wondering "Where is the serial number on a Silhouette CAMEO?"...it can be found on a small sticker on the back of the machine.
Creating a Silhouette America account allows you to purchase designs from the Silhouette Design Store, submit help tickets, and access your Silhouette Cloud which is where designs from the Silhouette Design Store (and those free designs will be stored)
4. Download Silhouette Studio
NOTE: As of January 2025: I would NOT recommend installing Silhouette Studio V5. Instead click the Legacy Versions and install V4.5.738.
TIP: Don't worry about Designer Edition, Designer Edition Plus, or Business Edition yet. You can learn more about those one time paid upgrade software versions after you get started!
5. Opening a Design to Cut in Silhouette Studio
6. Adding Fonts in Silhouette Studio
To add text to a design, click the 'A' text tool icon on the left sidebar and then click your cursor in the work area and begin typing. When you click the text box so it has a selection box around it, you can then pick a new font style and size from the Text Style window on the right side of the work area.
7. Silhouette CAMEO First Cut: Pick One Project...Keep It Simple!
The biggest challenge for Silhouette CAMEO beginners is knowing what is actually considered a beginner level Silhouette project. My suggestion to you is to pick one project and keep it simple. Maybe it's not EXACTLY what you purchased your machine for, but working through a beginner project first will help you learn the process, the software, and your machine. And I promise you - it will limit frustration and shorten the learning curve (not to mention name calling and gray hairs).
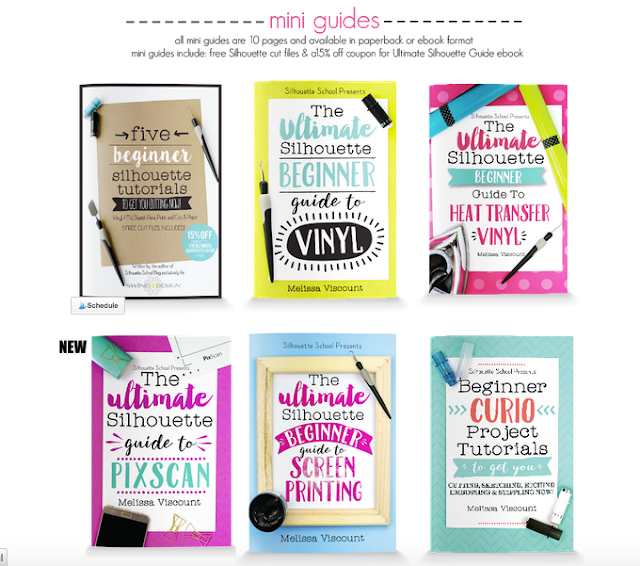
If your Silhouette CAMEO machine bundle came with my 5 Silhouette Beginner Project Tutorials mini guide you are in luck! I created all of these projects with first day newbies in mind. Pick one..and go.
If you did not get my 5 Silhouette Beginner Project Tutorials guide with your machine you can grab it here. In the meantime, I would suggest you pick a simple, solid and single-color design (NOTHING WITH TEXT) from your Silhouette Studio library. Open it in Silhouette Studio by double clicking the design.
Once open in a work area, select the design by clicking it and use the squares on the corner of selection box to adjust the size of the shape noting the dimensions along the bottom and side.
Select the design and move it to the top left corner of the work area so you are limiting the amount of wasted material.
Select the design and move it to the top left corner of the work area so you are limiting the amount of wasted material.
Go to the Send tool along the top tool bar. With your design selected, click "Cut" to turn on the bold red cut lines. Without these your design will not cut.
On the right side of the Send panel from the material list, Further down the window, pick the material you are going to cut. I would suggest you pick quality vinyl (such as Oracal brand) for your Silhouette CAMEO first cut ... if you don't have vinyl, cardstock is a good second choice.
After you pick the material from the Material List, the Send panel will reflect the recommended default cut settings based on the materials selected.
8. Preparing the Silhouette Cutting Mat and Blade
Vinyl should be placed with the paper backing-side down and the vinyl side up.
Try to avoid any wrinkles and ensure the material is covering the same area as where the design is positioned on the virtual mat in Silhouette Studio.
Place your blade into the blade housing on the Silhouette cutting machine. The Portrait 3 and CAMEO 4 Auto Blade must be placed in the left/tool 1 carriage. Make sure it's pressed down completely before pushing the locking mechanism all the way in. There should be NO gap at all.
9. Having a Successful Silhouette CAMEO First Cut
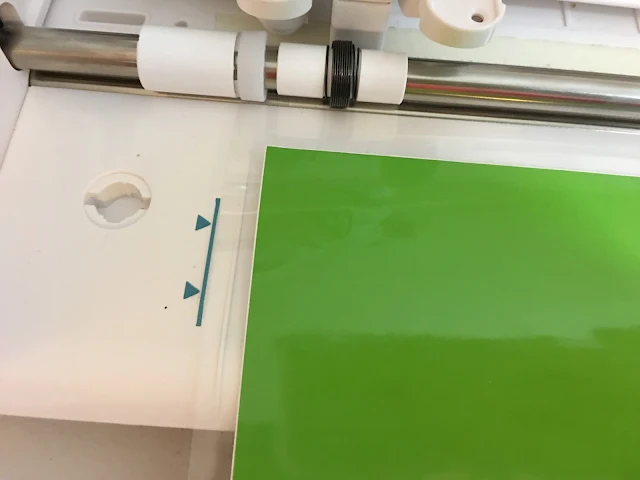
Place the cutting mat on the machine so the left edge is lined up with the blue line and arrows. The top edge should be gently touching the silver roller bar.
With the machine powered on and with the USB cord (or Bluetooth) connecting the cutting machine and computer, press "Load" on the touch screen. This will draw the mat and the material under the Silhouette CAMEO rollers in preparation for cutting.

With the machine powered on and with the USB cord (or Bluetooth) connecting the cutting machine and computer, press "Load" on the touch screen. This will draw the mat and the material under the Silhouette CAMEO rollers in preparation for cutting.

Go back into Silhouette Studio and click "Send to Cut". Your Silhouette CAMEO will now begin cutting the design on your material.
When it's finished, the blade housing will return to the starting position and your mat and material will be partially unloaded. Click "Unload" on the touch screen to fully remove the mat and material.
When it's finished, the blade housing will return to the starting position and your mat and material will be partially unloaded. Click "Unload" on the touch screen to fully remove the mat and material.
You can now slowly remove the material from the cutting mat. If you cut on vinyl, you will now need to weed or remove the excess vinyl from around cut design.
To avoid wasting vinyl cut off a square from the larger sheet of vinyl. Use your Silhouette hook to weed away the excess vinyl and expose your design. Now you'll want to grab some transfer tape or transfer paper to move your design to the surface where you want to place the vinyl decal.
To avoid wasting vinyl cut off a square from the larger sheet of vinyl. Use your Silhouette hook to weed away the excess vinyl and expose your design. Now you'll want to grab some transfer tape or transfer paper to move your design to the surface where you want to place the vinyl decal.
Congratulations you just made your first cut with Silhouette CAMEO!!! That wasn't that hard now was it?! But I have one more piece of advice for you, my Silhouette CAMEO beginner friends...and it might be the most important...
10. Take Advantage of Silhouette School
Over the last eight years I have built Silhouette School from a small blog with a few Silhouette tutorials into a full service resource for Silhouette crafters. We currently have more than 3,000 free Silhouette CAMEO tutorials (and Portrait, Curio and Mint too). I would suggest newbies start with the "New? Start Here" tab and read through the beginner Silhouette tutorials for each type of material and process! Take advantage of the tutorials...and the powerful search box located in three places on the blog (top left, right sidebar, bottom right)!!
I have also written a series of Silhouette guide books. The Ultimate Silhouette Guide series currently includes 13 books - nine mini guides and fourth full-length reference guides. The 160 page The Ultimate Silhouette Guide for CAMEO 4 is what I highly recommend for beginners.
You can also pair it with an ebook bundle and get a free month to Silhouette U with it!
You can also pair it with an ebook bundle and get a free month to Silhouette U with it!
If you prefer to learn Silhouette through video tutorials rather than written instruction, I also offer several online Silhouette video classes on CAMEO 3, Vinyl, Heat Transfer Vinyl, Silhouette Curio and Print and Cut.
Want all the videos for every level, an exclusive ebook on tracing in Silhouette Studio, one on one Silhouette tutoring and help, standing discounts to your favorite Silhouette suppliers? I'd suggest you check out Silhouette U. Our premium membership site offer three different membership length options. We add new video tutorials monthly to each of our four categories: beginner, intermediate, advanced and homework (put into practice what you've learned) along with a whole bunch of other amazing member benefits.
Looking for more of my advice to Silhouette CAMEO beginners just getting started? Here's my best advice! Note: This post may contain affiliate links. By clicking on them and purchasing products through my links, I receive a small commission. That's what helps fund Silhouette School so I can keep buying new Silhouette-related products to show you how to get the most out of your machine!
Get Silhouette School lessons delivered to your email inbox! Select Once Daily or Weekly.









.png)


I didnt even realize i had to peel off the sticky mat thing. omfg. OMFG. AHHHHHH. AHHHH. AH. AHHHHHHH!!!!!! So many lightbulbs going on! THANK YOU FOR THIS!!!
ReplyDeleteThank you so much for this! Makes it so much easier than trying to figure it out myself!
ReplyDeleteHi! Melissa I cant even begin to tell you how glad I was to find your videos I watched them before ordering my machine I got my Silhouette Cameo 4 as a birthday gift from my husband and I was getting very frustrated until I visually seen your You Tube videos but I am unable to get my machine to load the mat or paper so I have a request into customer service I hope I am doing something incorrectly and its not machine because I am so eager to get crafting !!!
ReplyDeleteI would suggest you go through these steps to get started with CAMEO 4
DeleteThank you!
ReplyDeleteI do not have a Cameo 4, I have a Cameo 3 and when I clicked on the link for the 5 tutorials for beginners it gave me an error of 404 page not found.
ReplyDeleteI need some books and beginning stuff for the 3. I am on a fixed income so it makes it hard for me to purchase a lot. The machine was a birthday gift and I want to learn to use it. I do better with a book than videos but I can do both. Any help would be greatly appreciated.
Thank you.
Hi there! You can find the guide for the Cameo 3 here: https://ultimate-silhouette-guide-series.myshopify.com/collections/silhouette-cameo-3-and-older-guides/products/the-ultimate-silhouette-guide-2nd-edition-v4
DeleteI bought my Cameo 3 from a friend over a year ago and have still not used it. It did not come with instructions. We live in the woods (literally) and our internet service was very expensive and spotty so we had to cancel. I have pattens available in my library that were purchased prior to discontinuing internet. Is internet access required for using the Silhouette? Thank you for your help.
ReplyDeleteHello! Internet service is NOT necessary for Silhouette Studio although if your designs are in your library, you will need internet to access them. If you were to be able to get online at some point, you can export your library to have them available without internet. This tutorial walks you through an export: https://www.silhouetteschoolblog.com/2020/06/how-to-export-silhouette-studio-library.html
Delete