 |
| This is a very easy way to organize your Silhouette Studio library. Commercial Use means you can legally use these designs in items that you sell. |
Start by purchasing the bundle and downloading the individual PNG or EPS files to your computer. You can then drag and drop the PNG version into Silhouette Studio or use the File > Open method. I would recommend, if you are saving the entire set, that you place all of the designs onto the same work area so you can save as a set.
TIP: If you need more help on how to open and use graphic packs like these in Silhouette Studio check out this Silhouette tutorial.

Now you're going to want to use the Trace and Detach method to trace the designs so you can generate cut lines around each element.
Before you save your design to the library, open up your Silhouette Studio library. Right click on the "Library" folder. Pick "New Folder."

The new unnamed folder will be created at the bottom of the Local User area. Type in something like "Commercial Use." This is now going to be the place you save all of your commercial-use design files in Silhouette Studio.

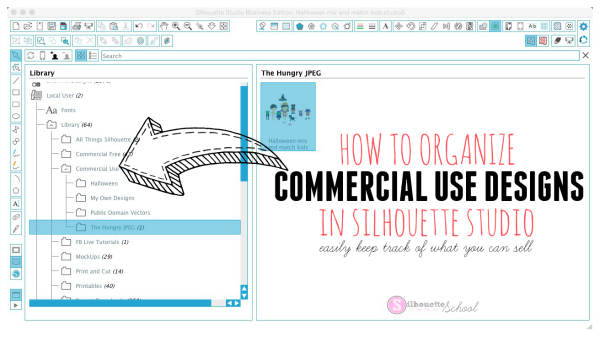
You can stop there or you can go one step further and make sub-folders, which is what I like to do. So right click on the folder you just created: Commercial Use > Right Click > "New Folder". Add the title of a sub-folder. You can see I created four including on named The Hungry JPEG. You can create and organize the sub folders so it works best for you - by holidays, season, designer, etc.
Now go back to your work area where you have your commercial use designs. From the File Menu click "Save > Save As > Save to Library" Before you name your file select the exact folder where you want it to save. In this case I picked The Hungry JPEG subfolder under my Commercial Designs head folder.

When I go into my library now and click on folder called The Hungry JPEG I can see the thumbnail for my Halloween designs.

As I use the elements of a bundle, I save them to my Commercial Designs folder in Silhouette Studio so they all stay organized.
And then you can go about using these designs in items you sell...like adorable Halloween mix and match magnet sets print and cut on your Silhouette CAMEO or Portrait!
Unfortunately, Silhouette Studio does not make it nearly as easy to organize commercial fonts. But there are ways to organize the fonts you purchase. I go into a lot of detail on the method I use in my book Cutting a Profit all about running a successful Silhouette-based business.
Get Silhouette School lessons delivered to your email inbox! Select Once Daily or Weekly.


.png)


Do you have a tutorial for the paper doll magnets you made?
ReplyDeleteIt looks like she used the "Halloween Cliparts" (#38) from the October bundle at The Hungry JPEG. I am guessing she opened the clipart in Silhouette Studio, selected the images she wanted, and then did a print and cut on magnetic paper.
DeleteIs there a way to add public domain fonts to my Silhouette Library?
ReplyDeleteIs there a way to tell if there is commercial license on files I've purchased?
ReplyDeleteWhat if we started out just using the Cameo for personal designs and later go to selling things? Is there anyway we can tell from the designs we already have purchased or gotten free from various sites if they are ok to use commercially?
ReplyDeleteYou could look up where you got them from and see what they’re license restrictions were. I have started trying to add a note to the properties of an image stating where I got it and if it’s commercial or personal.
DeleteCan you do a tutorial for patterns in the local user area? The traditional drag and drop method doesn't work on the local user. It's fine for the Cloud, but I don't want to add all my patterns to the Cloud.
ReplyDeletei have downloaded a bundle from the hungry jpeg and I have read your tutorial on how to move it to silhouette studio but have been unsuccessful in moving mine. I have created the new folder labeled commercial use and a subfolder labeled the hungry jpeg and have tried to drag and drop the files but it hasn't worked. Thanks, Shelleen
ReplyDelete