So when my second grade daughter asked if we could add some HTV to the strap, I told her I'd be here to help if she needed me, but she's been around Silhouette stuff long to enough to know how to do it on her own! And then I threw out the idea that she write up a tutorial for the blog...she couldn't resist my offer! So here's Liv...
Hi. I'm Olivia.This is my first blog post so today I'll show you how to make a camera strap with heat transfer vinyl.
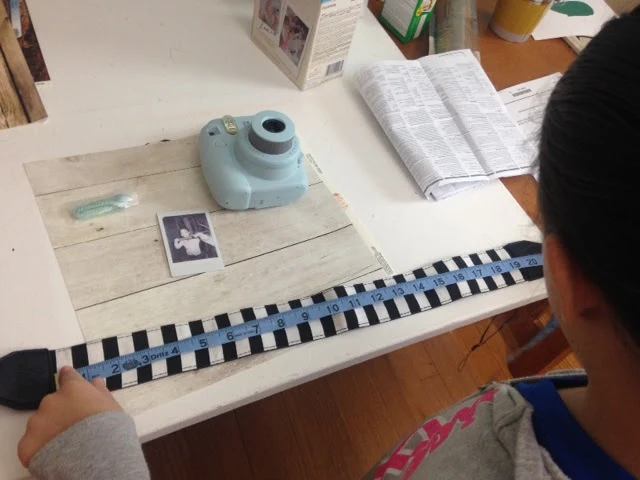
First I measured the camera strap.
Then I used Silhouette Studio and used Draw A Box tool to make a little box to the same size as the strap.
And I put the measurements in the Scale Window.The reason we did the box is to make sure the words aren't too big for the strap.
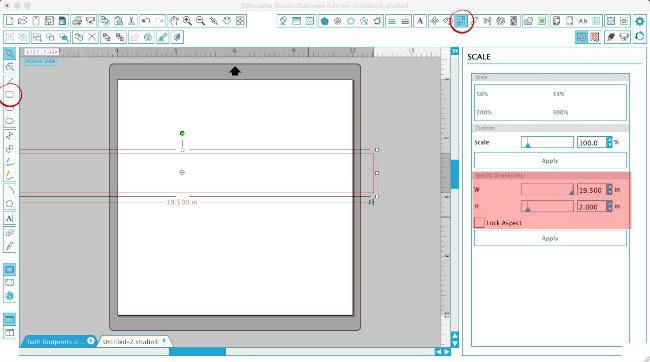
After that I used the A button to write 'Olivia's camera' on the little box.
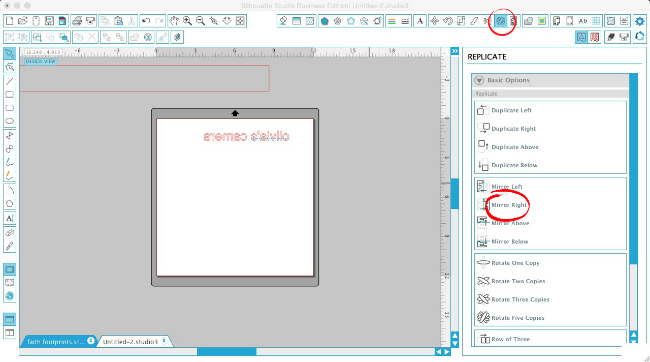
Then, since we were using heat transfer vinyl we flipped over the words. And we used the Mirror Right tool in the replicate window.
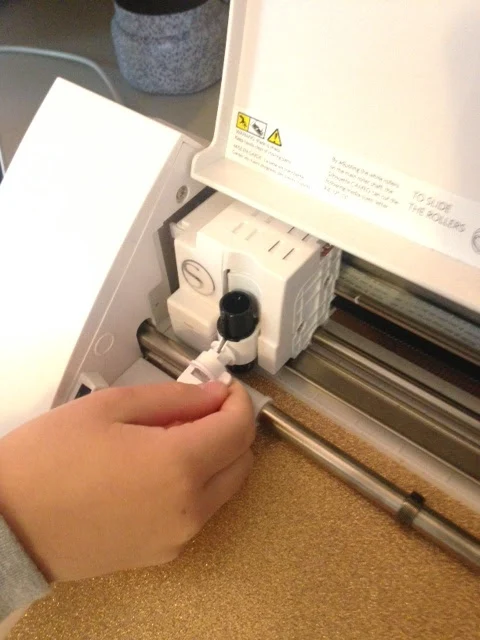
Then I adjusted the blade so we could put in the glitter heat transfer vinyl so it could cut. My mom has another blog post for the best settings to cut glitter heat transfer vinyl.
Then we let it cut. And after it cut I removed the extra.
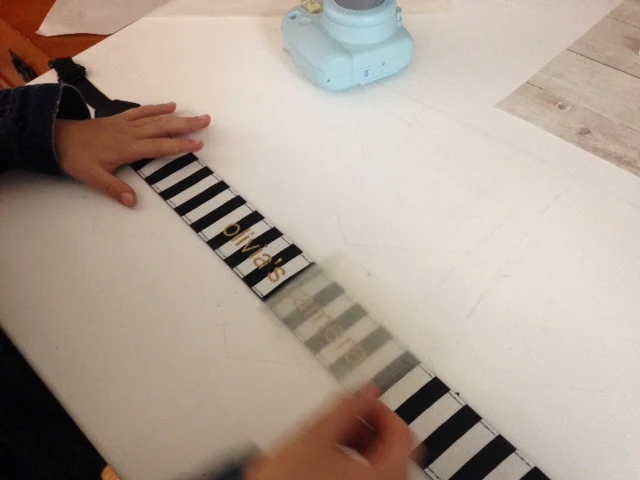
Then I folded it in half because if we folded it in half we could put it on in the middle of the strap.
Then we lined the two folds up.
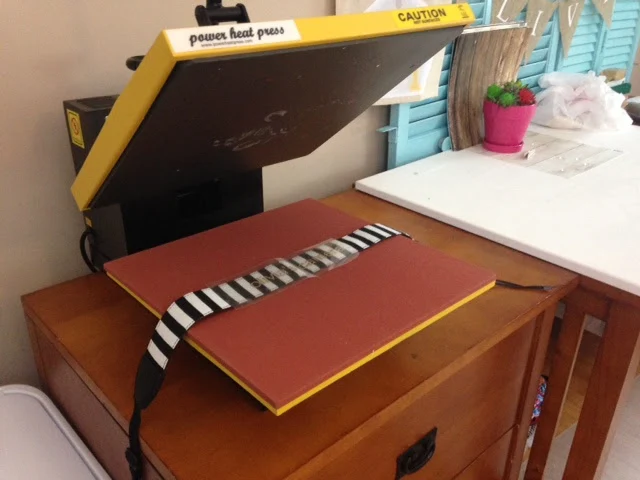
After that we put it on the strap with the heat press. My mom helped me.
Then after we put it on the heat press we took it out and we took off the sticky paper.
And then it was finished!
I hope you like my strap and my blog.
Note: This post may contain affiliate links. By clicking on them and purchasing products through my links, I receive a small commission. That's what helps fund Silhouette School so I can keep buying new Silhouette-related products to show you how to get the most out of your machine!
Thanks for coming to class today at Silhouette School. If you like what you see, I'd love for you to pin it!

Get Silhouette School lessons delivered to your email inbox! Select Once Daily or Weekly.









.png)


Lovely! Olivia is learning fast!
ReplyDeletegreat tutorial!
ReplyDeleteAwesome you go girl. I am so proud of you. Love your new camera strap too. Good job. Hope to see more of your work.
ReplyDeleteOlivia, what a nice job you did explaining all the steps to your project. It turned out super cute. I hope to see more of your blog posts in the future. You are your mother's daughter!
ReplyDeleteThanks, Olivia, you did a great job on your first tutorial! Your post is now pinned in my Silhoette School board on Pinterest. Keep up the good work!!!
ReplyDeleteKris
Thank you, that was a wonderful Tutorial! hope to see more soon!! I love the color of your camera :)
ReplyDeleteWonderful tutorial! :)
ReplyDeleteAwesome! Keep up the great work, Olivia!
ReplyDeleteOlivia, this was such a wonderful tutorial and the step by step instructions were perfect!
ReplyDeleteOlivia thank you for your step by step tutorial, it was perfect! I'm looking forward to your next one :) A+ for you, keep up the good work!
ReplyDeleteThis comment has been removed by the author.
ReplyDeleteOlivia knows how to do stuff several grown ups can't do!! Way to go!!
ReplyDeleteGreat job on both Olivia and mom for encouraging her to do this!
ReplyDeleteI'm inspired but I gotta get some HTV!! Thanks Olivia for a great tutorial. I'm gonna try it!!
ReplyDeleteGreat Job Olivia! I can't wait to read your next blog.
ReplyDeleteAwesome job Olivia. Pretty soon you'll be taking over your mom's blog.
ReplyDeleteWhat a great tutorial, Olivia! You are adorable and look just like your Mom.
ReplyDeleteYou did good Olivia!! Make it sound so easy to do a fancy camera strap just like you did. Move over Mom, you have a talented young lady there that needs to spread her wings and create!
ReplyDeleteThank you, Olivia! I'm about to cut and apply my very first HTV (I'm making a shirt for my son, who's 3 years old). Your post and walk through was really helpful and I'm glad I read it! Wish me luck :-D
ReplyDelete