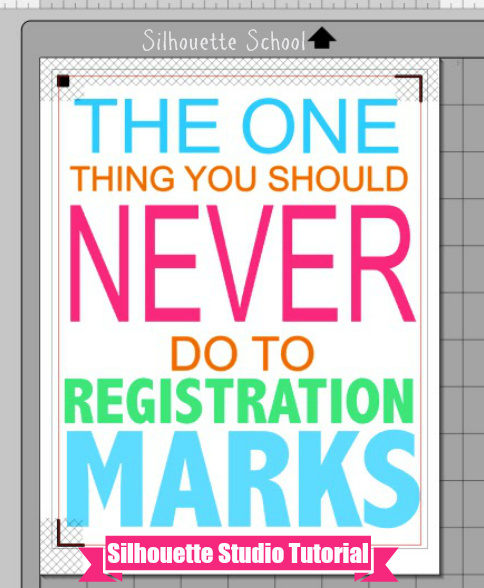
"Which one?" you ask, "and why?" The bottom left registration mark is the problem child. Let me explain.
Sometimes when you are working on a print and cut project you need a little more room in the safe cutting area than what the default registration marks provide. If your design is just slightly outside the safe cutting area you can actually move the registration marks change the margins basically.
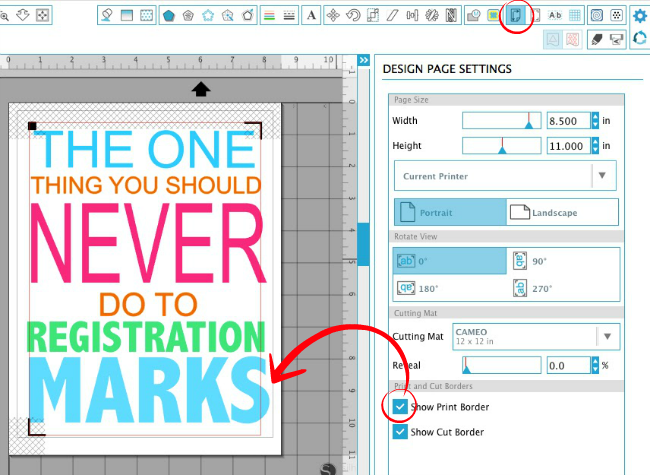
Before you move the registration marks though, you should always turn on the 'Show Print Border' option in the Design Page settings. The gray print border line will make it clear what will and what won't print.
When you turn on the Print Border, you can see that the printing area is actually slightly larger than the cut area with the registration makes in their default positions - which is why it's nice you can move them.
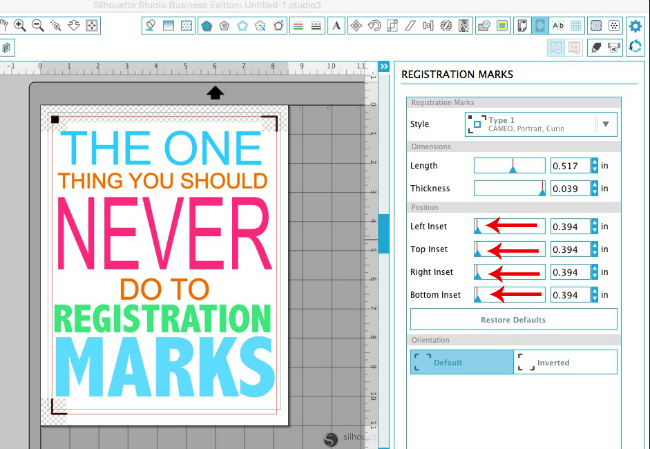
Silhouette Studio gives you the option and ability to move the registration marks towards the edge of the page to make more workable room for your design. Watch what happens when I move all of them. The design that was once partially touching the hashed area and was partially outside the cutting area is now completely inside. Wonderful!
BUT there's now a big ol' problem! The problem is...when you move the 'Bottom Inset' registration mark (the bottom left) down - at all - the actual registration mark ends up outside that safe printing area and therefore it will be cut off (aka not print) when your page is printed.
When it's cut off, the Silhouette machine can't read the registration mark or can't read it correctly and therefore you either get a registration failure or a cut that's not accurate.
So the moral of the story is - move the other three registration marks, but hands off the bottom inset or bottom left registration mark.
Note: This post may contain affiliate links. By clicking on them and purchasing products through my links, I receive a small commission. That's what helps fund Silhouette School so I can keep buying new Silhouette-related products to show you how to get the most out of your machine!
Thanks for coming to class today at Silhouette School. If you like what you see, I'd love for you to pin it!

Get Silhouette School lessons delivered to your email inbox! Select Once Daily or Weekly.


.png)


And here I thought it was how much I was moving them! Next time, I won't change the bottom left, and see what happens. Thanks for the post.
ReplyDeleteMerci Mélissa
ReplyDeleteAmitiés de France
I use an Epson printer and it really can print a very large area and get pretty close to the borders without cutting the image but another problem I find when you get the registration marks too close to the bottom is that when the machine is cutting the bottom edge of the paper is too close to the rollers and that may cause skipping of the material when it is cutting and the paper may get out of the rollers and fall at the back of the machine. In that case, to avoid it, I add a piece of paper with some adhesive tape to the bottom edge to avoid this problem and it works great
ReplyDeleteI also use Epson printers. Where the print border appears depends on the settings in Print Page Settings (in the File menu). The margins can be made quite small. These settings are universal - applied to all programs on the computer.
ReplyDeleteI usually print from illustrator and cut using Silhouette connect, maybe that affects my print margin and lets me do a bigger one.
DeleteThanks for another great tip!
ReplyDeletesí yo también descubrí con dos pruebas que solo debo mover las otras no la de abajo lindo tutorial, gracias por apoyarnos siempre con tan excelentes temas
ReplyDeleteThanks for all your tips. Also watch the "Style" box at the top. I have a couple times had major fails with print & cut only to see I had the wrong Silhouette machine checked in that box!
ReplyDeleteThank you so much for that advice. When I tried moving them, I moved ALL of them...hence... bad cut. So appreciate this info!
ReplyDeleteThanks so much Melissa! This was very,very useful information
ReplyDelete:-)