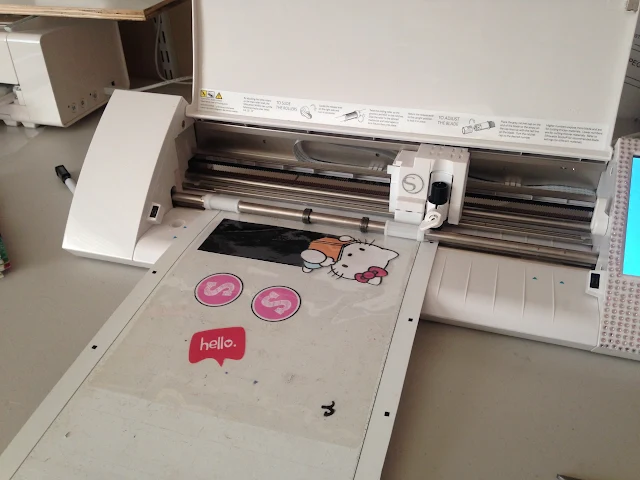
I've combined the powers of my Silhouette CAMEO and my laminator to make custom bookmarks, planner inserts, photo booth props, dry erase games for my kids, luggage tags, the list goes on.
Hear me out...
I got a very basic laminator - it's literally called the AmazonBasics Laminator and the 100 pack laminator sleeve refills cost more than half the price of the laminator...but I digress.
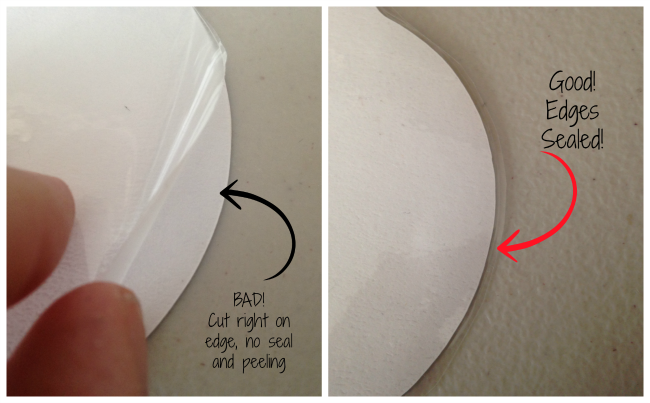
Thinking about it, I knew to successfully pair my Silhouette CAMEO (or Portrait or Curio) with my laminator, I would need need to cut (or print and cut) the design first, laminate and then cut again. Yes, it's a multi-step process...but laminating the paper first and then cutting only once does not allow for the edges of the designs to be heat sealed by the laminator. You'll see what I mean as we walk through this tutorial
I'm going to demo this using a few different designs. I created some basic print and cut designs in Silhouette Studio. They were print on my home printer on cardstock and then cut with my Silhouette.
I also grabbed a paper bookmark I made for my daughter a few weeks ago that desperately needed a layer of protection and I quickly designed and print and cut a meal planner insert for my planner (after it's laminated it can be re-used by using dry erase markers). I figured I had a whole laminating sheet I didn't want to waste it with just a few small designs.
After all my designs were cut I warmed up my laminator. All of the paper cuts were placed into a laminating sleeve. I made sure to leave enough room between each of the pieces so that when they were cut again they would still have a slight heat sealed border.
The sleeve was fed through the laminator and I was left with a nice laminated sheet when it was spit out the back just a few seconds later. All of my designs were nicely sealed inside.
Now here comes the fun part. You need to get out your PixScan mat. (I have a Portrait sized Pixscan mat - that I can use on both my Portrait and my Cameo - and the full laminated sheet didn't fit on it so I simply cut it down with scissors.)
Place your laminated sheet onto the Pixscan mat and take a picture with your phone. Make sure the entire PixScan mat is captured. This is the actual picture I used.
Whatever you do from here on out: DO NOT MOVE THE ELEMENTS ON THE PIXSCAN MAT!
If you're unfamiliar with how to use Silhouette Pixscan technology read this 101 tutorial before you go any further because I'm going to speed through this part.Open up Silhouette Studio and in a new work area import the picture of your Pixscan mat, using the Pixscan tool.
Once your PixScan mat with laminated items appears in Silhouette Studio, you're ready to go. Our ultimate goal is to make a slight offset cut line around each of the designs so that we can cut them out, but keep their edges sealed.
Use the Trace tool to trace all of the elements. Uncheck the high pass filter and move the Threshold slider bar over to the right. I like to get them all filled in yellow and then select 'Trace Edge'. This will put a cut line right around the edge of your designs.
Tip: If you get a bunch of static muck trace elsewhere on your mat (seen here in the green box), select everything > hold down 'shift' > de-select the cut lines you actually want to keep > hit 'Delete' on your keyboard to remove all the muck.Now you should only have cut lines around your designs.
If you loaded the Pixscan mat and cut just like this, you'd cut right along the edge of your design and you'd basically end up with a peeling-laminated piece. We don't want that. We want to keep the edges around the design heat sealed to protect the paper inside. So....we want to create a small offset.

Keep the original cut lines (I outlined one in green below) selected and pick the Offset tool from along the top tool bar. Set the offset distance to whatever you want. I used .100. Click Apply.
You now have two cut lines around each design...go back and delete the original cut lines so you ONLY have the offsets (blue arrow) to cut.
Load your Silhouette PixScan mat into your machine...and watch the magic happen.
When the machine is finished cutting, your laminated designs will pop right off the mat.
TIP: Don't throw out the excess laminated sheet...they're PERFECT for re-usable stencils!
The little 'hello' was adhered to a mini clothes pin. I use it to mark the current week in my planner. The meal insert was attached to a clip in and was easily inserted into my planner, too. And if you're wondering, yes I made the planner stickers...I mean I couldn't write a whole ebook about how to create beautiful stickers and not bling out my own planner with them!

And here's another example of a Silhouette project I print and cut and then laminated...these are photobooth props. Obviously laminating them gives the the paper a much needed layer of protection!
Note: This post may contain affiliate links. By clicking on them and purchasing products through my links, I receive a small commission. That's what helps fund Silhouette School so I can keep buying new Silhouette-related products to show you how to get the most out of your machine!
Thanks for coming to class today at Silhouette School. If you like what you see, I'd love for you to pin it!

Get Silhouette School lessons delivered to your email inbox! Select Once Daily or Weekly.


.png)


That is so clever. I still have not used my Cameo I think I am afraid of it :? I really need to just use it.
ReplyDeleteI guess you already know you are a genius!!!!
ReplyDeleteI love this tutorial I can never cut clean lines now that I know I will never cut with scissors again!! Thanks for the post!
ReplyDeleteyou had me very interested until the word pic scan mat ---I have tried and tried beyond trying to get that thing calibrated and just can't get it. So I gave up, chalking up the almost $10.00 to a bad decision.
ReplyDeleteThis comment has been removed by the author.
ReplyDeleteCan I use the 5mil laminating pockets for cutting, or only the thinner type? I love this tutorial :)
ReplyDeleteIf you try to use the thicker sheets I thin you will need to increase the thickness and possibley use the deep cut blade.
DeleteThanks Melissa! I'll have to experiment with this soon :)
DeleteI've been using this method for awhile, and I love it! Now, my question--I keep trying to cut out laminated bookmarks that are mostly white with words on them... Any ideas for getting that to work? The PixScan just doesn't pick up the borders very well with white on white. I've tried putting a colored piece of paper behind what I'm cutting out, but then what I'm cutting isn't stuck to the mat as firmly as when I don't put paper behind it... Wonder if you've come across this yet?
ReplyDeleteThanks!
I've had the same issue trying to cut white, I ended up just using a similar shape (thankfully I was cutting out an oval shape and could easily make the cut lines just a little larger) it took a few minutes to figure out HOW, because it was not happening when I tried to trace.
DeleteThat is one of the big problems with white and clear items - they are hard to trace. Instead of tracing, you could drop edit points and create your own cut border around the edge of the area to be traced.
Deletegenius
ReplyDeleteHow do I delete the original cut line?
ReplyDeleteYou can select it and delete
DeleteHi, can i do this with my portrait? I hace been having troubles with the print and cut settings, it always cut it wrong and with the pixscan y can never calibrate the image. Help
ReplyDeleteYou can definitely do it with your Portrait, just use the Portrait size pixscan mat. If you are having trouble with calibration you can print out the calibration sheet and use it to calibrate your phone
DeleteI can't get a straight cut line on light colored images and the scanner picks up the gloss from the laminating sheet. Any suggestions?
ReplyDeleteI can't get a straight cut line on light colored images and the scanner picks up the gloss from the laminating sheet. Any suggestions?
ReplyDeleteI haven't had the glare issue with the Pixscan mat b/c the registration are on the mat rather than lamination sheet. If you are having trouble getting a good trace, you can use the Draw a Curve Shape tool and drop edit points to create a cut line that way.
DeleteI dropped my Silhouette! I have an order Cricut too...can this be done in a similar way on it?
ReplyDeleteWhich Silhouette machine was this? I read elsewhere that the portrait won't do it.
ReplyDeleteHello! What are your cut settings on your Silhouette for the 3mil laminate? Blade setting? Force? Number of passes? Do you find that cutting laminate dulls your blade quickly? Thank you! Missy
ReplyDelete