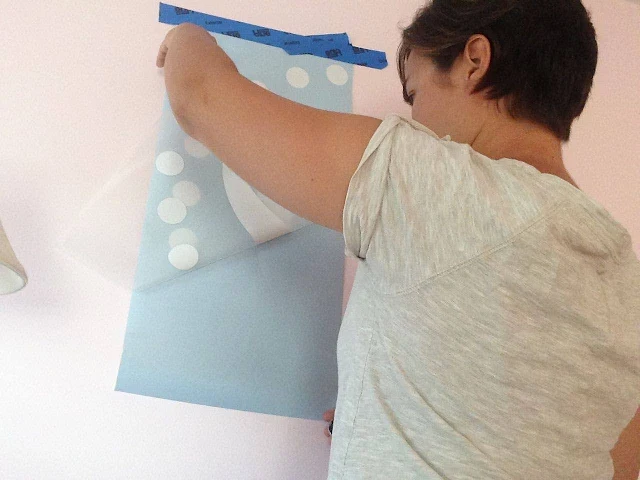
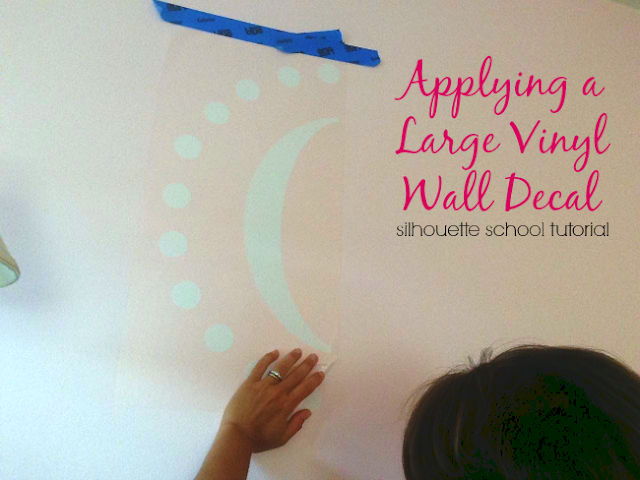
After you've cut and weeded your design, which you cut on 631 indoor/removable vinyl, grab your clear transfer tape. I prefer the clear - I got a huge roll (and all the vinyl for this project) from Expressions Vinyl - because you can see through it. If you read the first part the tutorial you know that I had to cut the circle and monogram in three parts and the name in three parts for a total of six pieces.
Let's start by hanging the white part of the design first.
I replaced the half cut dots with the full cut does by simply putting them in place and keeping them there with a piece of tape. This way when they are covered with transfer tape they'll all move together. (Ignore the fact that I forgot to take a picture of this before I put the transfer tape on.)
Now normally you'd cut off a piece of transfer tape from the roll and then place it down onto the vinyl. But with large vinyl designs, I actually like to do it the other way around. I like to roll out a large piece from the roll and keep it flat on the floor or the table so the sticky side of the tape is UP!
Before you lay the vinyl on there, it's a good idea to de-stick the tape somewhat with a clean cotton t-shirt or pillow case. Just kind of blot it on the tape. With the indoor vinyl it's not quite as sticky so if you don't de-stick the transfer tape slightly you may have issues getting the vinyl to release from the tape and stick to the wall without a lot of encouragement.
Then, while the transfer tape is still attached to the roll (the roll gives it some weight to keep in it in place, flip the vinyl design over (so the backside is up) and I lay the vinyl down onto the tape.
Now you can cut the tape off the roll and flip it over to make sure it's adhered to the vinyl.
Do not remove the vinyl backing. Just keep it on for now - so the actual vinyl should be between the transfer tape and the backing. The trick to applying oversized vinyl decals is to use the hinge method - similar to how you would when you have a smaller vinyl decal that you want to make sure goes on straight, centered, and even. However, instead of putting the hinge across the middle of the design, you're going to put it across the top of the vinyl.
The hinge gives you some wiggle room so that you can check your work and make sure the design is centered, straight, and even before you full commit. Once you've measured and measured again, you're ready to go for it!
Now you can slowly peel the transfer tape, with the vinyl on it, UP. Once you get to the hang, flip it up and pull out the backing. (If I can do this with a camera clicker in my right hand....and take pictures of each step...believe me, you've got this!)
....then lower the transfer tape, with the vinyl on it, back down making sure there are no wrinkles or bumps.
Burnish the design well to the wall.
And finally remove the transfer tape and the painters tape.
Repeat with the other half of the design. The easiest way to do this is to cut off the backing as close to the vinyl meeting point as possible. Then use that painters tape again as a hinge and adjust as necessary.
Repeat the above steps to remove the backing and burnish the design onto the wall.
The last step for this vinyl wall decal design was to add the name, which was cut in three pieces. I opted to reassemble the name first before putting it on the wall. Since it was cut on one piece I had to cut the pieces apart.
Then I trimmed close to the breaks and used my 12x24" cutting mat to line them back up. I applied one long piece of transfer tape to the name so it became one large vinyl decal instead of three to adhere it to the wall.

I repeated the same process using the painters tape hinge method to apply the name, measuring numerous times to make sure the name was centered and where I wanted it.
Fortunately by this point, my husband came to the rescue and took some pictures of the process for me.
After the backing is removed from the vinyl, again lay down the transfer tape onto the wall and burnish the vinyl decal onto the wall.
Then remove the transfer tape leaving the decal behind. Ta da!
And that's how you apply a large vinyl wall decal!
Special thanks to Expressions Vinyl for feeding my vinyl addiction and supplying the vinyl for this and so many other tutorials on Silhouette School!
Note: This post may contain affiliate links. By clicking on them and purchasing products through my links, I receive a small commission. That's what helps fund Silhouette School so I can keep buying new Silhouette-related products to show you how to get the most out of your machine!
Thanks for coming to class today at Silhouette School. If you like what you see, I'd love for you to pin it!

Get Silhouette School lessons delivered to your email inbox! Select Once Daily or Weekly.


.png)


My wife and I have been using the vinyl onto transfer tape for a while, we seem to get much better success with this technique.
ReplyDeleteThank you!
I started my business with wall decals like this, and have worked my way smaller. LOL. When using the hinge method, flip the entire decal upside down (using the painter's tape as the hinge of course) and pull the backing off instead of taking control of the transfer tape. You can manipulate the backing paper all you want to get the vinyl and transfer paper away from it. Hope that makes sense.
ReplyDelete