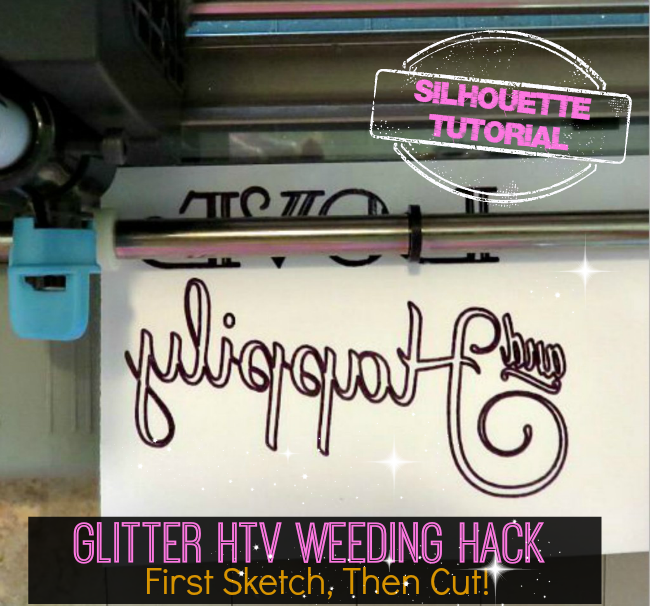
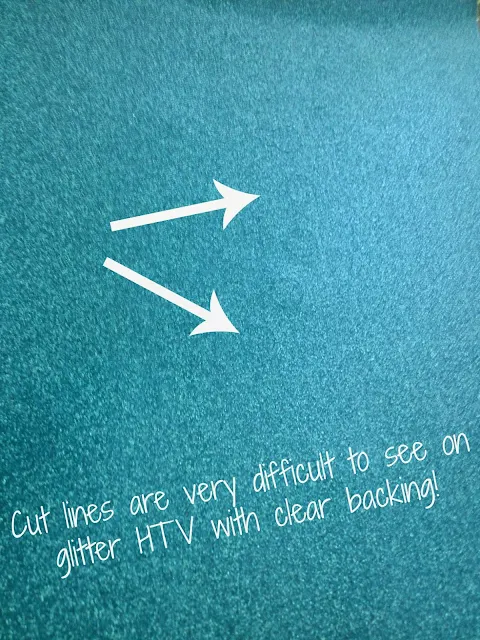
If you've ever cut Glitter HTV you know it can be extremely difficult to see the cut lines which can sometimes lead to mistakes when weeding. Well today Silhouette School contributors, Becky and Glenna from My Paper Craze are here to share a genius Silhouette hack they came across recently to make easy work of weeding intricate glitter HTV designs.

This idea came from a fellow crafter and is just too good not to share. The idea is to first sketch the design on the back of the glitter htv before cutting it. It was one of those "Why didn't I think of that?" moments. If you have the same problem with glitter HTV, grab a sharpie (or sketch pen) and give this a try!
I'm not going to bore you with too much detail on using sketch pens or even cutting glitter HTV with your Silhouette because I know Melissa has already covered those extensively. (Unless of course you played hooky on those days and in that case you might want to review those lessons).
In the first picture below you can see that I sized my grouped design and right clicked on it and selected "flip horizontally" to mirror the image.
My design calls for two different colors of HTV so I ungrouped the design and only put the pink text on the cut area first.
I opened the Cut Settings window and selected "Silhouette Sketch Pen". I followed the normal process and loaded my Silhouette Pen Holder with an extra fine point Sharpie, then used the popsicle stick trick to gauge the depth of the tip so it didn't drag.
After my design was all set and my settings were correct, I loaded the glitter HTV onto the cutting mat (shiny side down, just like you cut it). The idea is that I will draw the design with the sharpie onto the back of the HTV as a guide for when I weed it later. So with the HTV on the mat and the mat loaded into the Silhouette, I hit "Send to Silhouette".
Once the design is drawn on the back of the HTV the most important step now is DO NOT UNLOAD YOUR CUTTING MAT! You want the cut lines to be exactly where your image is drawn. Remove your sketch pen holder and replace it with your cutting blade.
Then open up the "Cut Settings" window and selected "Heat Transfer Material Flocked". You might use different settings to cut glitter HTV (Melissa does..these are the glitter htv cut settings she found to work perfectly for her) but this one works for me. I also changed the speed to 2 since this text is quite intricate. Click on "Send to Silhouette" again.
This image is what I was left with after weeding just the portion surrounding my text. As you can see the sketch shows me perfectly all the little bits I still need to weed without struggling to see them.
I then repeated the process with the white text.
And here's the final product! As you can see, my design was for a koozie, which is why the text was a little harder to weed than usual.
And here's the final product! As you can see, my design was for a koozie, which is why the text was a little harder to weed than usual.
Genius right?!
Note: This post may contain affiliate links. By clicking on them and purchasing products through my links, I receive a small commission. That's what helps fund Silhouette School so I can keep buying new Silhouette-related products to show you how to get the most out of your machine!
Thanks for coming to class today at Silhouette School. If you like what you see, I'd love for you to pin it!

Get Silhouette School lessons delivered to your email inbox! Select Once Daily or Weekly.


.png)


Great idea! This will be so helpful. Thank you!
ReplyDeleteI use a bit of baby powder and spread it out very thin. It outlines perfectly and wipes off clean with a blue shop paper towel or micro fiber cloth. I've also used a Swiffer duster.
ReplyDeleteThanks Pamela, we have recently heard of this as well. Perhaps we'll review it next, we were concerned about how it affected the ability to press the vinyl.
Delete
ReplyDelete@Pamela Brown, I love your idea. Sounds way simpler than the other......
Does the black sharpie not show through the white htv?
ReplyDeleteRenee, we haven't tried this method on white glitter HTV. The color we used is a pretty light orange/peach, and we didn't have any problems. I would suggest testing it on a small area (obvious) before doing a large project.
DeleteYou could try a dry erase marker then it would just wipe off.
DeleteWhat exactly does "weeding" mean?
ReplyDeleteWeeding is when you remove the parts of the HTV or vinyl that you don't need. Weeding removes these pieces so you are left with the design you intended when you cut.
DeleteI have a Silhouette and I just gave up on it!!! Reading this lesson are you telling me you can somehow choose this writing and them print out the words. I'll never learn that.
ReplyDeleteDolores Good
Don't give up Dolores! There are a ton of great tutorials for beginners on here, you just have to learn one step at a time! Have to thought of investing in the ebook? It has a great progressive learning structure that could help you, too!
DeleteI have had trouble with glitter HTV. I've even assumed my Silhouette wasn't cutting! I can see where this would be fine for a Koozie, but I'm concerned about the ink from the Sharpie showing through thinner materials, especially light colored T-shirts. Have you tried this trick on other materials?
ReplyDeleteHi Lori, we have used on other materials, but not necessarily light colored shirts. We seem to use darker colors shirts (or heather gray), so it hasn't seemed to be an issue. A pen could be used for the same purpose, or the ink could even been removed before pressing (they make permanent ink remover).
Delete