By no means should this be considered a Silhouette Curio review - it's not. I haven't had nearly enough time with it to offer that - yet. I will. For now this is me as a new user, just like you will be, if you decide to get a Silhouette Curio. This is me knowing the Silhouette Studio software inside and out and this is my honest first impression of the Silhouette Curio.
First off - you should know the biggest differences in the Silhouette CAMEO vs Curio are the Curio's focus is in embossing, stippling, and etching all with larger clearance for thicker materials, a dual carriage for tools with a much smaller cutting area. The CAMEO's focus is more on cutting a wide variety of materials with a larger cutting area.
If you watch me on Periscope and saw my live unboxing you know that I literally had no idea what I was getting into. I had no idea what all the plates and mats and gadgets were for.
Where did I turn first? The Silhouette Curio user manual that came with the machine. It's a decent getting started guide - it explains all of the stuff that comes with the machine including the new software CD that is necessary to activate the Curio features.
I popped the Silhouette Studio V3.4 software CD that came with the machine into my computer and installed the software. Then I read a little further into the book where it discusses how and why the platforms are necessary. The guide book states the Silhouette Studio software will suggest - in the Cut Settings window - the recommended platform level depending on the material you are cutting. I'm not even kidding when I tell you I poked around Studio for at least an hour looking for wherever these suggested platform levels were.
Turns out - the software CD that comes with the two week old machine is already outdated and does not include the platform levels as the guide book says. Instead, you actually have to go onto the Silhouette America website and get the newest version which was released on August 13.
The machine comes with a regular ratchet blade and two embossing tips - a wide and a fine. Along with the tip you want to use, you'll need to decide on the material and if you want to emboss or deboss or score and emboss.
The software gives you two options for embossing - embossing or debossing. One (embossing) is where the design is raised up and the other (debossing) is where the design is recessed. What the machine does is actually the same for both - where the difference comes in is in how you position your material.
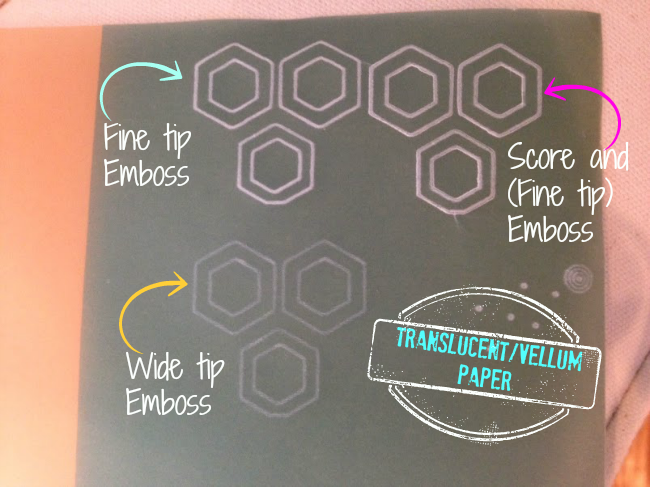
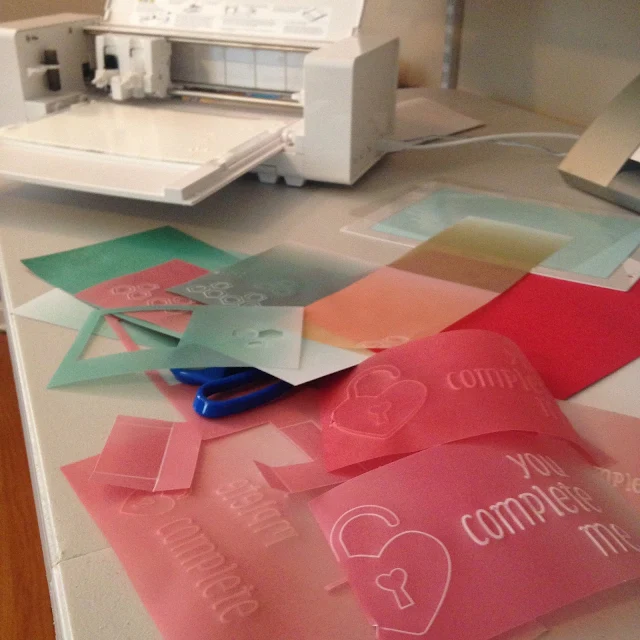
For vellum type papers the emboss or deboss tips works well. On the green vellum sheet I attempted a score and emboss where you have the blade set at 0 pass through first and then emboss. You can see however that the score cut through the vellum.
I've also noticed that the fine embossing tip gives a deeper/brighter embossing than the wide embossing tip. You can see the difference here with the same settings and material - just using the different tips. Depending on the look you're going for, one may be better than the other. Again, this is vellum.

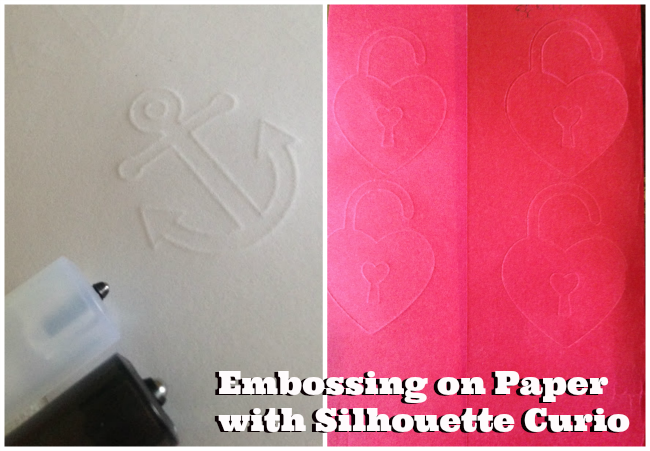
For thicker papers, such as cardstock I found the score and emboss function (rather than emboss alone) worked better. If you're looking for a deep embossing effect for thicker papers, I'm not sure you're going to achieve with the Curio. Again, my first impressions left me somewhat underwhelmed with the overall embossing capabilities on paper.
Now comes the part that I found the most confusing...setting up to emboss. If you select to 'Emboss' your design, you must flip your material on the mat so the wrong side is up. When the embossing tip presses down onto the material while 'cutting' it will be embossing (giving a raised look) on the right side. However, the software will also automatically mirror the entire page when embossing. This is different than mirroring an object in Silhouette Studio.
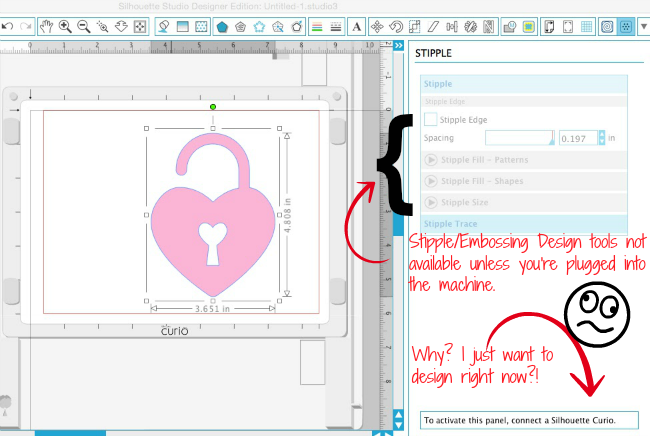
I found this difficult to wrap my head around to be honest. You'd think Silhouette Studio would mirror the design directly next to the original design so you'd get the red example, but instead it mirrors the entire work area, which leaves you with the blue and the worst part is - it still only shows the pink design in the work area. Ahhhhh how's a girl to know where to place a scrap?!
Without full length grid lines on the embossing mat and no preview of where the flipped design would be in Studio, I found it nearly impossible to know exactly where to position my material on the mat and therefore more than once cut off the material and onto the mat.
For me, I found it easier to mirror the object myself (from the Replicate window) and then score/emboss on the wrong side of the paper so I knew exactly where the machine is going to emboss. Not being able to see the placement before you emboss or score and emboss is where you can run into trouble and I'm sure I won't be the only one who goes bonkers trying to keep it all straight in my head.
Now let's talk about the software changes. While there are only two new icons along the top tool bar for the Curio, I can say this: they contain a lot of powerful options. The Embossing window and the Stippling window now have icons that are accessible only when the Curio is plugged in. The menus and settings within each of them are many - some more straight forward than others.
The Page Settings and Cut Settings icons looks the same, but when you open each of them, now they will appear differently.
In the Design Page Settings window, you'll have options to pick the Curio page size as well as the Curio cutting mat or embossing cutting mat at each the 8x6.5 or 8x12" size for a total of four new mat options. In the Cut Settings window, you'll now have options to pick which tool is in which holder and which material type each tool is cutting/embossing, etc. Yes your head will spin for a hot second....or perhaps longer.
One thing that struck me as odd (and rather annoying) is you must have your Curio connected to the computer to have access to the Embossing and Stippling tool windows. That means you won't be able to fully edit designs using these features unless you are physically connected to your machine. I don't know about you, but I often design on my laptop some place differently than where I cut. I like to get my design all ready to cut (say while sitting on my comfy couch) and then just go plug in to cut/emboss (in my office). With the way the options are grayed out in Silhouette Studio - that's not possible.
Almost two years ago when I got my first Silhouette Portrait I considered it a plug and play machine. The Silhouette Studio software was pretty intuitive for me and I find it relatively easy to explain to all of you. Unfortunately, I can't say the same at this point at the Curio. By no means am I saying I could have explained the functions of the Portrait/CAMEO the way I do now on day 1 or 2, but I certainly felt more confident and less frustrated while trying to work through CAMEO projects at the same point.
Again, I've only been using my Silhouette Curio for 10 or 12 hours - however knowing the Silhouette Studio software and knowing how quickly it all came together on the CAMEO I am comfortable saying my first impression of the Silhouette Curio is that it will take a lot of getting used to. Once we all get over the learning curve, creativity will take over and we'll be finding new and innovative ways to use the Silhouette Curio!

Finally, if you're wondering why I'm not giving a full review on the Silhouette Curio a lot of it has to do with the fact that the deep cut blades and stippling/etching blades meant for the Curio are not yet available. When the rest of the blades become available and I can test them out then I will share a full Silhouette Curio review for you right here on Silhouette School.
In the meantime I'll be sharing a Silhouette Curio set up and getting started tutorial on the blog in the next few days so be on the lookout.
Note: This post may contain affiliate links. By clicking on them and purchasing products through my links, I receive a small commission. That's what helps fund Silhouette School so I can keep buying new Silhouette-related products to show you how to get the most out of your machine!
Thanks for coming to class today at Silhouette School. If you like what you see, I'd love for you to pin it!

Get Silhouette School lessons delivered to your email inbox! Select Once Daily or Weekly.


.png)


Hi Melissa, I am in Sydney Australia and have to demo this machine at a trade show next week. I received mine on Tuesday and have experienced what you have IDENTICALLY! My vellum however even though I was JUST embossing kept "cutting" the vellum on all the horizontal lines. I MUST say though, the print & cut is much easier and accurate than the Cameo.
ReplyDeleteI haven't tested print and cut yet on Curio, but I'm glad you are liking it!!
Deletemelissa, what is your Periscope id?
ReplyDeleteHi Marie! Just search 'silhouetteschool' on Periscope and you'll find me.
ReplyDeleteI am SO glad to hear I am not the only one who is a little baffled by the Curio. I consider myself pretty computer and software savvy and I had the dickens of a time getting what I thought would be a simple task completed. I too am hoping Silhouette is listening and some user friendly options are in the next version of the software!
ReplyDeleteUgh....I can't even get mine to score/emboss on a piece of foil. Have been fiddling with it half the day. Keep getting registration failed error. I am baffled at how to even get registration marks on my foil. And same concern with the lack of lines to properly place material.
ReplyDeleteThank you so much for being honest in your review.... Will you be sending your first impressions and comments on to Silhouette for them to consider? Thanks for all you do!
ReplyDeleteI had similar first impressions about the Curio learning curve. I found the older Silhouette models and the Studio software quite intuitive, but it's going to take a bit longer with the Curio. You make a very good point about the automatic mirroring for embossing with no preview. That's certainly short sighted on their part. The other thing that bothers me is the base loading and unloading. The instructions are not very clear about how to load and unload, and going to manually pushing and pulling out the base after years of auto loading deserves some mention.
ReplyDeleteHey Melissa, Thanks for the review! Just opening up mine now, wondering what tools are which? I mean, what is the scoring tool? (thanks for all you do at silhouette school!!)
ReplyDeleteI'am reading your review and I could of wrote it. I have the same experience, the same findings and thoughts. The new software futures are indeed confusing. There where I had almost no problems understanding and using Studio with the Cameo a year a go and started almost immediately making projects, this time I know for sure I need longer to get to know the new features. I find the results of embossing also very dissapointing, not what I was expecting at all. And because I mostly bought the Curio for embossing I at this point think it was a bad buy :(
ReplyDeleteI also ruined my embossing mat like you did. Luckily almost at the bottom but never the less it's a shame.
This comment has been removed by the author.
ReplyDeleteHow may I ask you an unrelated question about Cameo? It has to do with cutting tho.
ReplyDeleteSuzanne
Hi Melissa, thank you so very much for your blogpost. It was very helpful to me. I couldn't find the platform height like you also had and after I had installed the version you recommended, it worked fine!
ReplyDeleteMonique from the Netherlands.
So thankful you posted your thoughts on day one of using your Curio, because I also had the issue with the platform feature not showing up. Wishing SA had set up step-by-step video tutorials on their website to walk us through how to use this new machine since their instructions are so skimpy. I also wish there was a Curio chat page where new owners could help one another. Short of that, thank you for offering your comments & instructions on how to use Silhouette machines. You've helped me with my Cameo more times than I can remember!
ReplyDeleteI cannot get my machine to emboss at all. I am very frustrated.
ReplyDeleteI am a newbie at all things silhouette. I just received my curio a few weeks ago and if it wasnt for you I would still be trying to figure out the platform issues on the program. I was so aggravated looking for where it tells how many platforms to use I was starting to pull my hair out.The manual I thought was not helpful at all. So thank you!
ReplyDeleteThis comment has been removed by the author.
DeleteI feel I've bought a bit of a turkey. I bought this to emboss and I wish I had read your post beforehand as the results are underwhelming to say the least, and there are NO instructions - I had to figure it out by myself - all these instructions for cutting but nothing about embossing (that I could find). It embosses very poorly I think, or maybe I'm doing something wrong. I wish they had a simple step by step guide which talked you through it. I contacted the company, but they don't have one, just the Vimeo video which sort of glosses over it and gets better results than I've managed. I'm crushed at the waste of money....
ReplyDeleteMelissa, Thank you for your comments on the Curio. I have a Cameo and have had it for 2 years. I originally bought it to make etching stencils and have ventured out into a bigger realm of vinyl and other things. I have just purchase the Curio and have yet to try anything with it. I have to admit that I am not an "embossing" person, so this question may really seem dumb, but can you give me some advantages to doing embossing? I understand how it comes into play with cards, but is there other things that could be done? Also, once you emboss something with the Curior, would you then have to use embossing powder, etc?
ReplyDeleteHi would to know if the curio cutting heat transfert vinyl for t-shirt?and can I use the normal vinyl to put on tshirt?
ReplyDeleteHi would to know if the curio cutting heat transfert vinyl for t-shirt?and can I use the normal vinyl to put on tshirt?
ReplyDeleteHi Thugsta, did you get any reply on your question? I am also thinking of buying the Curio for cutting heat transfer vinyl.
DeleteThank you!
Thank you for educating us about the Curio.I am thinking of getting one, but I am a bit confused about the emboss & cut modes. Silhouette support is not very helpful. Do you emboss & cut on the same mat? Did I miss something? Are the embossing mats padded to allow for embossing as you would do by hand, using a mouse pad or embossing mat?
ReplyDeleteAre the mats for the Curio different than the ones for Cameo? How long do they last?
Can you use deeper settings for embossing on cardstock? I want to do vellum-currently do by hand-but embossing is hard for me to do because of arm/hand issues, so thinking of Curio for helping me do more. Any embossing hints/setting. on different paper types would
be great and appreciated.
Thank you this is very helpful. I just replaced my Cameo v2 with a Curio and am a little unsure of it. How are the black plastic squares and material holder strips used? Not mentioned in guide book.
ReplyDeletePS.. I agree, I work on designs on my laptop at a different location than the cutting machine. Not being able to do this with the Curio is a pain, hope they fix this in an update of the software soon!
ReplyDeleteI made a file called CurioGrid.studio3 which is simply a 8½"x6" page with 1"x1" grid covering it ... works like a charm for placing materials on the mat.
ReplyDeletemY HUSBAND GAVE ME THE CURIO FOR A CHRISTMAS PRESENT AND I FIND IT VERY DISAPPOINTING INDEED...HARDLY USE IT. IF YOU GOOGLE OTHER SITES SHOW OTHER BLADES TO USE ON THIS MACHINE...I FOUND IT DISAPPOINTING THAT ALL THE MATS AND BLADES DO NOT COME WITH THE MACHINE SO ONE CAN TEST ITS FULL POTENTIAL. AS IT STANDS I WOULD NOT RECOMMEND ANYONE BUY THIS MACHINE AND I LIVE MY SILHOUETTE SO THAT IS HOW DISAPPOINTED I AM
ReplyDeleteLYNETTE FROM AUSTRALIA
Excellent post and wonderful blog, I really like this type of interesting articles keep it u
ReplyDelete123hpremoteassistance Officejet 6822 Printer Setup
Hey Quick question. I'm looking into buying a cutting machine, and I'm torn between the Curio and Portrait. Honestly I'll probably only be cutting planner stickers and maybe some vinyls and cards. I found them both on Jet.com for under $130 so I'm just wondering which would you choose?
ReplyDelete