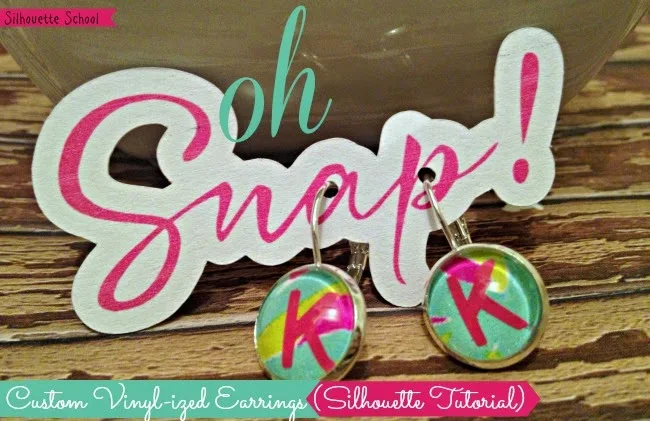
 The gift is actually two parts: the first part is a personalized jewelry dish. That's like old news...see here for the tutorial.
The second part is a set of monogrammed earrings for each of them. I've shared some other stud earrings on the blog before but I have to say - these may just be my new favorites. I just love that little glass bubble that goes on the top.

I ordered everything together from Amazon: the 12mm studs and 12 mm dangles and the 12mm
magnify cabochon. If you're going to use the cabochon too you'll need some type of adhesive because they won't stay in the earring settings without it. I use E6000 and it works well, but we'll get to that.
Now the easiest way to do this in Silhouette Studio is to first convert 12mm to inches. A quick google conversion and you'll find that 12mm = .4724 inches.
In Silhouette Studio use the draw an ellipse tool to draw a perfect circle. Select the circle and then from the Scale window enter 0.472 into the 'specify dimensions' boxes. Click apply.
If you want to add a monogram to the earring use the text tool to type out a letter. Pick the font and then in Studio move the letter over top the circle so it's sized correctly.
TIP: If the font is very delicate and thin you may want to put a .01 offset around the font and cut the offset rather than the original. See more here on cutting thin/small fonts.
After you've sized the text move it away from the circle, duplicate the letter, and cut it in a contrasting vinyl color.
Weed both the circle and the letter then use a small piece of transfer tape to put the letter onto the center of the vinyl circle. Transfer tape is better than paper, in this case, (I actually always prefer it) as it will allow you to see through to the vinyl circle for easier for better placement.
If you try to use transfer tape to move the circle into the earrings you will have issues because the edge of the setting is raised up. Instead I suggest you put the vinyl circle onto the edge of your weeding hook and place it that way. Placement is very easy this way!
The final step is to add the cabochon. I've experimented a lot with this part of the process and I've found that a generous dot of E6000 glue is the best way to go. A large dot of glue is evenly spread across the entire face of the earring so you don't even notice the glue. A dot too small doesn't fully cover the vinyl circle and is much more noticeable.
Now since we were at the Snap Conference I thought it would be cut to make earring cards using the snap logo. I simply imported the design as a jpeg > traced it > filled the trace > added a .125 offset. After adding two small circles for the earrings to go through, I set up like any print and cut.
The original trace was set to "no cut" since I just wanted to print it. The circles and the offset were cut lines. If you need more detailed directions on print and cut click here to see the 101 tutorial for beginners.
And here's how they all came together. Too cute, right?!
Note: This post may contain affiliate links. By clicking on them and purchasing products through my links, I receive a small commission. That's what helps fund Silhouette School so I can keep buying new Silhouette-related products to show you how to get the most out of your machine!
Thanks for coming to class today at Silhouette School. If you like what you see, I'd love for you to pin it!


.png)


Very interesting blog, looking forward to more wonderful! Swarovski outlet uk store
ReplyDeleteI knowed How to make vinyl cabochon earrings with Silhouette.Thanks for sharings this blog........ afrocentric earrings...... Natural hair earrings. Afrocentric earrings. Afro earrings. Africa earrings | See more about Afro Braids, Afro and Ethnic Jewelry.If you love fashion, Natural Hair accessories, afrocentric jewelry or Ethnic Earrings you will love our website www.EthnicEarring.com
ReplyDelete