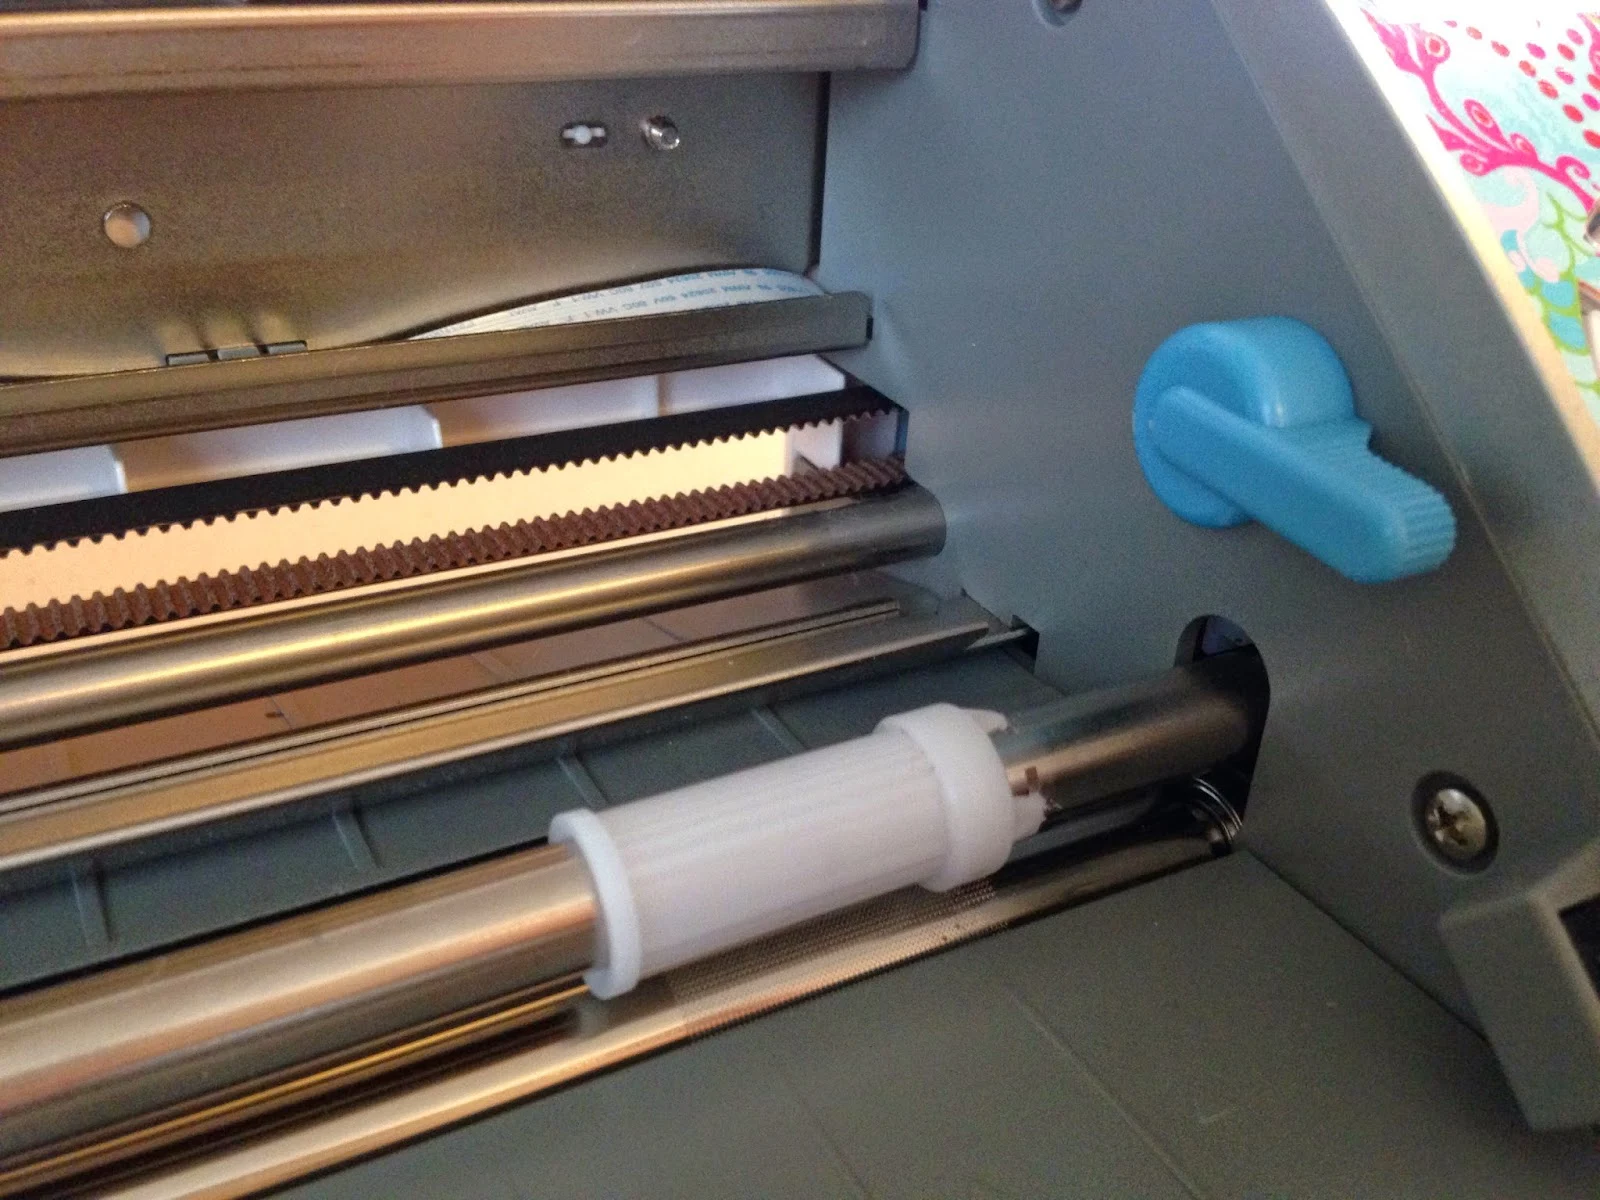
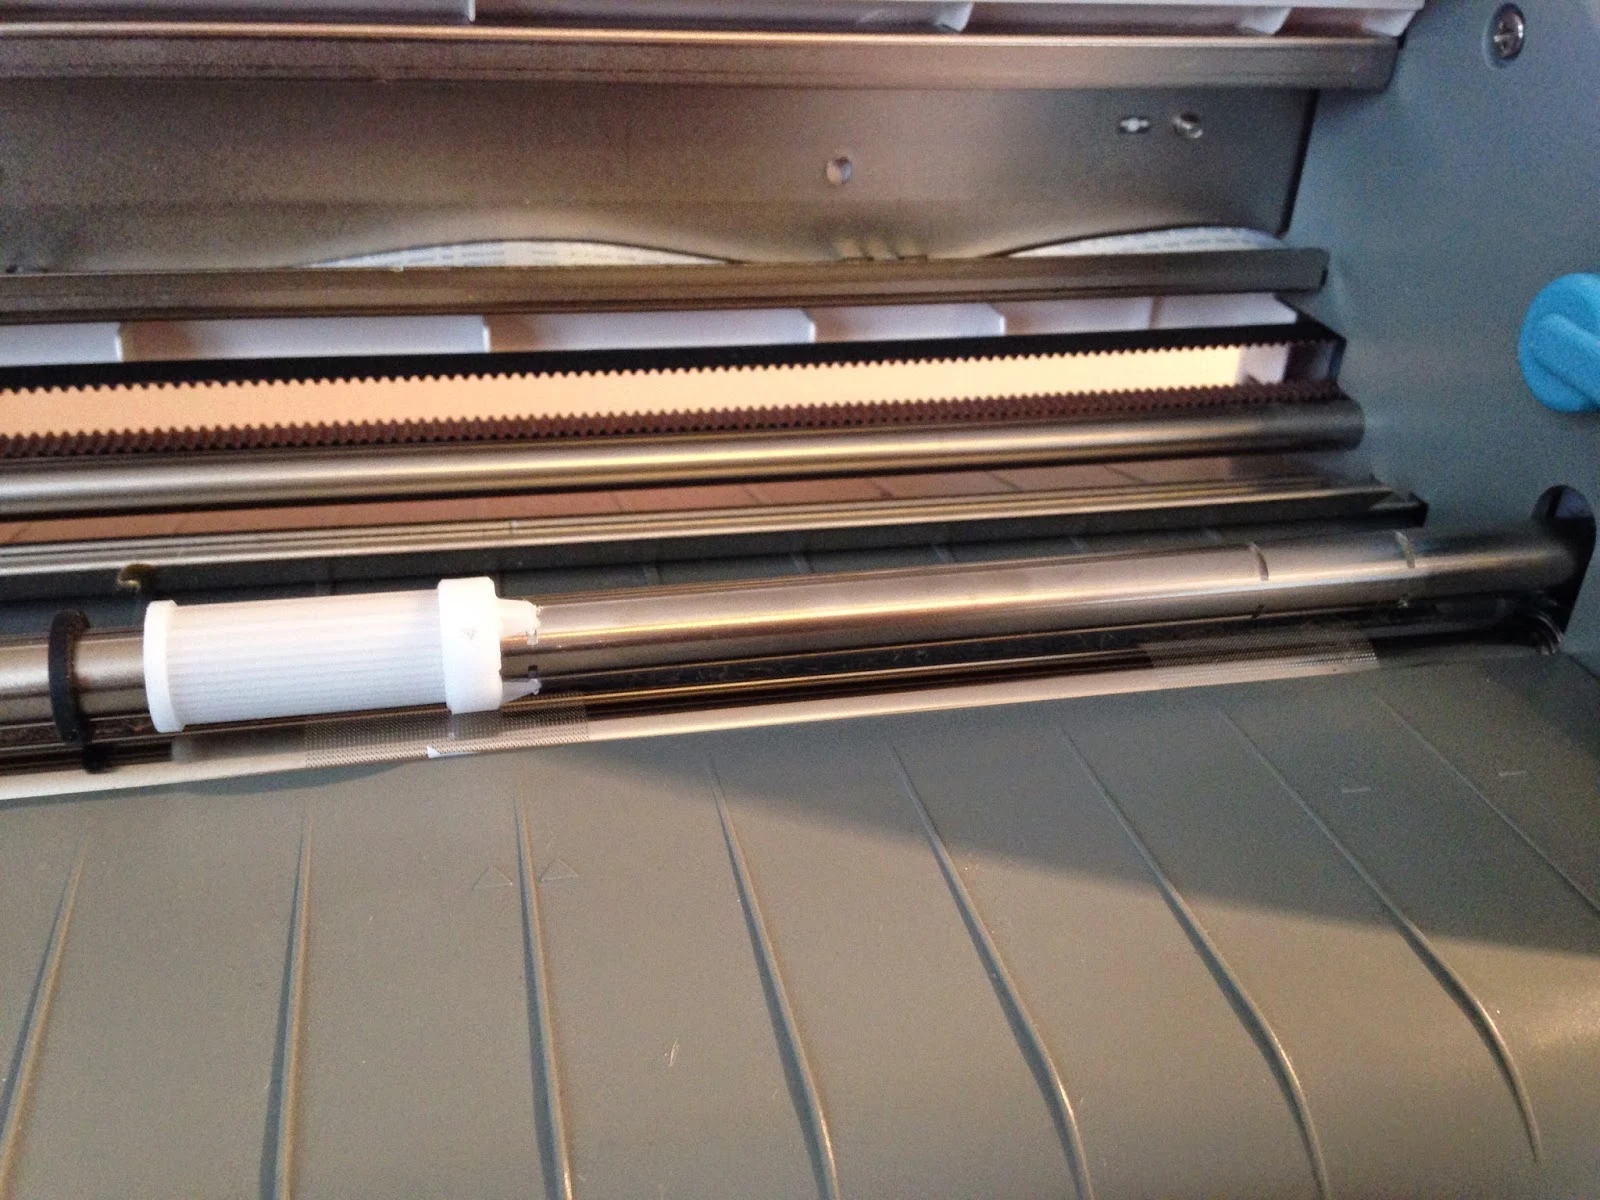
The first thing you want to do to move the Silhouette CAMEO rollers is to flip open the top of the machine.
On the right side, there's a blue lever. Flip it down. This moves the roller bar up slightly making it easier to grab the white roller.
 With one hand hold the silver roller bar still while using the other hand to firmly grasp the right white roller (near the top) and twist.
Stop when the teeth come out of the divots in the roller bar.
With the teeth of the roller between the openings in the bar, slide the roller over to the next set of divots. Keep on sliding the roller over until you get to a set of divots where you want to position the roller.
Twist the roller again until the teeth snap back into the roller bar.
Flip the blue lever on the side back up.
And in a Silhouette School first... I'm sharing a video tutorial on the blog to go along with the written instructions. Things are getting crazy around here, I tell ya. And don't worry - Silhouette School is NOT moving away from written tutorials for video tutorials. I am simply hoping to incorporate them more along side the written tutorials for those of you who prefer to watch instead of read.
Speaking of reading...be sure to read further down after you watch so you know what NOT to do to when trying to move the CAMEO rollers.)
What you absolutely don't want to do is grab the white rollers with any kind of tool - such as pliers. This could leave indentations on the rollers which could then leave marking on the material you are cutting. Silhouette America does not sell replacement rollers which means the only way to get around torn up rollers is to buy a new machine!
Note: This post may contain affiliate links. By clicking on them and purchasing products through my links, I receive a small commission. That's what helps fund Silhouette School so I can keep buying new Silhouette-related products to show you how to get the most out of your machine!
Thanks for coming to class today at Silhouette School. If you like what you see, I'd love for you to pin it!


.png)


Me toooo. I finally started using a small plier to hold it for me. It worked for me...
ReplyDeleteI am loving my Silhouette...and Silhouette School. I have learned so many great helps and fun things including how to spell "silhouette". Well most of the time. Grandma Betty
I would absolutely NOT use pliers to move the rollers or hold the bar. You are at great risk for scuffing both parts which can leave marks on your material and there are no replacement parts.
DeleteI've tried to move the roller & it's so hard for me I give up. You make it look so easy ( like everything else you do!). Thanks for the tip about NOT using tools-I was very tempted; I didn't realize the repercussions; that is a BIG "heads up"!! Thanks for all your tips & tricks, I've learned more from your blog than any other I've followed!
ReplyDeleteI have the portrait. How do I move my rollers?
ReplyDeleteAs far as I know, the portrait does not have moveable rollers, only the Cameo does.
DeleteSarah is correct the Portrait does not have rollers
DeleteI always have trouble getting a grip to move the rollers. I use a rubber grip pad like you would use to open a jar.
ReplyDeleteGREAT TIP!!
DeleteI have tried and tried to move my rollers and they will NOT move!
ReplyDeleteDo you know how to get the roller off where the notch is all the way around? Thanks!
ReplyDeleteOh Lisa...I did that! I used my 'hook' and 'spatula' from my vinyl tools to gently pry up a couple of edges. It took two of us to get it out of there. I don't know if I voided anything with my machine, but I got it moved. I'll never do that again!
DeleteI moved the roller too far to the left on my silhouette cameo. To move it back to the right of the center indention, I GENTLY pried two of the prongs up with my vinyl hook and slipped in a tiny piece of stiff, thin cardboard from a piece of junk mail. This allowed me to push the roller to the right, using the cardboard as a "ramp" up and over the notch. If you pry the prongs too much and they won't stay in the correct notch, use a pair of needle nose pliers to GENTLY squeeze them just a little, being careful not to get the pliers on the white collar next to the prongs which could mark up your media.
Deletethis just happened to me! My husband is frustrated with me! But he got it. We had to use 3 weeding hooks to pry all three prongs off and slide over. Put the rubber back in place and won't do that again! Thanks ladies for your comments! Thought I was the only bozo!
DeleteCan the roller feed be removed from the new silhouette cameo 2
ReplyDeleteCan the roller feed be removed from the new silhouette cameo 2
ReplyDeletewhen i moved mine it went way too far as to right by the black ring and i can't get it back. help!
ReplyDeleteThis is very difficult for those of us with arthritis in our hands.
ReplyDeleteLove, love, love that you are incorporating videos! Did I mention I LOVE the video. ;)
ReplyDeleteGlad I found you... pulled out my Silhouette for the first time in a long time and still struggling. Is it ok to move the white clips down so they are much narrower than the vinyl? The first time I tried my vinyl went crooked in the middle of the cut. When I moved one of the clips more toward the center of the vinyl it worked better.
ReplyDeleteI moved my roller too far to the left and can't get it back. Any suggestions?
ReplyDeleteLove the machine, but this seems like a design flaw that should be addressed in the next revision. REALLY hard to adjust unless you have really tough fingers.
ReplyDeletethanks for the video. I prefer written but a lot of times seeing helps me understand.
ReplyDeleteOnce again, Melissa to the rescue! I had three problems.
ReplyDeleteFirst, I was trying to cut Valentine stickers and my mat kept twisting as it loaded. I tried to straighten the mat manually, but that did not help - the mat still loaded wonky.
The problem: the rollers were out of place. Once I got the rollers moved (thanks to this video) I reloaded the mat perfectly.
Second, the Cameo could not connect with the Registration marks. Again, thanks to Melissa's tutorials, I manually set the registration marks successfully.
Third, I was worried that since I had to manually set the Registration marks the Cameo would not be able to cut the stickers exactly on the first cut line (Blade set to 1). Silly me. Yes, I did have to manually set the Registration marks again, but the Cameo handled everything perfectly. MAGICAL!
As an aside, the sticker sheet did not have a perimeter cut mark so I could not use Melissa's suggestion of turning off the perimeter cut mark to cut the stickers cut then do the perimeter cut. I think I may try to copy and paste a duplicate file and try adding the Perimeter cut to the copied file. If it does not work, I will still have the original file.
It worries me that my Cameo does not recognize the Registration marks. They look to be perfectly placed. This is the first time I have had that problem, but it is also the first time I have tried to cut sticker sheets. HAPPY VALENTINE'S DAY TO ALL!!
Just a suggestion - get a wide rubber band that can slide underneath the rollers and use that to help your fingers get a grip on the roller while you twist it. I was having a heck of a time trying to twist the roller right. The more I tried the more my fingers would slip. So I used a rubber band and it worked! Hopefully this helps some of you out there having similar problems! :)
ReplyDeleteI was having serious issues getting my rollers to move. So much that I was afraid I'd break something. I finally tried gripping the roller with a lightly dampened washcloth. It worked really well and the roller moved without the strain of prior attempts.
ReplyDeletethis just happened to me! My husband is frustrated with me! But he got it. We had to use 3 weeding hooks to pry all three prongs off and slide over. Put the rubber back in place and won't do that again! Thanks ladies for your comments! Thought I was the only bozo!
ReplyDeleteI put on latex(well they are not really latex any more)gloves to hold and it works well
ReplyDeleteYou shared very useful post. Thanks for sharing.
ReplyDeleteNon woven fabric bag making machine
I had this happen and we got the roller pulled off the groove going back towards the blade,then put a piece of shipping tape around the grove and the roller slipped over it. This is a huge design flaw. There is also a video on you tube that shows how to take the bar and rollers off. I don't know if you can buy the parts but they do come off and go back together.
ReplyDelete