Well, my friends it's far easier than it looks - if you have Designer Edition. As we've discussed here in the past, you need Silhouette Studio Designer Edition to make custom rhinestone templates and that's what is needed for this tutorial. But the best news is just because you're using the rhinestone tool, doesn't mean you have to use rhinestones when you cut...as you can see, I cut my spray design on HTV!
So if you have DE go ahead and open up Silhouette Studio. If you don't, stop stalling and go get yourself DE or higher - you won't regret it.
With Silhouette Studio open, open up a design. Use a basic shape like a heart or a shamrock. You don't want anything with too much detail or the rhinestone spray design will get muddled. Less is more here.
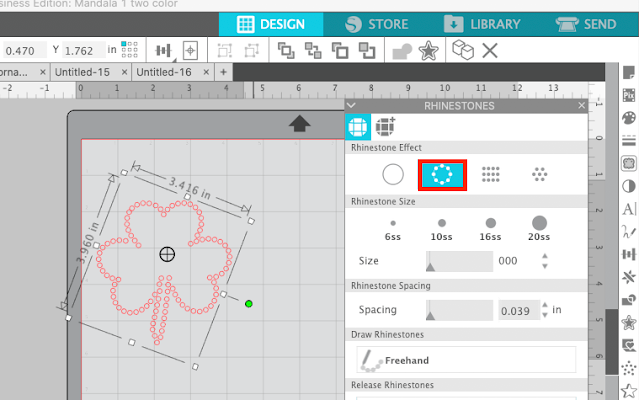
Under Rhinestone Effect pick the 'Edge' option. This turns the line into a bunch of rhinestone circles.
Select 6ss from the rhinestone size area.
I also like to fill in the circles with color. This really helps to 'see' the finished design easier. Use the fill tool and change the line color to transparent.
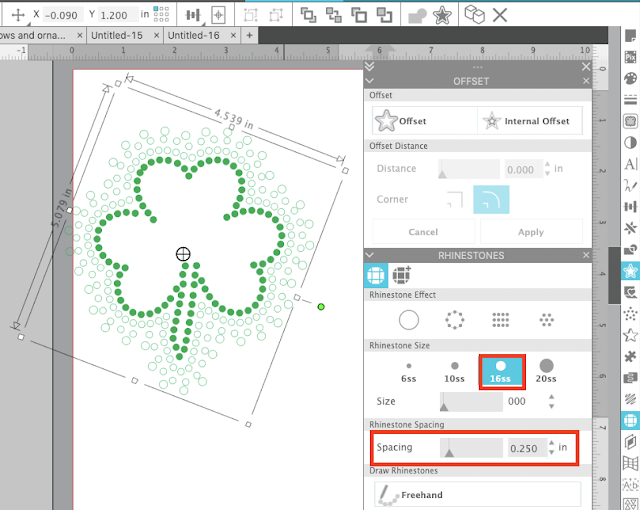
With the rhinestone shape selected still, open the Offset panel from the right sidebar. Click "Offset".
Set the offset to a distance where the two rows of rhinestones are not touching, but are still pretty close together.
Repeat the offset process again (you can choose to make the offset distance the same or more it's totally up to you). At this point I like to change the rhinestone size to 10ss AND I like to space them out a little bit more to start getting the spray effect.
- 4th row: 16ss rhinestones, more space between them
- 5th row : 20ss rhinestones, more space between them
- 6th row: 20ss rhinestones, so much space between them there's only about 6 or 8 rhinestones in the entire offset row
When you are finished adding layers to the spray, group it all together.
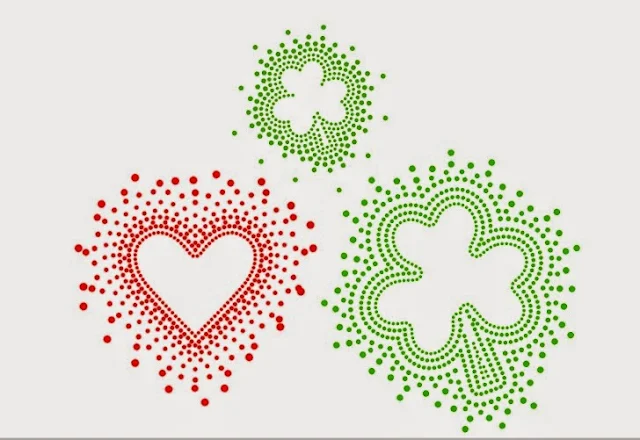
I quickly made three and here's how they turned out.
Now you can cut this on rhinestone template material and fill it with rhinestones. Or not!
This girl doesn't have too much patience for rhinestones these days, which is why I took the easy way out...and cut on HTV. Holographic HTV, glitter HTV, regular vinyl or freezer paper to make a stencil for fabric paint are all great alternatives as well depending on what you want to do with your spray design.
If you do cut on vinyl, HTV or stencil material just be careful weeding so that you don't lose any of the dots.
Here's a closer look...
Note: This post may contain affiliate links. By clicking on them and purchasing products through my links, I receive a small commission. That's what helps fund Silhouette School so I can keep buying new Silhouette-related products to show you how to get the most out of your machine!
Get Silhouette School lessons delivered to your email inbox! Select Once Daily or Weekly.


.png)


Beautiful! I had no idea you could configure the rhinestones!
ReplyDeleteAWESOME
ReplyDeleteThanks!
ReplyDeleteAwesome! Thank you.
ReplyDeleteLove it. Thanks for sharing.
ReplyDeleteCan this machine cameo 4 can cut rhinestone template using balso wood 2mm
ReplyDeleteLove it! Thanks for sharing.
ReplyDelete