Holographic Heat Transfer Vinyl is one of the newest crazes in the die cast and DIY world. It comes in a variety of colors and adds the sparkle of rhinestones without dealing with time-consuming rhinestone flipping. You did read my rhinestone 101 tutorial, right? Expressions Vinyl gave me a few sheets of their holographic HTV to
How to Cut Holographic Heat Transfer Vinyl (Free Cut File)
Friday, October 31, 2014
Holographic Heat Transfer Vinyl is one of the newest crazes in the die cast and DIY world. It comes in a variety of colors and adds the sparkle of rhinestones without dealing with time-consuming rhinestone flipping. You did read my rhinestone 101 tutorial, right? Expressions Vinyl gave me a few sheets of their holographic HTV to
Craft Show Tips for Beginners: Part 1 - How to NOT be a Nervous Wreck
Thursday, October 30, 2014
As I've mentioned a time or two on the blog and Facebook pages I'm currently crafting my heart out to prepare for my first craft show. The show is a few weeks out and since I've been preparing for months now I thought I'd share what I've learned so far with you.
This is by far not a conclusive list or one that will probably work for everyone, but is intended to be a guide to help you decide if and which craft show is right for you and how to be successful at your first show without being completely overwhelmed and a total nervous Nelly on craft fair day.
I'll continue to follow up on this series as we get closer to the craft show and then afterwards to wrap up my craft show best and worst sellers and what I learned along the way.
To be completely honest with you I never really considered selling at a craft fair until over the summer when a friend of mine suggested I join the holiday vendor fair she did last year for the first time. It's a relatively small show with about 45 vendors and just $30 for a 5x6 booth area. It's an indoor craft fair at a local school that is open for just 3 hours only on the Friday evening before Thanksgiving. As my first fair, all of these things were important to me.
This is by far not a conclusive list or one that will probably work for everyone, but is intended to be a guide to help you decide if and which craft show is right for you and how to be successful at your first show without being completely overwhelmed and a total nervous Nelly on craft fair day.
I'll continue to follow up on this series as we get closer to the craft show and then afterwards to wrap up my craft show best and worst sellers and what I learned along the way.
Find the Right Craft Fair
To be completely honest with you I never really considered selling at a craft fair until over the summer when a friend of mine suggested I join the holiday vendor fair she did last year for the first time. It's a relatively small show with about 45 vendors and just $30 for a 5x6 booth area. It's an indoor craft fair at a local school that is open for just 3 hours only on the Friday evening before Thanksgiving. As my first fair, all of these things were important to me.
Filling in Silhouette Sketch Pens (or Pencil) Designs
Friday, October 24, 2014
I shared awhile back a trick on how to fill in fonts with sketch pens, but I was recently asked how to fill in designs. Filling the designs with a solid color in Silhouette Studio will allow you to visualize what the image will look like filled it, but it will not actually make the sketch pen 'color in' the design when it's sketching. However, if you have Silhouette Studio Designer Edition, which I recommend for these 13 reasons (and counting), you can sketch 'filled in' designs.
SPOOK-Tacular Silhouette Gift Basket Giveaway ($275 Value)
Wednesday, October 22, 2014
 I promised you October would the be the month of giveaways on Silhouette School and I'm keeping my promise. The giveaway comes at a wonderful time for Silhouette School as we reach 20,000 followers on Facebook and nearly 1,000,000 page views on the blog! That's an amazing feat for a relatively new blog. We're not even a year old yet. I say it at least every other week...I'm continually humbled and flattered by the feedback I get from my readers and social media followers. I'm convinced you are the best out there and so I'm always so thrilled to have an awesome giveaway to thank you!!!
 The SPOOK-tacular Silhouette Gift Basket Giveaway is the third big giveaway this month and it's a good one! How about more than $275 in Silhouette-related prizes and gift cards including a $25 Gift Card to the Silhouette Online Store, a Silhouette roll feeder, 30 sheets of adhesive vinyl in 15 different colors, PixScan, blades, a $25 Gift Card to Punch Place Plus, an Amy Chomas engraving tip and much more? Yeah...there's nothing scary about that, right?!
HTV and Vinyl Storage in an Over the Door Shoe Organizer (Bigger and Better)
Tuesday, October 21, 2014
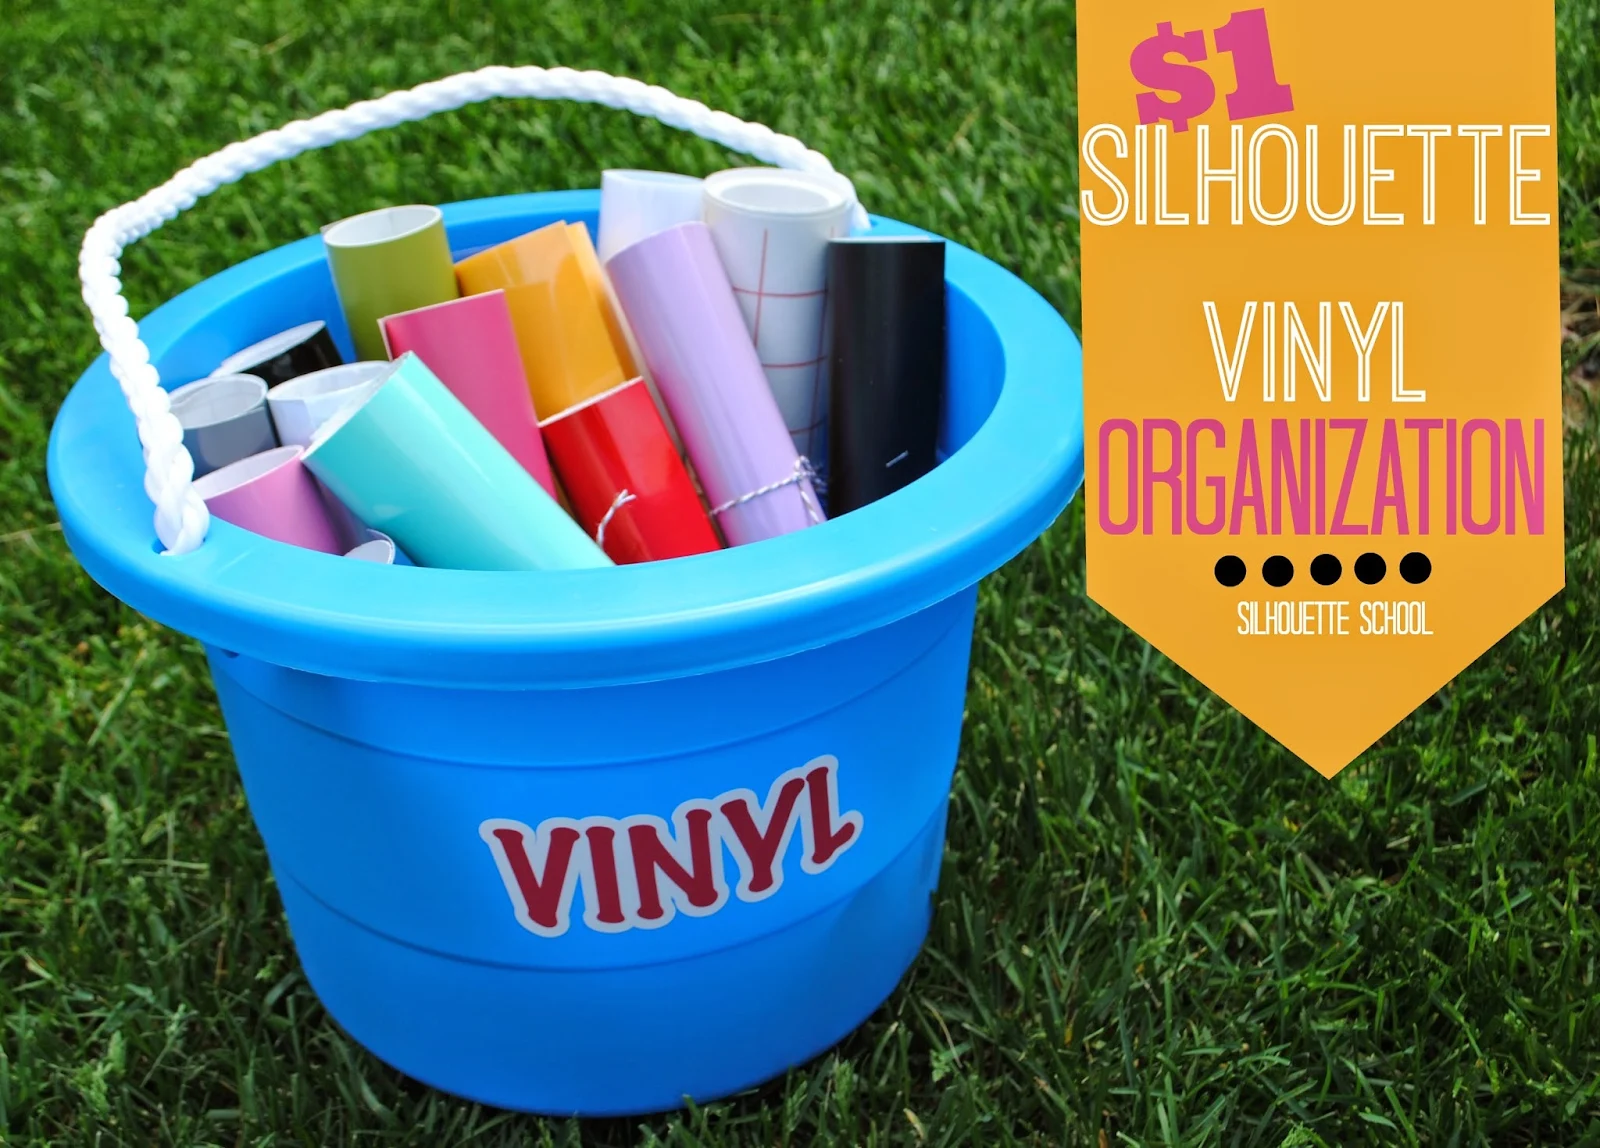
 A few months ago I shared my vinyl storage solution on the blog. Back then my handy dandy little bucket from the dollar store did the trick. After some custom orders, purchasing the extreme deal of 30 sheets of 24x24" vinyl from Amazon, and few other "I just have to get more vinyl" purchases the bucket just ain't cutting it.
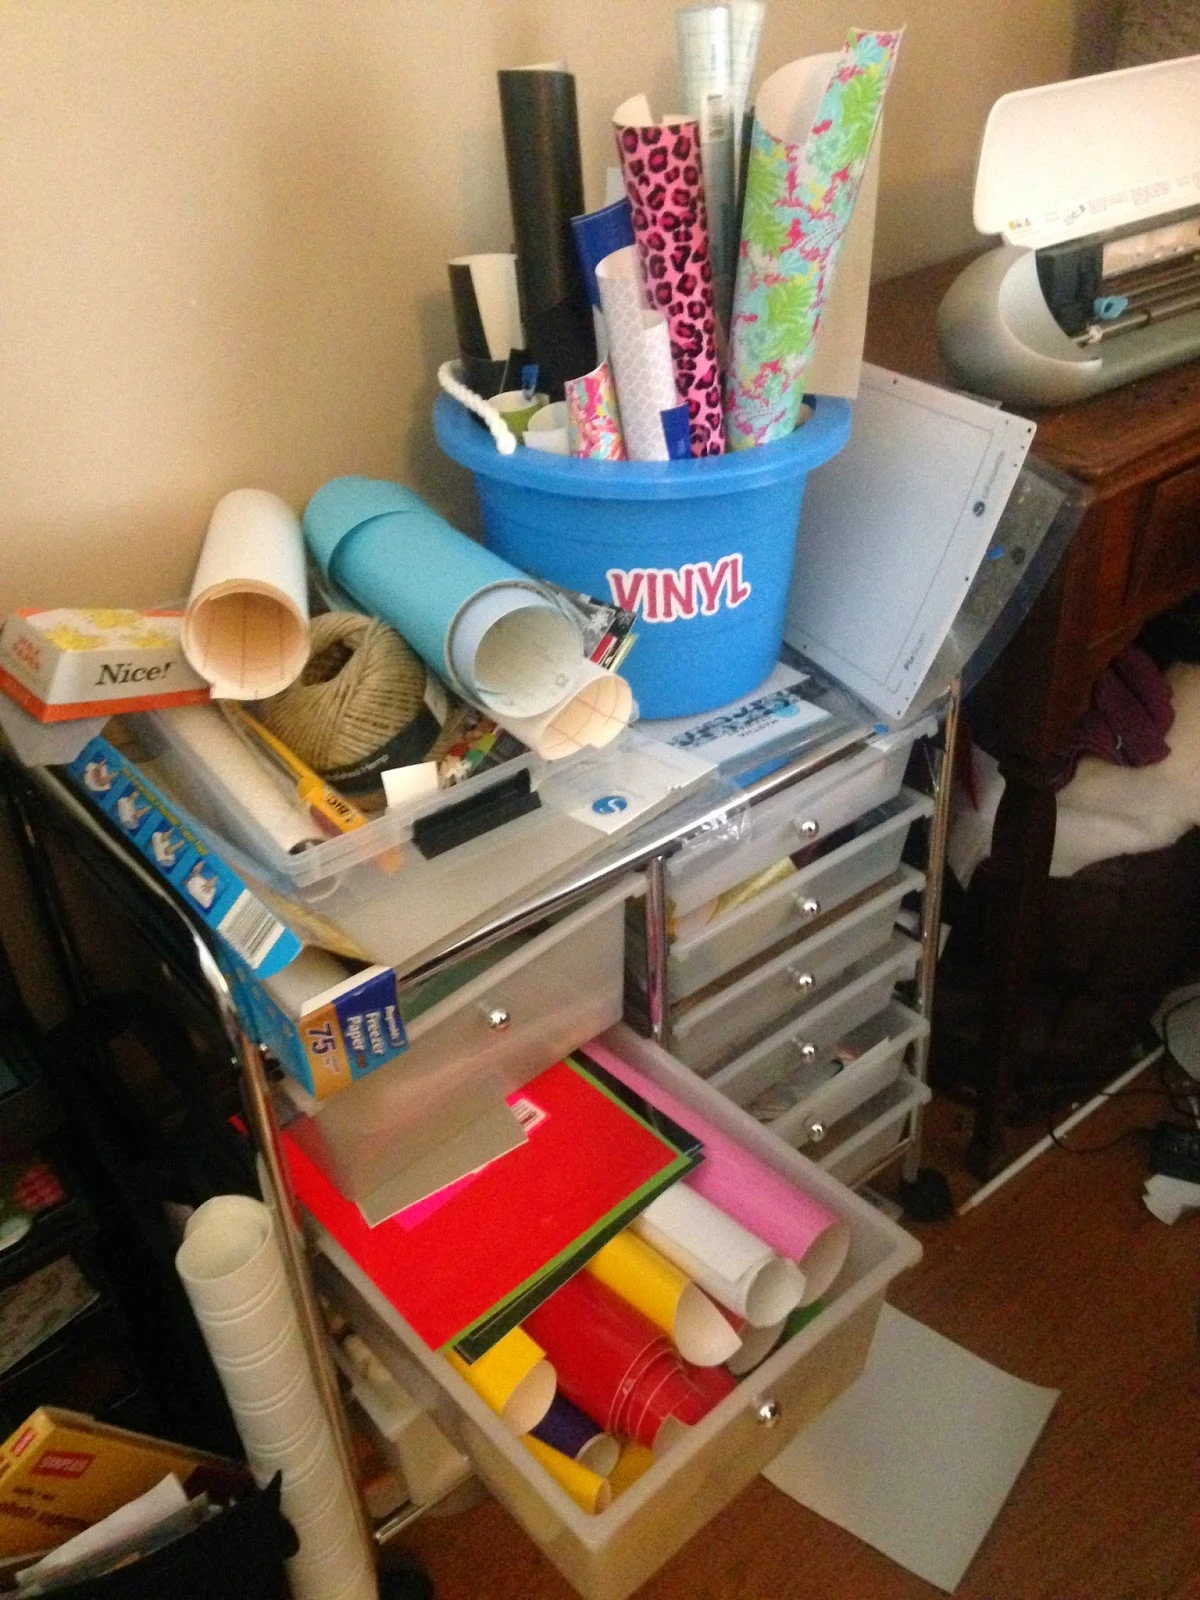
Vinyl was literally spilling onto the floor and all over my desk(s). Scraps were taking over. Rolls were coming undone. I was ordering more vinyl because I didn't realize what I actually had because I couldn't find it or worse it was bent because I hadn't stored it neatly.
Perhaps my husband has a point when he slips into his hazmat suit to enter... (I'm mortified to even share this because my house is honestly very tidy with the exception of this one little space but...for the good of the blog.)
Regardless I'm on a mission to make my craft room neater (at least for the next 8.5 minutes until I get into 12 more projects at the same time) and more organized and that starts with getting my vinyl stash in order.
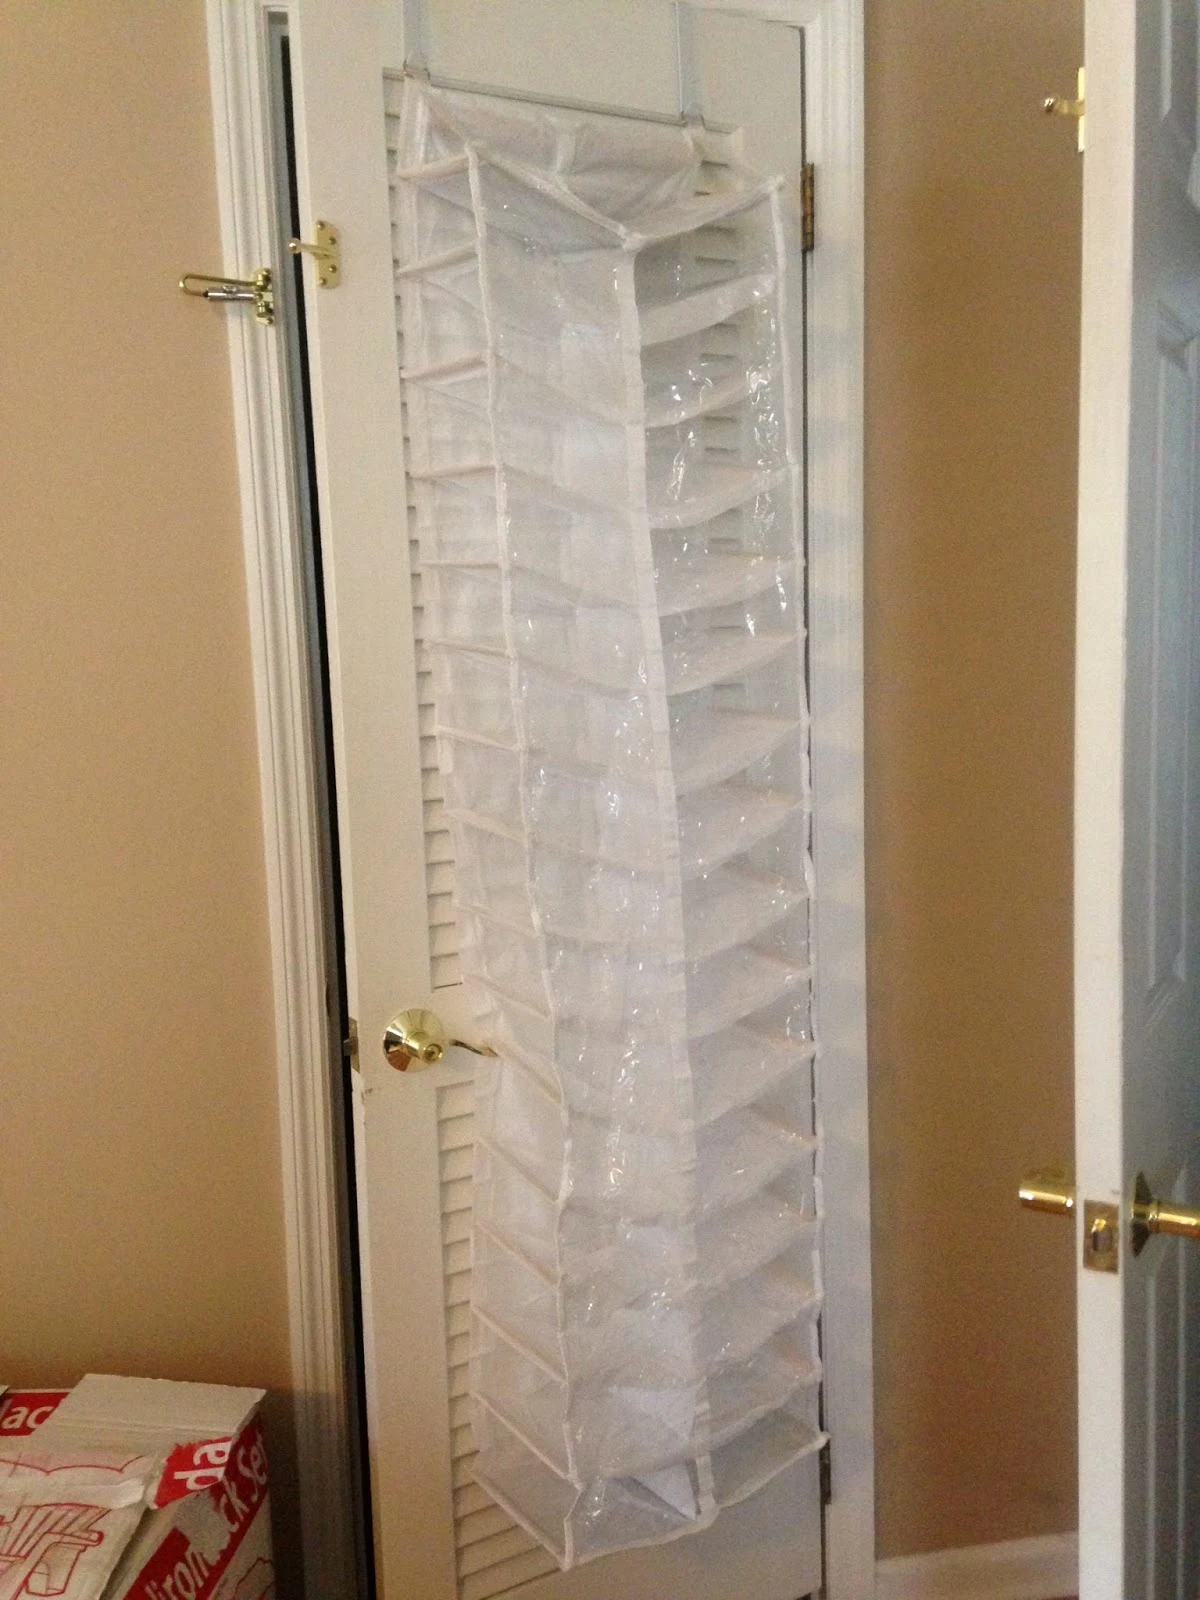
A few of my fellow vinyl hoarders suggested an over-the-door shoe organizer as the solution to my vinyl woes. I researched a few different shoe organizers and finally settled on this 30 pair Shoes Away organizer.
I picked this one for a few different reasons:
- It has a lot of compartments. I have a lot of vinyl.
- The compartments are horizontal, but angled slightly upwards so the vinyl won't fall out. I just had a feeling the organizers with the vertical slots would cause my vinyl to look messy as it was sticking up on top of each other.
- The compartments are clear so I can easily see the vinyl without pulling everything out.
- It was on sale.
I started by rolling each roll/sheet of vinyl neatly and secured it loosely with a piece of painters tape to keep it rolled. I know that not everyone agrees with storing vinyl in a roll (some prefer to store vinyl in a long flat container like this) due to the possibility of bubbles, but I have had no problems.
I put adhesive - glossy and matte - on the left side and all my HTV on the right according to color.
And as for my scrap pieces...they're now in my vinyl bucket. You can check out the tutorial on how I layered the 'Vinyl' label here!
Note: This post may contain affiliate links. By clicking on them and purchasing products through my links, I receive a small commission. That's what helps fund Silhouette School so I can keep buying new Silhouette-related products to show you how to get the most out of your machine!
Thanks for coming to class today at Silhouette School. If you like what you see, I'd love for you to pin it!
Amy Chomas Sketch Pen Holder Review & Tutorial
Monday, October 20, 2014
The Silhouette Sketch Pen feature is one of the coolest...but if you haven't tried a Chomas Creation adjustable sketch pen holder you don't know what you're missing. The sketch pen holder created by Amy Chomas is not only great quality, but what I love the most - adjustable! So you can use the same older to sketch with a thin pencil as you can with a Sharpie! I mean how cool is that?
Labels:
How to,
How to...,
New Products,
Reviews,
Silhouette,
Sketch Pen Series,
Sketch Pens,
Tutorials
Silhouette CAMEO 2 Released by Silhouette America; Hits Pre-order on Amazon
Wednesday, October 15, 2014
Silhouette American officially released the new Silhouette CAMEO machine today (October 15). It's already hit Amazon at a pre-order discount - $269.99 for the bundle. Amazon will start shipping on October 22.
Opening Samantha Font and Glyphs in Silhouette Studio (Tutorial)
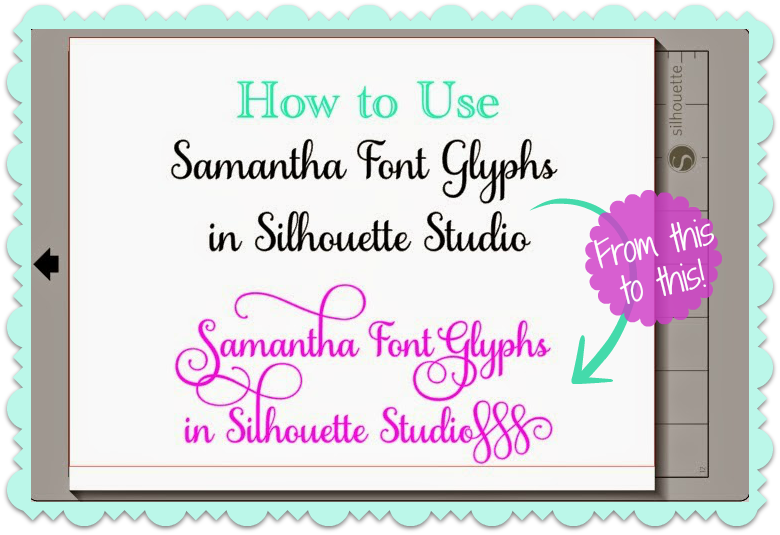
If you follow Silhouette School on Facebook you know last week I was pretty much freaking out because the beautiful Laura Worthington Samantha font was on sale on Mighty Deals. I snagged the upright version for $17...the font family usually costs upwards of $300! Truly, a mighty deal...(which has been extended so grab it while you can!!). But then what? Ahhhh...I couldn't access the glyphs in Silhouette Studio. I had a few generous readers come to my rescue to help me figure out how to use the full font and now I'm here to pass along what I've learned.
Engraving with Silhouette: 7 Tips to the Perfect Engraving
Tuesday, October 14, 2014
I have never been so excited to share a Silhouette tutorial with you. Not only have I been working on perfecting this engraving process for a week now, but I've quite literally tried dozens of combinations of settings and tools until I finally figured out the best way to get a clean, legible, centered, and (relatively) deep engraving.
15 Minute Customized Halloween Buckets (On The Cheap)
Monday, October 13, 2014
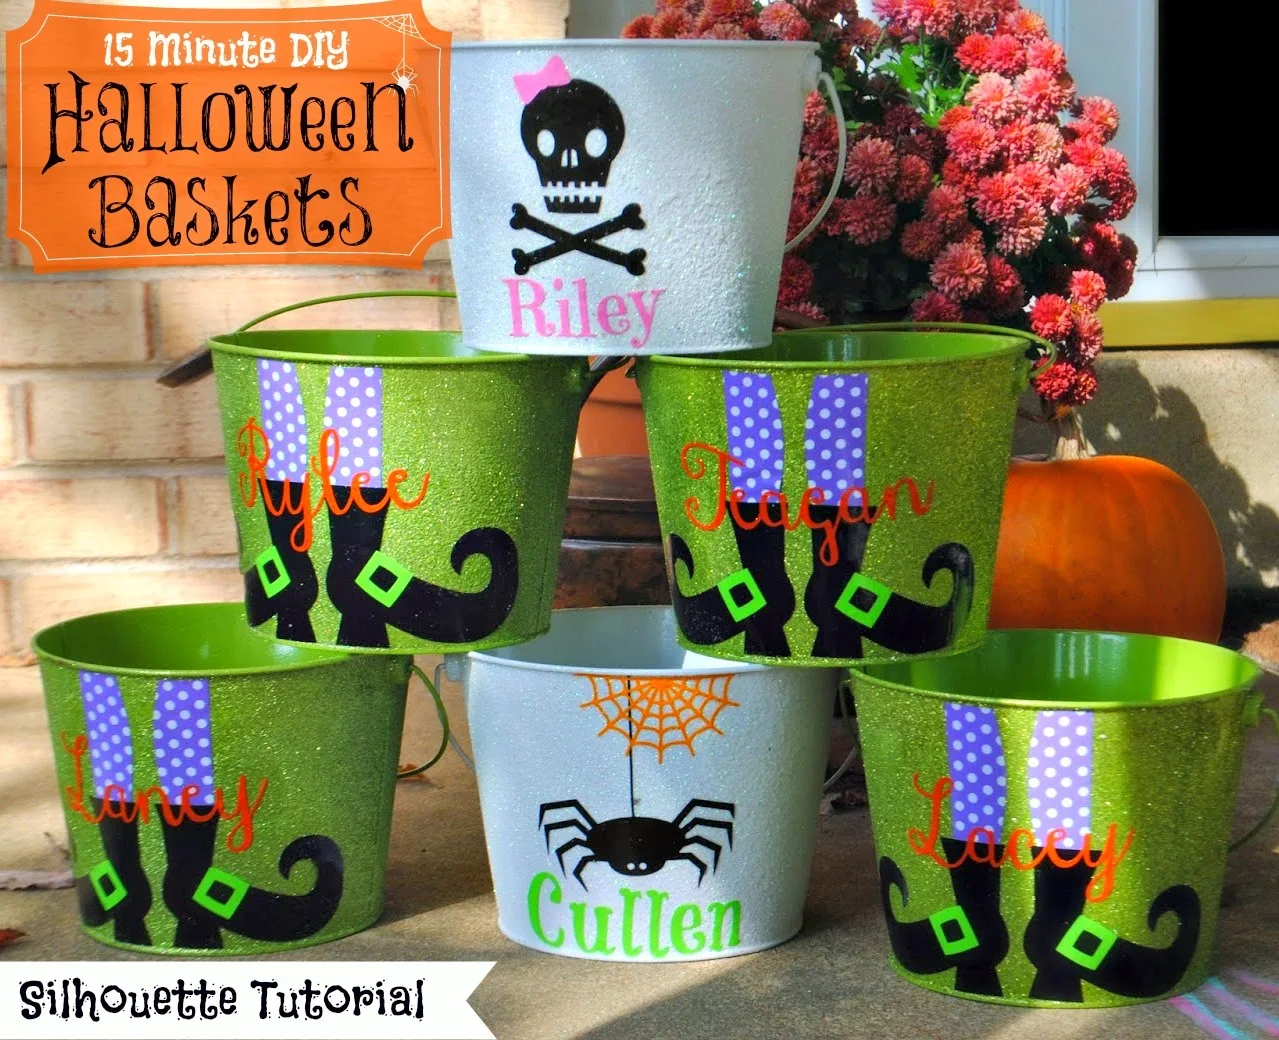 Halloween and fall crafts have completely taken over my craft room the last few weeks!! Apparently, I'm not the only one because as you'll see later in the post my buddies form the Silhouette Challenge group are in full on fall mode, too.
I've been knee-high in witch boots for weeks! I purchased a few Halloween buckets at Target's Dollar Spot this year to personalize for the kiddos and their friends.
Long before I had the buckets I had a reader request asking how one would go about making something just like this. It looks complicated. It looks like a whole lot of layering. It's actually not. Whether you want to go out and purchase all the design pieces (there are a few similar designs in the Silhouette Online Store), the entire design or do a trace in Silhouette Studio is up to you. I can tell you that I found a pair of witch legs clipart, traced and then modified the design to make the boots higher and add the buckles (just a square with an internal offset).
Happy Fall Y'all Blog Hop and $1000 CASH Giveaway!!! (4 Winners!)
Friday, October 10, 2014
I promised y'all three amazing giveaways in October...and I wasn't lying. Today kicks off the biggest giveaway we've ever hosted here on Silhouette School. How about more than $1000 in cold hard cash? That's right - welcome to the All Things Fall Y'all Blog Hop & Giveaway! Along with fabulous Fall DIY crafts (#24 is especially close to my heart), decor and recipes, we are excited to bring you the chance to win one of four CASH PRIZES totaling over $1,000!
How to Cut a Cereal Box with Silhouette (It's Easy and Awesome)
Thursday, October 9, 2014
One of my favorite craft supplies to use with my Silhouette is not an actual craft supply at all....it's a cereal box! Yep, an everyday, run of the mill, weekly grocery store grab is an excellent substitute for chipboard or even wood. Here are some of the reasons why I love using cereal boxes for crafts:
- FREE craft supplies! You buy the cereal and the box is an added free bonus....what a great two-for-one!
- It's an easy way to be green and upcycle.
- They cut nicely with a Silhouette and also take paint (both spray and craft paints) very well. They also can easily be covered with scrapbook paper, vinyl, or other materials if you don't feel like painting.
- They are lightweight and easy to hang but still firm and sturdy.
How to Restore Original Color to Silhouette Store Designs in Studio
Wednesday, October 8, 2014
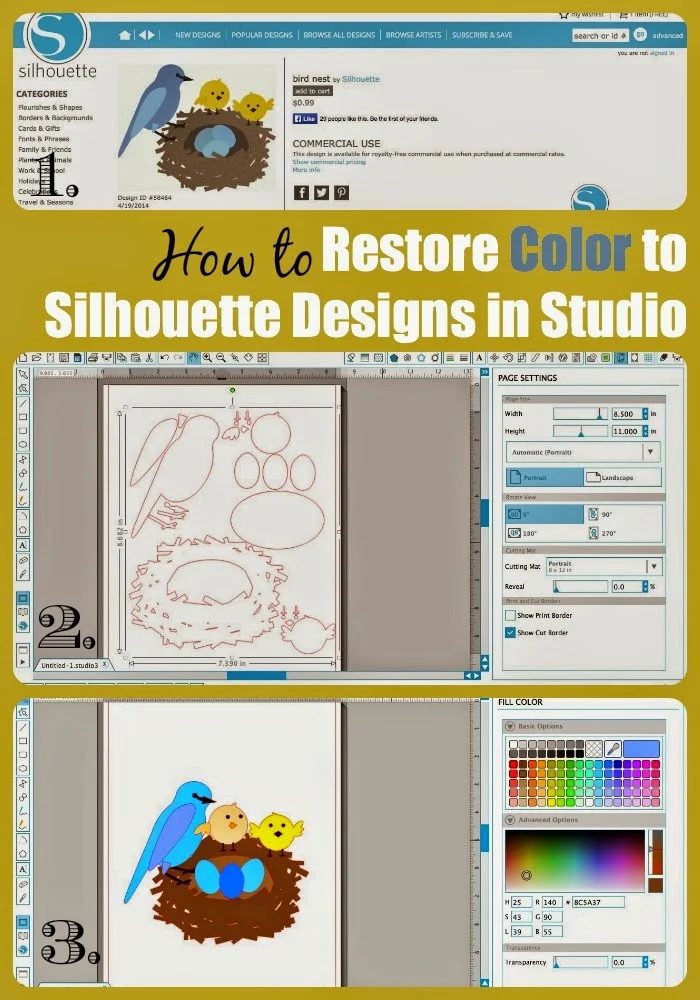
Recently I've had a lot of questions about how to get designs downloaded from the Silhouette Online Store to open in the original colors shown. Here's the thing...unless you purchase a design that's specifically designated a 'print and cut' design (marked with a tiny P in the store), the shapes you purchase will open in Silhouette Studio with only the red cut lines.
Silhouette Print and Cut Stickers Tutorial (with Remote Printing)
Tuesday, October 7, 2014
Earlier this week I shared the 101 lesson on making DIY stickers with the Silhouette. Today I'm going to show you how take it one step further so you can get a really professional looking sticker or label. For me the key is a good print and while I love my printer for most things, high quality, color printing is not one of them. Perhaps that's because I run burlap through it all the time...I'm pretty sure it hates me. But I digress.
I was recently asked to make some wine bottle labels as a favor for a rehearsal dinner. The groom's mother wanted a photo with the bride and groom's name on them that could be stuck right onto bottles of wine. Immediately I knew the white Silhouette Sticker Paper would be ideal, but I would have to remotely print at a copy center to get a great quality print.
I was recently asked to make some wine bottle labels as a favor for a rehearsal dinner. The groom's mother wanted a photo with the bride and groom's name on them that could be stuck right onto bottles of wine. Immediately I knew the white Silhouette Sticker Paper would be ideal, but I would have to remotely print at a copy center to get a great quality print.
Silhouette Studio: Trace Tool Only Tracing Half the Image (Troubleshooting Tutorial)
Monday, October 6, 2014
Recently I've been getting a lot of questions about why the Silhouette Studio tracing tool is only tracing half the image. I don't know what version of Studio it started in, but this is a glitch...and an annoying one at that.
But there is some good news...I have figured out a way (or two) to fix it quickly and easily so you're left with a full trace and a lot fewer gray hairs.
Curving Text Under a Circle in Silhouette Studio
Friday, October 3, 2014
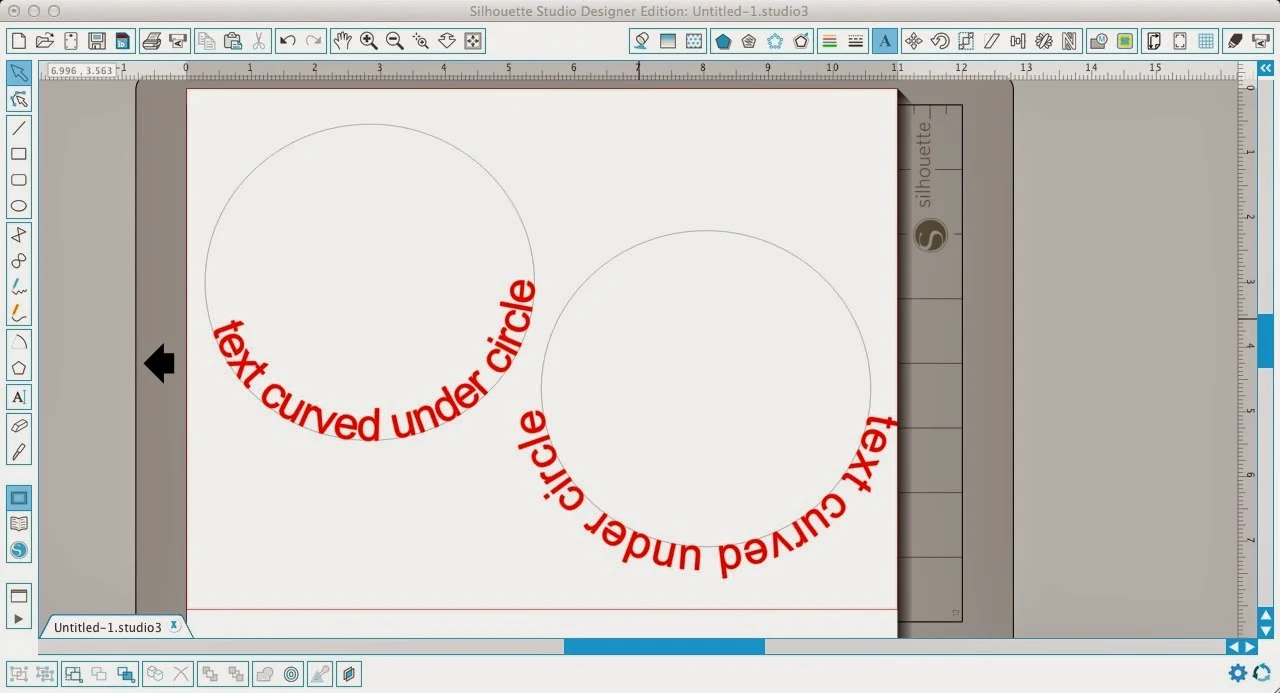
So you've figured out how to put curve around a circle (aka text to path) in Silhouette Studio...but you want it under the circle and, let me guess...this is what you're getting? Or this?
Well, that ain't no good.
Lucky for you, there is a quick and easy fix.
Well, that ain't no good.
Lucky for you, there is a quick and easy fix.
22 Silhouette Tutorials, Tips, and Tricks (September Month in Review)
Thursday, October 2, 2014
And BAM it's October! Yup, fall's in full swing and we've had another great month here at Silhouette School! We've learned the PVPP Method, decided if we really 'need' a heat press, picked up tips on how to cut teeny tiny design, and shared secrets on how to mirror text on a curve without pulling our hair out. Silhouette School Blog got a few tweaks (with more to come) and there's more exciting stuff - including THREE giveaways in October (including the current $100 giveaway to Expressions Vinyl) - on the horizon.
In case you fell asleep in class for a hot minute or maybe played hookey for a day (you wouldn't dare!)...here are 22 awesome Silhouette tutorials, tips, and tricks shared in September. This is definitely one to pin now and read later!
In case you fell asleep in class for a hot minute or maybe played hookey for a day (you wouldn't dare!)...here are 22 awesome Silhouette tutorials, tips, and tricks shared in September. This is definitely one to pin now and read later!
- DIY Team Apparel with HTV (And a Giveaway)
- Silhouette PVPP Method Tutorial {DIY Oversized Chalkboard Sign)
- How to Use a Heat Press with HTV (And Is it Worth the Money?)
- Making Custom Silhouette Stickers 101
- Disassembling Silhouette Shapes to Use Part of a Design
- Silhouette Friendly & (mostly) FREE Fall and Halloween Fonts
- Custom Monogram Pumpkin: How to Design in Silhouette
- Silhouette PixScan Tutorial: Taking It Up a Notch (Part 2/2)
- Print and Cut Tutorial: How to Make a Custom Cut Line
- Tips for Cutting, Weeding, and Placing Tiny Silhouette Designs
- Faux 'Stitching' in Silhouette Studio
- Silhouette School News, Baby!
- Use the Silhouette Studio Nesting Tool Like a Pro
- Mirroring Curved Text for HTV in Silhouette Studio
- Silhouette PixScan Tutorial for Beginners: Part 1/2
- DIY Custom Mailbox Decals (Silhouette Tutorial)
- How to (Perfectly) Trace a Photo in Silhouette Studio
- Making Polka Dot Shapes in Silhouette Studio (3 Ways)
- Trick to Removing Bubbles in Vinyl (And Preventing Them in the First Place)
- Silhouette Stamp Material Tutorial: 10 Things Beginners Should Know)
- DIY Chore Chart Using Chalkboard Vinyl (Free Studio File)
- How to Hang Large Vinyl Wall Decals
Oh baby...Custom Wipe Cases (And a 13 FREE Silhouette Studio Cut Files)
Wednesday, October 1, 2014
Oh baby, your diaper bag isn't fully stocked without a custom vinyl or fabric-covered wipe case. Am I right, here? I mean come on you can't just have a plain old boring white or green cases. No way, man mom!
And if you're not a mom toting around a bunch of baby wipes...don't click outta here yet! I've got some ideas for using these wipe cases even without a baby in tow!
I grabbed these blank wipe cases (6 for $10) from my favorite blank supplier, Punch Place Plus, and in just a few minutes made them all purrrty!
Labels:
Blanks,
Customizing Designs,
Fabric,
Free Studio Files,
Gift,
Gift Ideas,
How to,
How to...,
Kids Stuff,
Vinyl
Subscribe to:
Posts (Atom)












.png)


