Making your own team team gear can not only save you a bunch of money, but also allow you to personalize it just how you want it.
DIY Team Apparel Shirts with HTV
Tuesday, September 30, 2014
Making your own team team gear can not only save you a bunch of money, but also allow you to personalize it just how you want it.
Silhouette PVPP Method Tutorial {DIY Oversized Chalkboard Sign}
Monday, September 29, 2014
I mean I might be a little too excited for a Monday...but heck, friends, we have a guest blogger today. And let me tell you, Karley from Craft It Out is about to knock your socks off. Not only is her PVPP tutorial totally awesome, but her crafting abilites are stellar. For some reason, she calls herself a 'wannabe' wannabe shwanabee...the girl's genius! See for yourself...
Disassembling Silhouette Shapes to Use Part of a Design
Wednesday, September 24, 2014
Did you ever have a design in your library (or a JPEG that you've traced) that part of it would be perfect for your project, but how to just pull that one section out. I try, at all costs, to avoid the eraser tool because it just freezes up my software and basically drives me to crazytown. So...this is my anti-eraser disassembling method.
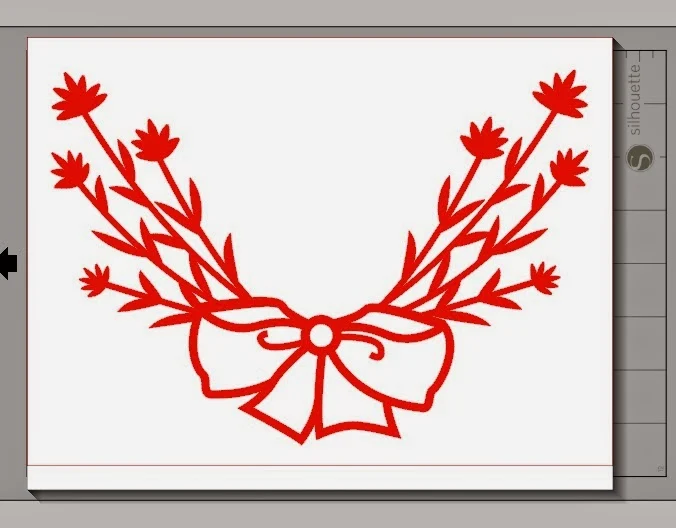
I recently was working on a card and I needed a bow. I searched my library, but the only bow shape that came up was this...
Yeah...the little leafy branches just aren't going to work on my baby onesie card. BUT the bow would definitely work if only I could separate it from the branches.
Oh but I can....
The first thing you want to do is open the shape in Silhouette Studio.
Select the design. Now we want to release the compound path. Do this by right clicking > release compound path. You may have to do this several times to get 'down' far enough if there have been several compound paths created. You may also have to ungroup - again depending on how the shape was designed. You'll know you've disassembled far enough when you can start pulling the design part.
Since I wanted to keep the bow intact, I pulled away the branches and the outline which were all one big piece.
You can see a few stray pieces remained so I just selected them and clicked 'delete'.
I'm left with what resembles a bow, but what is really just a bunch of pieces. To put this thing back together I need to make it a compound path again. So right select the pieces > right click > make compound path.
If I cut like this it will cut in like 8 difference pieces..this girl doesn't have time for that! The easiest way to fix this is to put an offset around the entire design. So select the design > click the offset tool > offset. An now I have this! Wahooo...a bow I can use. Remember, personal use only if you don't have the commercial license.
I filled it in and the image on the left is what I got.....but what if you want the image on the right?
Well, then, you need to click the image and release the compound path...and you'll get this image on the right...kinda, sorta, no.
Now ONLY select the offset and fill it in with white. Can you hear the angels singing?! That's a thing of beauty!
And that's how you go from this to this to this
And here's a look at how I used my bow!
Tomorrow I'm going to show you how I got the faux stitching on there!
Note: This post may contain affiliate links. By clicking on them and purchasing products through my links, I received a small commission. That's what helps fund Silhouette School so I can keep buying new Silhouette-related products to show you how to get the most out of your machine!
Thanks for coming to class today at Silhouette School. If you like what you see, I'd love for you to pin it!
Silhouette Friendly & (mostly) FREE Fall Fonts and Halloween Designs
Tuesday, September 23, 2014
It's the first day of fall and we're celebrating here on Silhouette School by sharing a bunch of FREE fall and Halloween-inspired designs, fonts, and dingbats. You know my favorite source of free designs is PicMonkey and when it comes to holidays the monk' does not disappoint!
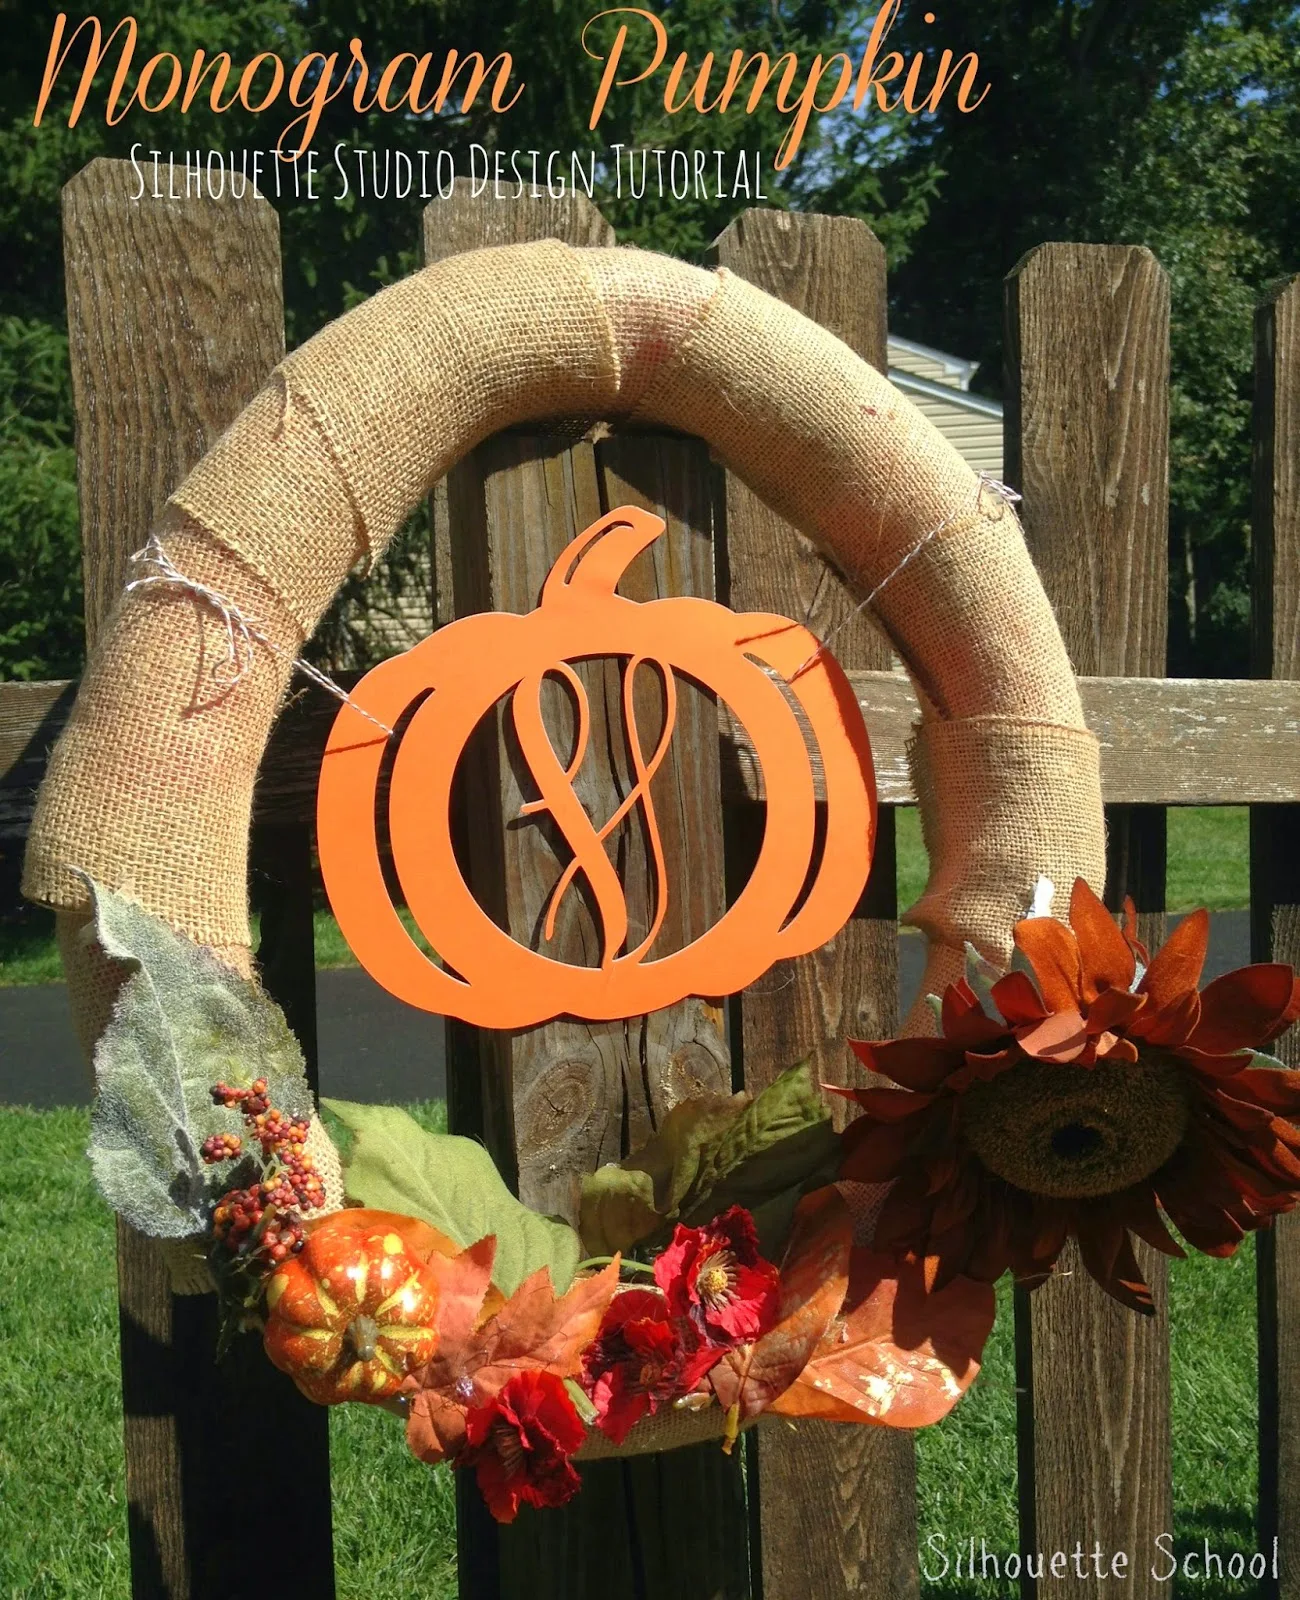
Custom Monogram Pumpkin: How to Design in Silhouette Studio (Using Everything You Already Know!)
Monday, September 22, 2014
 A few weeks ago a Silhouette School reader posted on our Facebook page asking where to start in making a pumpkin monogram like this one. She had found a door hanger she was going after and it certainly was ADORABLE! I mean, you can't go wrong with a monogram, right?
Designing something like this takes a few steps, but nothing you can't handle...promise!
Of course, I could just give you the design, but honestly what fun is that? I'm trying to help teach you how to use the Silhouette Studio software and your machine and this tutorial is a great example of how learning the basics can really help you. As you'll see this tutorial builds off soooo many previous lessons covered on Silhouette School: tracing, replicating, aligning, edit points, offset, welding, compound paths, PicMonkey designs, thickening fonts, modifying and subtracting...all to achieve the final design! Sound intimidating? It's not...promise!
So here goes!
Silhouette PixScan Tutorial: Taking It Up a Notch (Part 2)
Friday, September 19, 2014
Last week I shared a beginner-level tutorial on how to use the newly released Silhouette PixScan Mat. If you didn't catch it, read through it here before you go any further as this tutorial will build off the basics.
Now that you understand the basics about using the PixScan technology let's about customizing your designs. In this example, I'm going to upcycle Christmas cards we received last year into gift tags for this year. Don't add the ribbon hole and you can have beautiful new sentiments for paper crafts like scrapbooking or cards!
Print and Cut Tutorial: How to Make a Custom Cut Line
Thursday, September 18, 2014
Today I'm answering a reader question about how to create what essentially are custom cut lines for a print and cut. Normally, print and cut lines would be right around the outside of the design after you either purchase through the online store or trace it from another image. But what if you want to force a cut line so it's not around the edge of the design? Today I'm going to show you an easy way to do that.
Faux 'Stitching' in Silhouette Studio
Tuesday, September 16, 2014
I'm always amazed at just how many design elements there are in Silhouette Studio and how you can use them in so many different ways! The rhinestone took to make polka dots shapes and now score lines as faux stitching. Yup..today I'm going to show you how to make faux stitching in your designs. This is great for paper layouts and print and cut..you could even make the stitching as a layer of vinyl!
I made this card for a cousin's baby shower recently and I thought it came out really cute with the stitching. I admit, I took the easy way out doing a print and cut (and not paper piecing)...mostly because I basically made it as I was walking out the door.
I made this card for a cousin's baby shower recently and I thought it came out really cute with the stitching. I admit, I took the easy way out doing a print and cut (and not paper piecing)...mostly because I basically made it as I was walking out the door.
Silhouette School News, Baby!
Monday, September 15, 2014
We've had some big things happening behind the scenes here at Silhouette School..and until now I've had to keep them on the DL. I am the worst secret keeper so I word vomitted all over my husband about all this...but now I'm sooooooo excited to finally tell all of you!!
A few things I wanted to point out to you and a few more things I've got to keep close to the chest for a little bit longer, but don't you worry - I'm bursting at the seams to share and I will just as soon as I can.
Tweaks to the Blog:
You'll notice Silhouette School has a new website address...we put on our big girl pants and moved over to www.SilhouetteSchoolBlog.com. You have no idea how happy this makes me :) I mean like really, really happy. The old URL - if you've bookmarked or pinned - will redirect you to the new site and all the tutorials are still there and everything is honky dory! You'll notice more changes to the website over the next few weeks, too, all in an effort to make it easier for you to navigate and find lessons!
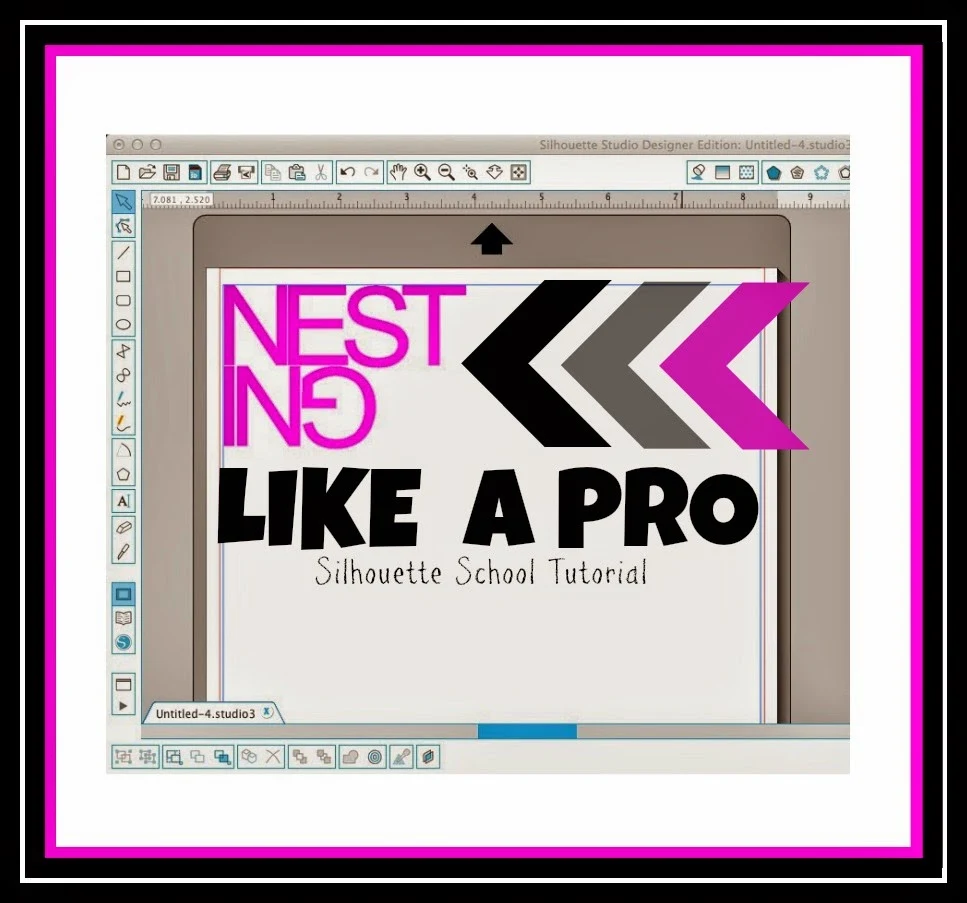
Use the Silhouette Studio Nesting Tool Like a Pro
One of the added features you get when you get the free V3 upgrade of Silhouette Studio, if you also have Designer Edition, is the nesting tool.
The nesting tool is one of the coolest features and one that will actually save you money in the way of supplies and materials. The tool takes all of your designs and 'nests' them in the smallest surface area possible without any overlapping - minimizing waste.
It's really easy to use, too! I used the nesting feature recently while cutting out the numbers for a ruler growth chart. I only had a scrap piece of white vinyl but by nesting, I was easily able to fit everything on the scrap piece.
All you have to do is create your design or type out your font like you normally would in Studio.
Mirroring Curved Text for HTV in Silhouette Studio (The EASY 3 Step Way)
Friday, September 12, 2014
A few months ago I did a post on how to mirror curved text for HTV (this is most commonly needed for logos). My tutorial included at least half a dozen steps. Since then I've been asked the question repeatedly and each time instead of sending folks to the Silhouette School tutorial I explain in a matter of a sentence. You see, I am always learning, too, and honestly the tutorial was NOT the easiest way to mirror curved text in Silhouette Studio. But I assure you I have since learned THE easiest way and now I'm going to share it with you!
Silhouette PixScan Tutorial for Beginners: Part 1 of 2
Thursday, September 11, 2014
In August, Silhouette announced the release of the new Silhouette PixScan Technoloy. The concept is cool, but to be honest I found the written directions and the video tutorial rather vague. Here at Silhouette School we like to spell.it.all.out. so it's baby steps the whole way.
First let's talk about what Pixscan is. Pixscan Technology utilizes a cutting mat that has pre-printed registration marks on it which allows you to cut out pre-printed patterns or images. Think of it like you're doing a print and cut, but someone else did the printing.
DIY Custom Mailbox Decals (Silhouette Tutorial)
Wednesday, September 10, 2014
Vinyl makes it super easy to add curb appeal to your home. I've done many vinyl projects outside - remember my front door welcome wreath and my faux carriage garage doors? My latest exterior project - making a custom mailbox decal - took me 15 minutes start to finish and that included creating the design from scratch. Today I'm going to share with you some tips so you, too, can make easily design a custom mailbox decal.
Making Polka Dot Shapes in Silhouette Studio (3 Ways)
Monday, September 8, 2014
In my recent tutorial on how to make chalkboard style subway art I kind of glazed over how to make polka dot lines. Since polka dots are one of those things that NEVER got out of style and I know lots of you like them for vinyl designs, paper crafts, and stencils I thought I'd expand on how to create polka dot shapes in Silhouette Studio.
There are actually three different ways to turn shapes into polka dot outlines and I'll explainall three here.
The first method requires Silhouette Studio Designer Edition. The rhinestone feature is honestly the easiest way to change anything into a polka dot pattern. If you can get passed the idea that rhinestone templates are only for rhinestones, you'll open up a whole new designing world for yourself. Check this out...
Start by drawing a shape.
Silhouette Stamp Material Tutorial: 10 Things Beginners Should Know
Thursday, September 4, 2014
If you follow Silhouette School on Instagram, you know I took a stab at Silhouette's Stamp Material recently. Well, lucky for you, I'm here to give you the low down on making your own stamps. And so here are my 10 beginner tips and a Silhouette Stamp Material Tutorial.
The first thing you need to do is make sure you have the two essentials tools: the stamping material and the special stamp mat (which is smaller than both the CAMEO and Portrait mat, but will work in both). Both are relatively inexpensive and can almost always be found on sale on Amazon.
You can also go the way of buying the Silhouette Stamp Starter Kit which comes with a few acrylic blocks to mount your stamps on, ink and a download card for 10 stamp designs. I skipped the starter kit this time and use some pieces of scrap wood I had on hand to put my stamps on.
1. Supplies
You can also go the way of buying the Silhouette Stamp Starter Kit which comes with a few acrylic blocks to mount your stamps on, ink and a download card for 10 stamp designs. I skipped the starter kit this time and use some pieces of scrap wood I had on hand to put my stamps on.
DIY Chore Chart Using Chalkboard Vinyl (Free Studio File)
Wednesday, September 3, 2014
Last week I gave you a sneak peek of this project in the tutorial on applying vinyl straight, but today I'm going to share the full reveal. My daughter has come up with some pretty creative ways to fill up her piggy bank...like selling water with Craisins in it (when life runs out of lemons..make craisin water, I guess). So my husband and I decided to have pity on the poor neighbors and come up with some chores that our 6 year old could do to earn herself some money to fill out her stuffed animal collection (are you picking up on my sarcasm here?) ;)
Anyway, we needed a way to keep track, so I thought I'd make a chore chart that she could check off the chores she's done throughout the week allowing us to add up her chores at the end of the week. The easiest way I thought we could do it is by using something like a chalkboard that could be erased and re-used. Enter Chalkboard Vinyl and Chalkboard Markers!
This project is actually super simple...and I'm making it even easier for you by proving the free cut file at the end of this post. I used a label design from my library and made it really big to get the shape of the chart. I cut out the chalkboard vinyl (you can pick some up at My Vinyl Direct in the specialty vinyl category) out - it's about 8x10.
20 Silhouette Tips, Tricks and Project Ideas (August Wrap Up)
Tuesday, September 2, 2014
Another month in the books here at Silhouette School...we had a big ol' giveaway, some amazing guest bloggers, lots of tutorials and I even took you behind the scenes of what goes into making Silhouette School. In case you missed any because you had your toes in the sand or your head in a book...here are 20 Silhouette Tips, Tricks and Projects Ideas shared on Silhouette School in August.
- HTV Coloring Book Style Designs
- DIY Growth Ruler Tutorial (with free .studio file)
- How to Apply Vinyl Straight...on the first try
- Why Your SVGs Won't Cut (Even with Designer Edition)
- Chalkboard-style Subway Art Tutorial
- Converting Studio Files to PDFs
- Tracing Complex and Multi-Color Designs in Silhouette Studio
- How to Add Custom Material Cut Settings to Silhouette Studio
- Circle Monogram Tip: Getting Two Monograms from One Cut
- How to Create Custom Split Monograms in Silhouette Studio
- Custom Laptop Vinyl Decal Tutorial
- DIY Silhouette Charm Necklace Tutorial
- DIY Fabric Wall Art with Silhouette
- Faux Etched Glass Door with Silhouette
- 9 Non-Apparel Things to Put Silhouette Rhinestones...
- Silhouette School Blog: Behind the Scenes
- How to Faux Etch Glass, Mirrors and More with Viny...
- Custom Cuffs with Vinyl (PLUS a GIVEAWAY)
- Turning Patterns Into Cut Files (or Backgrounds)
- Adding Weeding Lines in Silhouette Studio (Why and...
How to Hang Large Vinyl Wall Decals
Monday, September 1, 2014
I was honored to recently be asked by my daughter's school to create not one, but two very large vinyl decals. The original plan was to put them directly onto the wall of the newly made over teacher's lounge. Long story short - the PTO ultimately decided the smaller of the two should go on a large canvas to be hung. But I still had an 8' x 15" beast on my hands.
Due to the size of the decals and how they had to be cut, I calculated that I needed 10 yards of black Oracal 631 which was provided by Expressions Vinyl...which also threw in a $50 gift card giveaway for one lucky Sil School reader, that you'll find at the bottom of this post! While that sounds like a lot, due to the 9" limitations of my Portrait every line of the three line quote had to be cut separately and then later pieced together on the wall using registration marks.
Subscribe to:
Posts (Atom)


.png)


