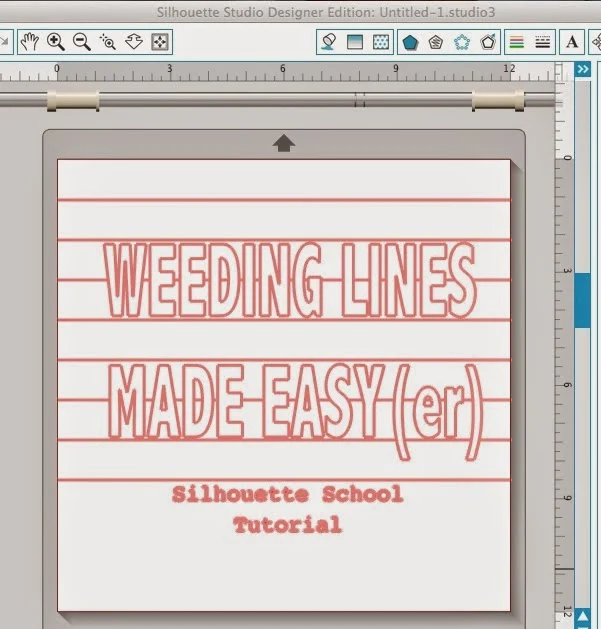
 It has come to my attention that perhaps a simpler version of the weeding lines tutorial is needed....and so today I'm going to give you bare bones weeding lines.
 In just 7 steps you'll be all set to cut and weed easier.
If you're unfamiliar, weeding lines help cut the vinyl in the negative space down into smaller, easier to manage sections so it's easier to weed and you don't risk the excess sticking to the actual design while you're trying to weeding. Alight let's get started..
1. Open up Silhouette Studio.
2. In your work area, using the Draw a Line tool...draw a line.
3. Select the line > copy and paste it.
Repeat until you have about 10 or 12 lines (the number of lines you need depends on how large your design is...but for this example we're going to use large design that takes up the entire work area.)
4. Move the lines so they're about an inch or two apart and all pretty much aligned (they don't have to be exact).
5. Select all of the lines > right click > make a compound path.
6. NOW open up the design you want to cut. You do this second so the design is "in front" of the lines. As you can see it appears the lines are cutting straight through the design.
7. To fix that, select the lines AND the design at the same time and from the modify window click "Subtract all."
And now you can see you have added weeding lines in the excess space of the vinyl, but they do not cut through the design. This makes weeding a breeze!
Note: This post may contain affiliate links. By clicking on them and purchasing products through my links, I receive a small commission. That's what helps fund Silhouette School so I can keep buying new Silhouette-related products to show you how to get the most out of your machine!
Thanks for coming to class today at Silhouette School. If you like what you see, I'd love for you to pin it!


.jpg)


.png)


THANK YOU!!! Been weeding for YEARS but never had the ability to do this (just got a cricut and silhouette... was using a professional cutter but the software wouldn't allow this) THANK YOU!!!
ReplyDeleteThank you! This was a fabulous tutorial!!
ReplyDeleteThis is some of the best advice ever. I wish I always remembered to DO it when I am cutting vinyl. Still learning!
ReplyDeletethank you, thank you
ReplyDeleteThank you!! This is a life (and work) saver!
ReplyDeletePerfect! Thank you !!
ReplyDeleteAwesome! Thank you!
ReplyDeleteI'm following step by step but it isn't working. :-(
ReplyDeleteme neither. When I click subtract all it's still showing the lines going thru the image
DeleteWhat worked for me. After selecting the lines and making a Compound Path; send the lines to the back; next copy and paste the image on top of the lines (making sure the pasted image is also a compound path). Next "Select All" (lines and image), select the Modify Tool then "Subtract All".
DeleteThank you....thank you.....thank you
ReplyDeleteThis rarely works for me. It doesn't subtract anything and Sil Studio just locks up. Has anyone else had this issue?
ReplyDeleteI tried to make the images into a compound path and it still happened. My machine just hates those lines being subtracted. ;-(
DeleteAnn Carlson
Ok, I have done this about six times now . All six times program freezes and locks up?!? What am I doing wrong. I did the tutorial to a t , using exact image and came out fine. When I do another image I purchased from store....no go. Complete freeze up.
ReplyDeleteMy Silhouette locks up (after I click subtract all) right when I click send to Silhouette. I didn't make the project a compound path, only the lines. Could that be the issue?
ReplyDeleteAnn Carlson