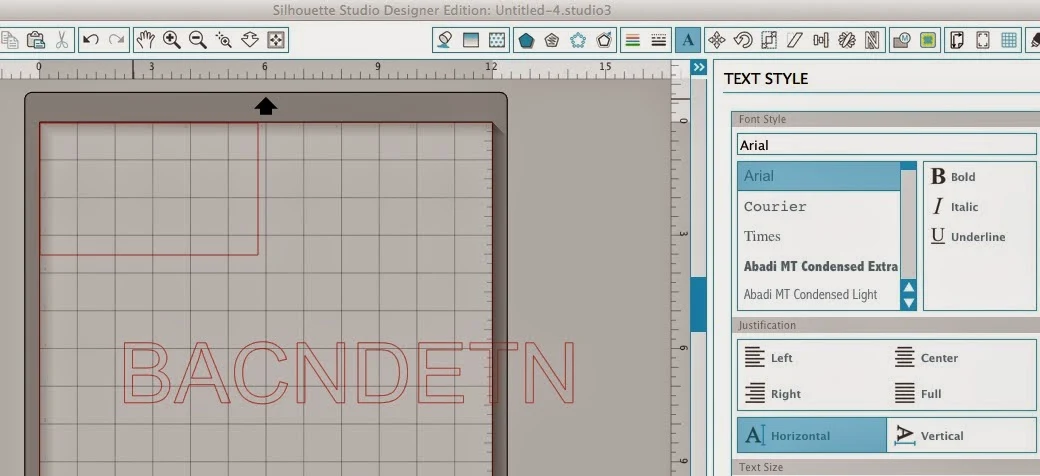
One of my favorite tools in Silhouette Studio Designer Edition (you must be upgraded to V3) is the nesting tool since it really helps to avoid wasting precious materials. The nesting tool nests designs to be cut into the smallest possible area. (Check out the 101 lesson here.) But...unless you know how to use the tool to its fullest potential you might notice that it tends to nest everything along the top of the mat. This works great if you have piece of vinyl or paper that stretches the entire width of the mat.
I don't know about you, but I have approximately 12056 scrap pieces in about that many different sizes. I like to use scraps when I can so I'm not wasting even more vinyl or paper.
Finally I have figured out how to get the nesting tool to cooperate when it comes to scraps. (Perhaps I'm late to the party here, but I thought it was worth a mention on the ol' blog.)
So let's say you have to cut a few different letters for monograms. Hypothetically, of course. FYI: This also works for shapes, and not just text.
What I do is first find my scrap piece of vinyl (this works for any medium though...). Put the piece of scrap on your mat and notice where the edges hit (you can measure it with a ruler if you really want to get fancy.)
Then in Silhouette Studio, using the draw a rectangle tool, draw out a box the same shape and dimension as the scrap piece.
Reveal the cutting mat in Silhouette Studio so you can see the grid. Make sure you place the box on the virtual mat in Silhouette Studio in the EXACT same position as the actual scrap is on your cutting mat.
Now go to the text tool and type out your letters. Ungroup the letters and resize if you need to. If they are grouped together, they will not be able to be nested since they act as one design and not several different pieces of the design.
You can see that the default is to pick the entire mat as the nesting area - as indicated by the thin blue line around the perimeter of the mat.
If we nested now, this is how the letters would be nested.

BUT if you want your little scrap piece to be the nesting area click on the virtual scrap piece and click "Set Selected Shape as Boundary". Now you can see, because it's blue, the scrap piece will be the area in which your letters are nested.
(The box itself won't cut since Silhouette Studio recognizes you are using it as a boundary area rather than a shape to cut.)
TIP: If you have an odd shape scrap (as is almost always the case) you can draw out a few different shapes with the draw a square and draw a circle tool and weld them together to get close to the shape of your scrap. Then set that shape as the nesting boundary.
Note: This post may contain affiliate links. By clicking on them and purchasing products through my links, I receive a small commission.
That's what helps fund Silhouette School so I can keep buying new Silhouette-related products to show you how to get the most out of your machine! Thanks for coming to class today at Silhouette School. If you like what you see, I'd love for you to pin it!


.png)


OMG! I love this nesting feature. No more making sure I cross the red cut line and worrying if something is too close! Can't wait to try this! Thanks for the tutorial. 💚
ReplyDeleteThis is FANTASTIC. THANK YOU!
ReplyDeleteTerrific! What a handy thing to know. Thanks!
ReplyDeleteHi Melissa. I feel like the only thing i need to upgrade to the designer version is for nesting. Is it really worth it? What else would benefit me by upgrading? Thanks from another Melissa.
ReplyDeleteLately when I try to use the nesting capability it is putting shapes on top of one another. How do I get it to stop that?
ReplyDeleteSame thing has been happening to me...
Delete