The two tone layered offset makes a big impact and it's actually not too hard to do...especially with a few of my favorite tricks. I used this very technique a while back when I created my original Fight Like a Girl mug as a donation for a breast cancer benefit.
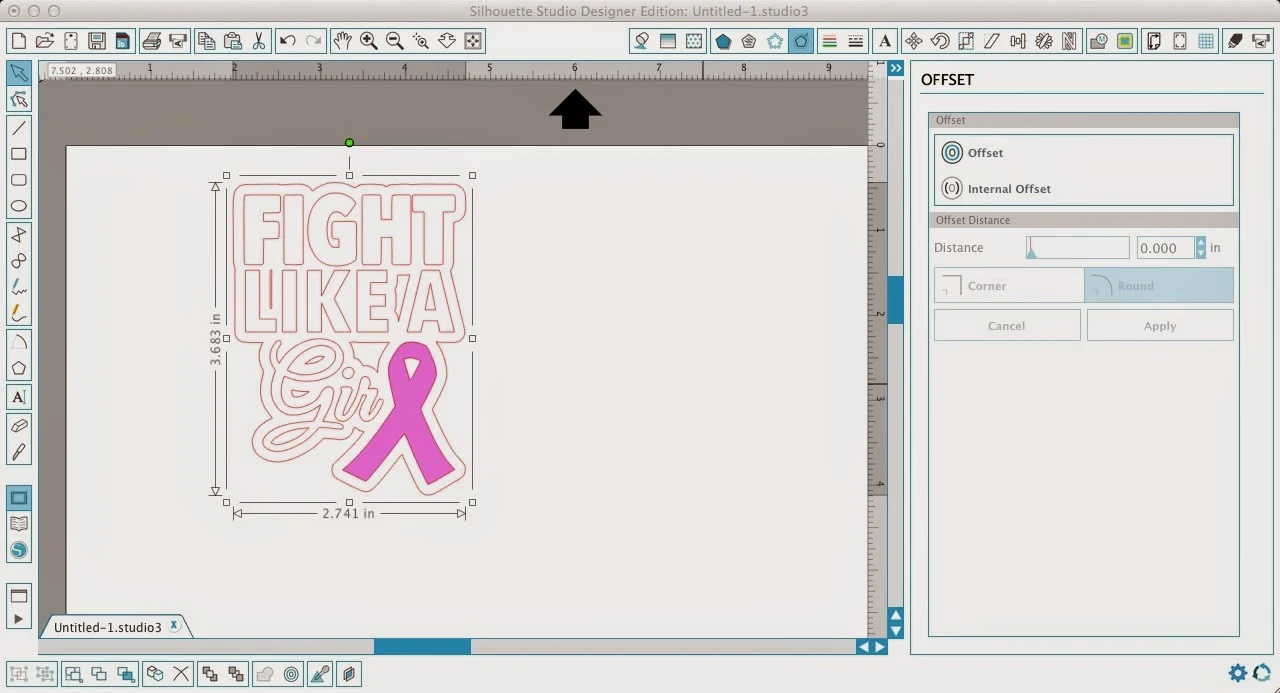
Start by creating your design...whatever it may be: text, shapes, or a combination of both. (You can make the design from scratch or use a studio file that you have purchased.) Obviously my design is both as you can see by the text and then the ribbon.
I find it easiest to fill in the design with color so I'm working with what appears to be solid designs instead of just outlines.
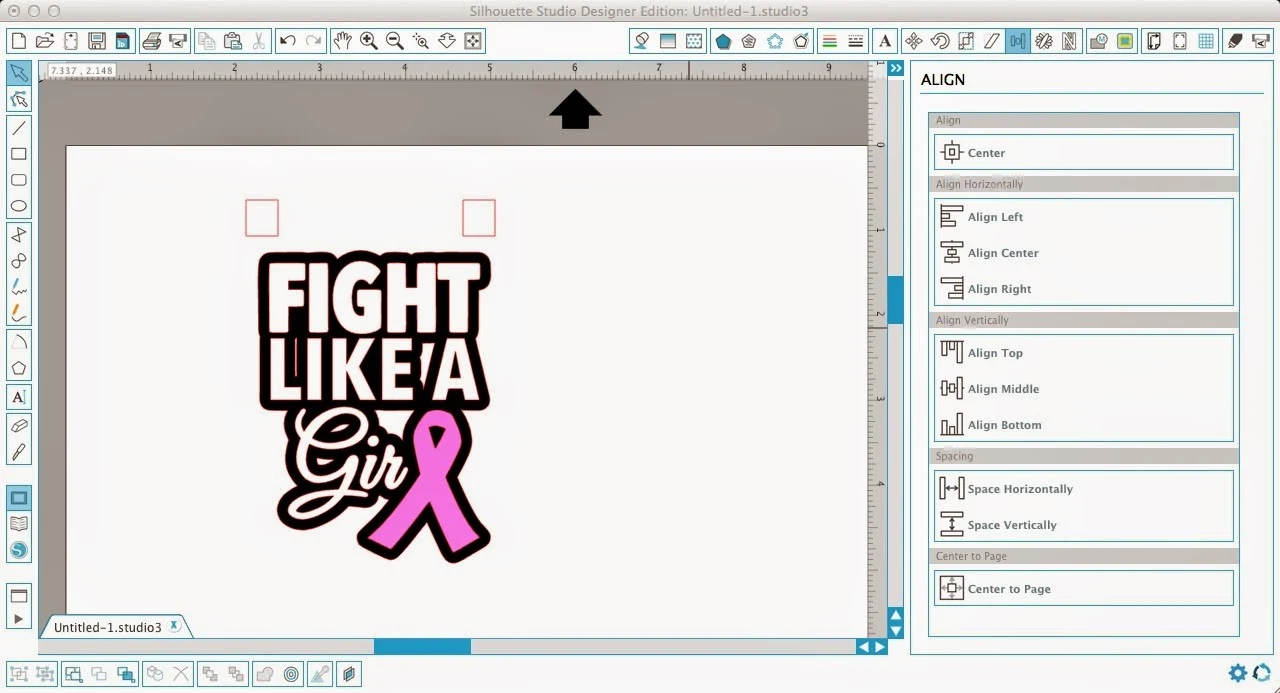
When you click 'Apply' the offset will automatically weld together to look like this...see how all the overlaps from the above image weld together below?
And now you're wondering about those boxes....those are my layering registration marks. If you've followed my basic layering tutorial you've seen them before.
Now these boxes (created by using the 'draw a square tool') are really important because they will ensure that everything is lined up exactly when we go to put this decal/design together after it's all cut and weeded. But this only works if you make sure the boxes stay in the same relative place and are not moved even a smidge.
So....select both boxes and one of the layers...say the pink ribbon. Copy and paste the boxes + ribbon elsewhere in the work area. GROUP them immediately. Repeat by copying the same boxes (DO NOT MAKE NEW BOXES) and the black background layer and pasting them in the work area. Group. And do the same process one more time with the boxes and the white layer. Now you should have something that looks like this.
Go ahead and cut each layer of your design separately. Be sure you include the boxes when you cut.
Weed all three layers.
Grab your transfer tape. Cut off a piece that's bigger than your biggest layer (including the boxes). You're going to start putting the top two layers together first...so pink and white. We're going to use the registration marks technique described in details here in my most popular tutorial ever on how to layer vinyl on the first try.
Put the transfer paper over the pink ribbon and the boxes. Peel the vinyl aways from the backing, but save the backing piece.
Now grab your next layer..the white layer. You're going to put the pink layer on the white layer.
I find the easiest way to line up the boxes, is to have the design that's NOT on the transfer paper stuck to my mat so it stays in place. I also find it easier to have the boxes closest to me (so the design is upside down). Cover the bottom design (white) with that vinyl backing piece you saved so you can line up the boxes without the rest of the vinyl design accidentally sticking together.
Burnish with the scraper.
Peel the pink and white layers off the backing using the transfer tape. Now they're a single layer and can be lined up with the black offset layer. Line up the boxes with the same boxes on the black layer using the same upside down - on the mat technique.
Lining up the boxes, so long as they weren't moved at all, ensures that the layers are perfectly align perfectly!
Use your scraper to burnish all three layers together before picking up the entire design (minus the boxes) with the transfer paper to move it into place.
Place the design onto the surface - in my case a mason jar mug - burnish again and then finally, remove the transfer tape leaving the vinyl on the surface.
Note: This post may contain affiliate links. By clicking on them and purchasing products through my links, I receive a small commission. That's what helps fund Silhouette School so I can keep buying new Silhouette-related products to show you how to get the most out of your machine!
Thanks for coming to class today at Silhouette School. If you like what you see, I'd love for you to pin it!


.jpg)


.png)


I no Longer see the pinterest button at the bottom of your page since you updated your site. I'm sure it's a silly question, but how can I pin this post? Thanks!
ReplyDeleteI love it, but this design is not in the Silhouette Store.
ReplyDeleteOops, I see in my email it says you created this design Melissa. I would love to try this design, but I don't see a link to download it.
ReplyDelete
ReplyDeleteHi, I have read your blog and I got a useful information from this blog. Thanks for sharing, keep posting.
Online Web Development Courses
Thank you for this informative post! We all do this, and I agree with you. In case you need bulk sticker printing do hesitate to visit us - allstickerprinting.com
ReplyDeleteOffset printing is a more efficient and refined operation in generating prints. It is also the most common and practical printing process used by commercial printers for it adequately meets the standards of a desirable print.
ReplyDelete