For this example I'm going to use the Flowers in a Bell Jar design which, in my opinion, is one of the best free designs of the week that the Sil Store has ever had. Just saying.
The preview picture in the store shows this adorable little design....
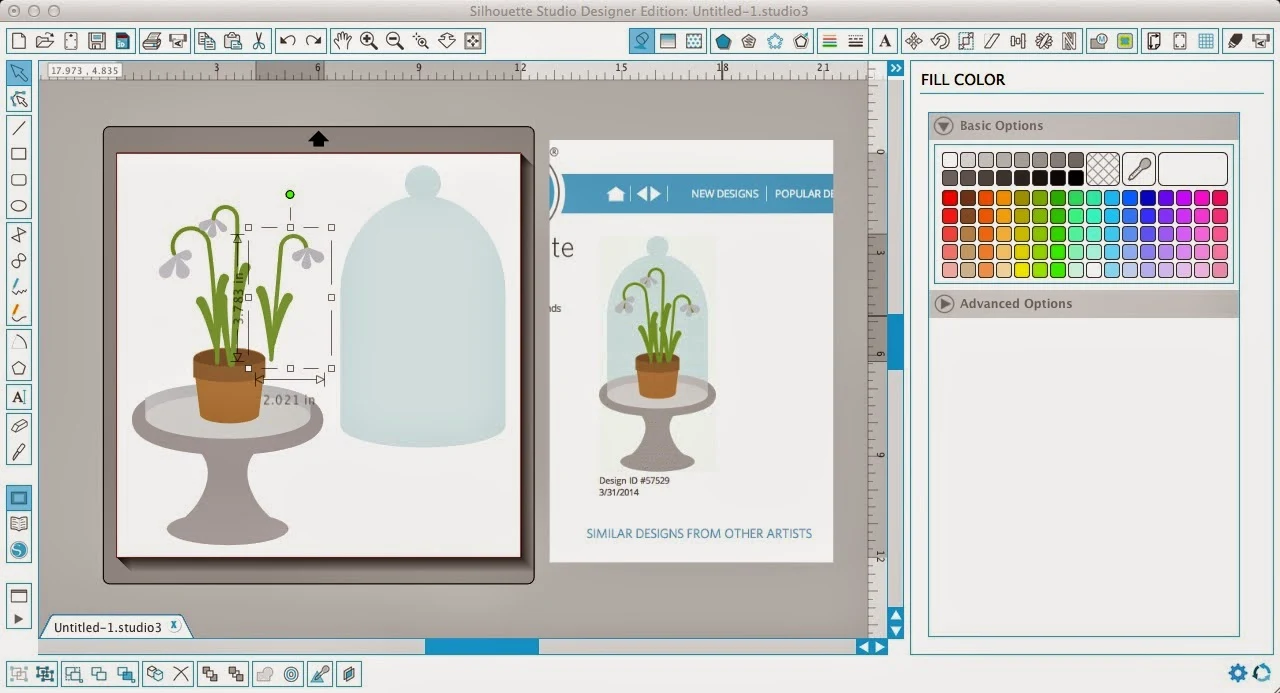
...but when you open it in Silhouette Studio this is what you get....
That's because it's a cut file and not specifically marked as print and cut. But that doesn't mean you can't use it as a print and cut. You totally can..with a little bit of work.
What you want to do is first ungroup all of the pieces so you can fill them in with color. To ungroup Select design > Right Click > Ungroup. You may need to ungroup more than once depending on how your design was originally grouped by the designer.
For example you can see that the flowers and the stem are ungrouped from the rest of the design, but not from each other. I need them each to stand alone so I need to ungroup again. You'll know when everything is ungrouped when each piece has its own box around it.
Now you are going to start filling in each piece of the design with a color by using the fill color tool. If you want it to exactly match the example in the preview you can actually do a screen grab of the preview and then do a color match using the color dropper. To be able to pick the color from the preview screen, you have to save the screen grab as a jpeg and then open the jpeg file in Silhouette Studio. (Am I making any sense here?)
If you haven't already, open up your fill tool and click on the eye dropper. Select the design piece you want to fill and then use the eye dropper to match the color or just pick whatever color you want from the color swatches shown.
Repeat for all of the pieces.
Once all of the pieces are filled in, you can start arranging them by simply selecting each piece and dragging it into position. If something is 'behind' and you need it in front: select it > right click > bring to front.
Now after you have everything in the correct spot select it all and GROUP!! (Select all pieces > Right Click > Group). Don't skip the grouping.
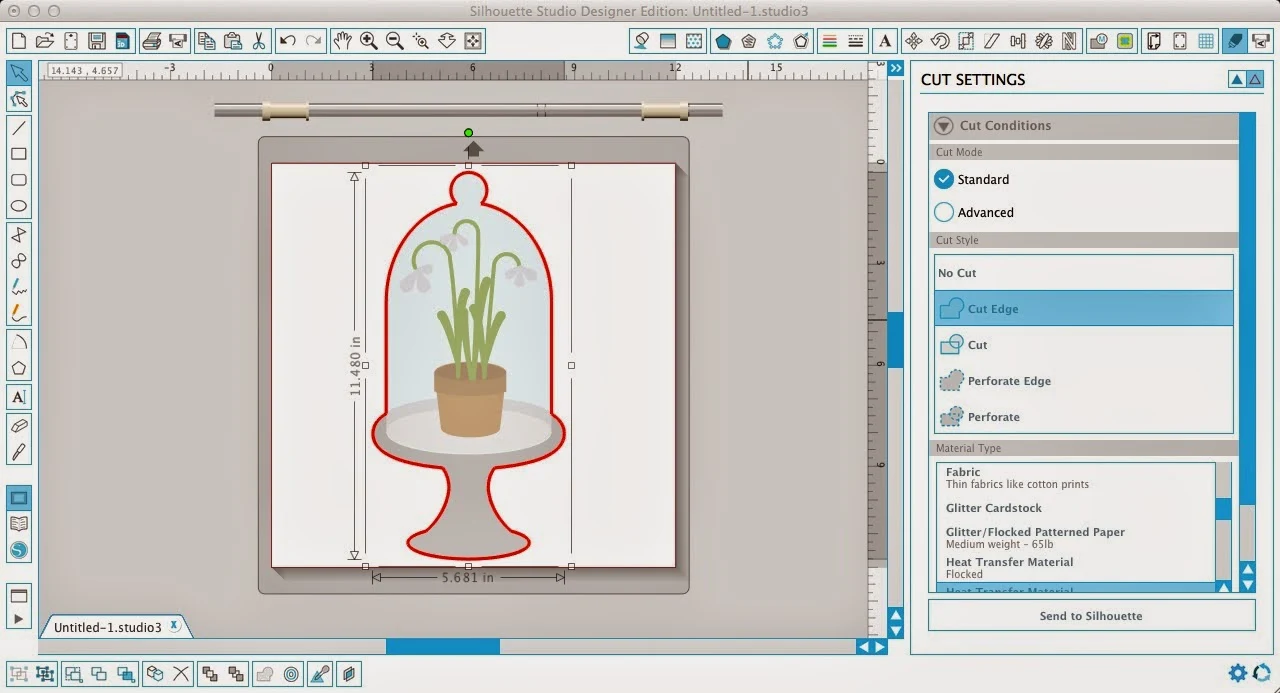
This is NOT what we want for a print and cut.
We only want a cut line around the very outside of the design. So instead of clicking 'Cut' you want to pick 'Cut Edge' (highlighted in blue). And now you'll have something like this...
Yay!
We're almost ready to print and cut just like we normally would! From here you know the drill...add your registration marks, resize your design if you need to and you're ready for printing! If you're like "WHAT????? is she talking about...I'm a print and cut newbie?!" click here for my Print and Cut 101 tutorial to finish up.
And that's all there is to turning a Silhouette Studio cut file into a print and cut design.
NOTE: This post may contain affiliate links. By clicking on them and purchasing products through my links, I receive a small commission. That's what helps fund Silhouette School so I can keep buying new Silhouette-related products to show you how to get the most out of your machine!
Thanks for coming to class today at Silhouette School. If you like what you see, I'd love for you to pin it!


.png)


Such a very useful article. Really interesting to read this article.I would like to thank you for the efforts you had made for writing this awesome article. It is really helpful for me. really interesting. Keep sharing new ideas :)
ReplyDeleteIRCTC Reservation Cancellation Charges
ReplyDeleteIndian Railway PNR Status Enquiry
GNWL Full Form
I love it. Thanks for sharing.
ReplyDeleteirctc reservation form
This is my first time here. Literally spent almost 2 hours just reading through. Love love love it! Just about to get my cameo 3, Would jpeg files require any conversion or can they just go into print and cut?
ReplyDeleteMelissa, it is amazing how quickly one forgets things if not done for a while. I had totally forgotten how to convert a cut file to a print and cut, and even how to get the print and cut done, so THANK YOU for having this information out there! I had also upgraded to Version 4 since I had last done one, so I would have been really lost. It was a piece of cake following your instructions.
ReplyDelete