That's not going to work for a print and cut. In fact, I don't even even want the text to cut. So the first thing I do after I trace is to release the compound path so I can select the text and delete it. You can also use the eraser tool to do this, but I find the eraser sometimes freezes up the software.

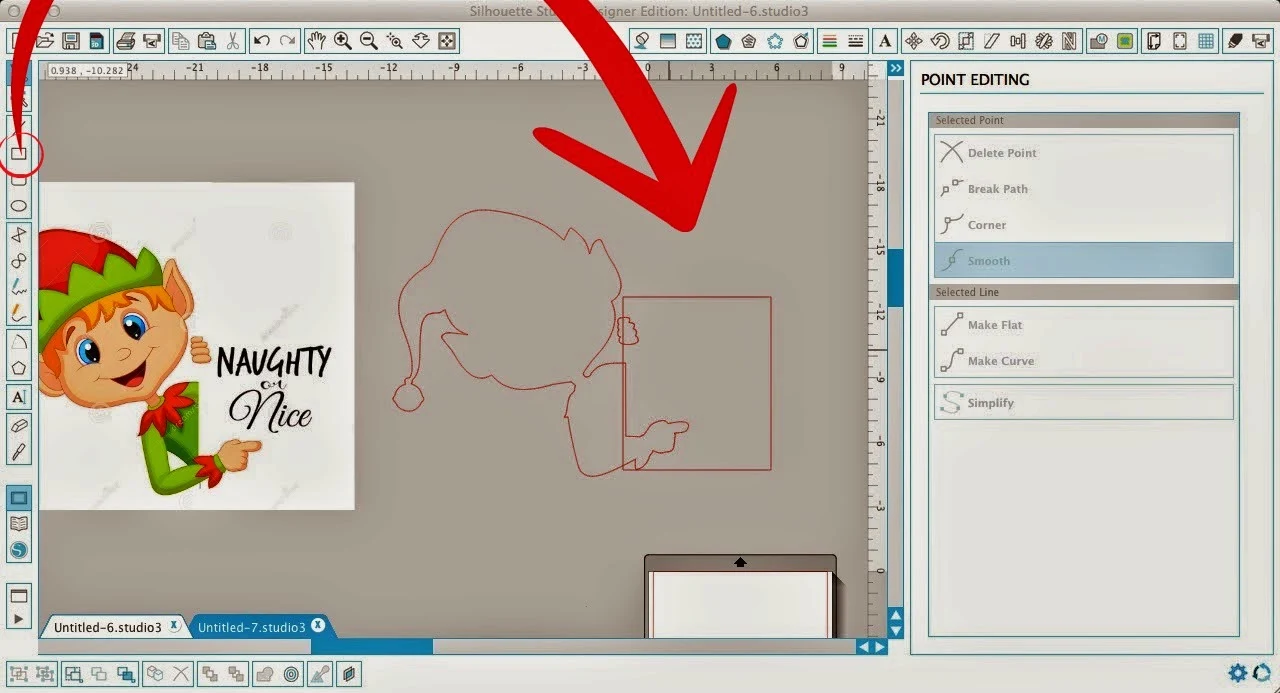
Since I do want the text to print in the print and cut I need to force a custom a border around it. To do this, I used the draw a square tool and drew out a square. Move it into place.

You can move your JPEG back over into the area to make sure everything lines up correctly.
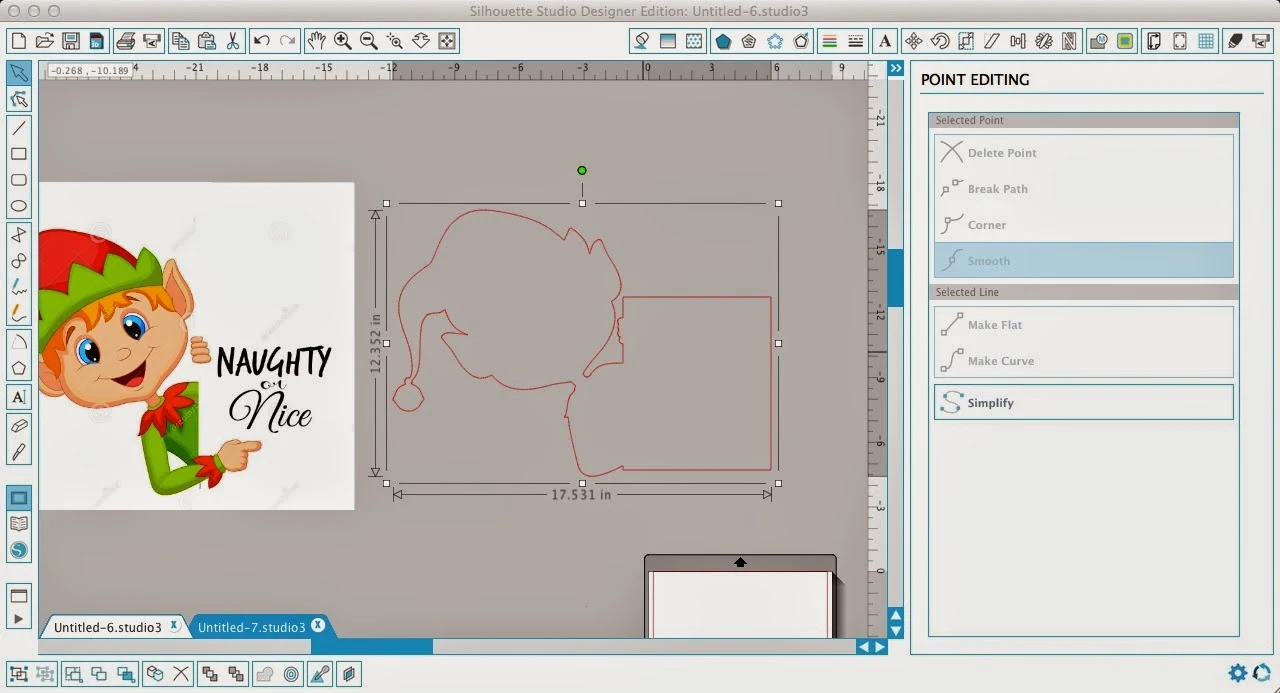
When you're sure it does, you want to select the original traced design (elf outline) and the additional design (rectangle) and WELD them together. Right click > weld
Now you can move your image back into place and add the registration marks and proceed with your print and cut like normal. That thick red line indicates where your print and cut will cut.

Here are a few more ways to customize Print and Cuts...
 |
| Customize Print & Cut 101 |
 |
| Change Colors of Print & Cut |
Note: This post may contain affiliate links. By clicking on them and purchasing products through my links, I received a small commission. That's what helps fund Silhouette School so I can keep buying new Silhouette-related products to show you how to get the most out of your machine!
Thanks for coming to class today at Silhouette School. If you like what you see, I'd love for you to pin it!


.png)


No comments
Thanks for leaving a comment! We get several hundred comments a day. While we appreciate every single one of them it's nearly impossible to respond back to all of them, all the time. So... if you could help me by treating these comments like a forum where readers help readers.
In addition, don't forget to look for specific answers by using the Search Box on the blog. If you're still not having any luck, feel free to email me with your question.