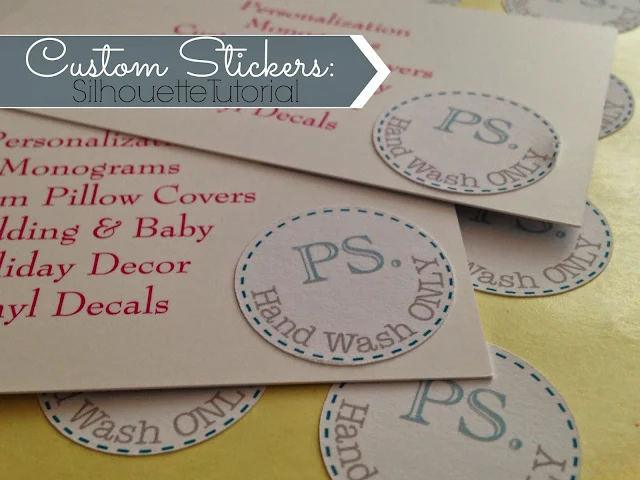
Making stickers with Silhouette is really no different than Silhouette print and cut...instead of printing and cutting on paper, you're printing and cutting on sticker sheets!
And just like print and cut, once you make your first set of stickers, you'll be hooked!!!
And just like print and cut, once you make your first set of stickers, you'll be hooked!!!
Design a Silhouette Print and Cut Design
To start making stickers with Silhouette, you want to first create your sticker design in Silhouette Studio.I wanted something pretty simple since my stickers are each less than 1". I'm going to fly through this part since I have free Silhouette tutorials on every step along the way...click on any of the links if you get stuck (and of course these steps may or may not apply to your sticker design):
- Draw a circle
- Make an internal offset
- Change the internal offset line so it's a dashed/colored line. (Be sure to give it a weight so it prints)
- Type out the text, position, and make a text to path to get the curve
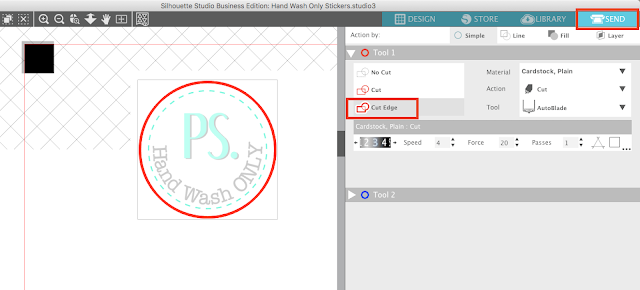
- In the Send panel, turn on Cut Edge ONLY on the outer circle so it cuts, but nothing else does.
How to Set Up Sticker Sheets in Silhouette Studio
With your sticker design created in Silhouette Studio, now you can set up the page.Open the Page Setup tool from the right sidebar. Change the Media Size to Letter and check the box to show the Print Border.
Click "M" on your keyboard to turn on the registration marks.
Now select your single design and open the Replicate tool from the right sidebar. Click "Fill Page."
The software will fill the printable page area with as many repeating designs as possible.
Click the Printer icon along the top toolbar of Silhouette Studio or go to the File menu and click Print.
How to Print and Cut Sticker for Beginners with Silhouette CAMEO
I have a lot of different printers, for various uses, but the one I use for all of my stickers is a simple, basic and old, HP OfficeJet 8610. It's expensive now because it's basically an antique.
It prints great, but really the way to get the best stickers is to make sure you have the right printer settings and the best paper - that's why I always use Online Labels sheets.
After printing, it's time to cut.
Return to Silhouette Studio and from the Send panel select Sticker Material, White. I find for the Online Labels white sticker paper the default cut settings for "Sticker Paper, White" work best.
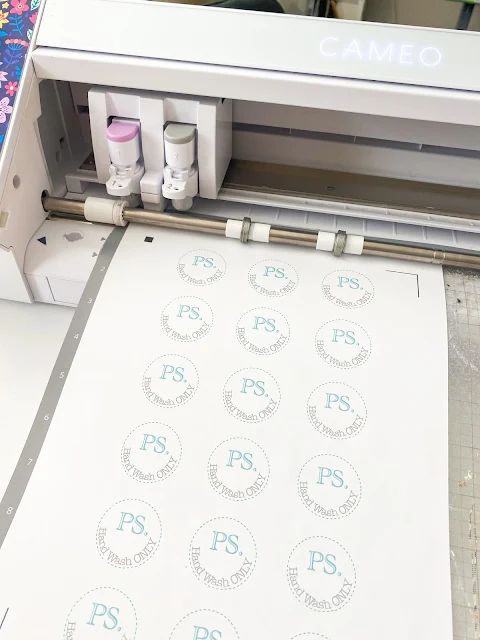
Place your printed sticker sheet on your Silhouette cutting mat and load it into the cutting machine. The process is the same whether you're making stickers with Silhouette CAMEO 4, CAMEO 3 or even a Portrait.
When you click "Send" in Silhouette Studio from the Send panel, the Silhouette machine will first search for the registration marks. That's how it knows exactly where to cut.
Once the registration marks are successfully found the cutting will begin.
Once the registration marks are successfully found the cutting will begin.
These stickers cut beautifully and only through the top sticker sheet - not the liner which is what we want. That's called a 'kiss cut' when the blade cuts through the top sheet, but not the bottom.

Note: This post may contain affiliate links. By clicking on them and purchasing products through my links, I received a small commission. That's what helps fund Silhouette School so I can keep buying new Silhouette-related products to show you how to get the most out of your machine!
Thanks for coming to class today at Silhouette School. If you like what you see, I'd love for you to pin it!
Get Silhouette School lessons delivered to your email inbox! Select Once Daily or Weekly.


.png)


how did you get your stickers printed on the sticker paper before you cut with cameo? sketch pins? Or did you design else where and print using your printer or what? Anything to help me figure this out Thanks in advance.
ReplyDeleteIt's essentially a print and cut...so I designed in Silhouette Studio, printed on the sticker paper and then cut on the machine.
DeleteI have the cameo 3.. like Vicki, how can you print? From an external printer? Or is there a way to print on the cameo 3? I was assuming the sketch pens, but that probably won't work on the glossy paper.. Please help thanks!!!
DeletePlease Help! This was so easy to do only thing is that when I print everything prints except the PS. I can't figure that out. If anyone can help please do and thank you kindly.
ReplyDeleteHi Niecy, It's most likely not printing b/c the text is not filled or the line does not have a weight to it. Change one or both of these and it should print.
DeleteThis comment has been removed by the author.
ReplyDeleteI'm wondering, one you design a sticker in the Sil project, is there a way to save the sticker only to your library so it can be used in other projects later? Similar to what you buy in the design store but it's your own design?
ReplyDeleteyou can do a save as to your library......
DeleteI keep cutting all the way through the backing page. Any suggestions? I have the blade at 1 and the thickness at 15. Thanks!!!
ReplyDeleteThank you for your post, Do you have any tutorial video for use Silhouette ?
ReplyDeleteHi Melissa,
ReplyDeleteI am learning how to do this, thank you, but I am having an issue replicating a full page. My circle and dotted lines replicate but not the Hand Wash Only. I cannot for the life of me figure this one out. Suggestions? Thank you
Ensure your entire design is grouped before you replicate.
DeleteMy problem is that I want to be able to remove the whole sticker sheet and not cut all the way through. I want to create a sheet of stickers and peel them off of the sheet as I need them. Everytime I try to peel the sheet off of the mat, it takes a lot of force and ends up curling the sticker sheet no matter who careful I am. Are the mats usually this sticky? Any recommendations?
ReplyDeleteI unstickied my mat by wiping it over with a clean dry t-shirt a few times, the more you use it the less sticky it becomes
DeleteWe are welcome you on eman printing to explore your business with our best quality products.Design your business with flyers, posters, cards, brochure and other many printing services.We are providing you best quality designs which you really need and we surely make best design for your business and other activities in cheap and affordable rates. Order today and book your deal to make your work more professional visit at http://www.emanprinting.com/
ReplyDeleteI want to use the clear sticker paper to make jungle animal stickers for the walls and furniture of a baby's room. My question, is the stickers peel able so as the child ages you can remove them and perhaps put up some other type of decoration without ruining the walls or furniture?
ReplyDeleteWhat kind of sticker paper? Sorry, I'm a newbie. Would window cling vinyl work well for glass items. I'm just concerned that sticker might not come off easily.
ReplyDeleteI just made Minecraft "Creeper Juice" labels the other day, in preparation for my son's 9th birthday coming up in a few weeks. (Found predesigned Minecraft labels online, but modified them quite a bit, adding each kid's name in a Minecraft font, picking the exact same colors from the original "Creeper Juice" text below, and enlarging the labels by adding an offset with a cut-line, then another offset with same color fill without a cut-line. (Learnt it here on your blog!). My son is so exited about everything regarding his upcoming birthday party. (Some things he knows, like these labels, and some things will be a surprise for him). Also making Minecraft square cardstock torches with print & cut (not labels), printing, cutting, glueing, putting something inside to fill them up, leaving room inside for the upper 1/5 of the torch, to add battery tea-lights. :)
ReplyDeleteDo you use any kind of sealer to keep the ink from running off the sticker paper? Or is that more of a problem for glossy paper? Thanks!
ReplyDeleteDo you use any kind of sealer to keep the ink from running off the sticker paper? Or is that more of a problem for glossy paper? Thanks!
ReplyDeleteThanks for this useful post. Now i am bookmarking it for future posts. Keep Sharing............
ReplyDeletehttp://goo.gl/2glZVz
do you use a silhouette cutting mat? if so, which size do you use for the full size avery shipping labels?
ReplyDeleteI made some stickers using the same sticker paper using the sticker cut setting, but with some stickers the blade cut through the top white sheet and bottom yellow sheet, other stickers it did not cut through at all. Any suggestions? I have the cameo 3 with the auto blade. Could the autoblade be part of the problem?
ReplyDeleteGreat idea.. Thanks for sharing this with us.. These tips and guides are really valuable.
ReplyDeleteWhat kind of mat do you use? Do I need to have the PixScan mat to do this?
ReplyDeleteIs there a way to cut around each sticker so they could be individual stickers rather than one big sticker sheet?
ReplyDeleteYes you print to your home printer (not the Silhouette machine)
ReplyDeleteI just did a sheet this morning and the pre-determined cut settings in the Cameo 3 for "Sticker Paper, white" cut all the way through the sticker and the backing of my Avery sticker paper. It's ok because the sheets are scored on the back so they still can easily release but I will have to play with the settings. Force of 14 is WAY higher than another of your posts where you show the cut settings provided by Onlinelabels.com, which was Force of 3 or 4.
ReplyDeleteWhat do we do if we designed something in Adobe Illustrator? I usually design in that program but now I'm wanting to make some spice jar labels and don't know how to get the two programs to work together. Maybe they don't?
ReplyDeleteHey there! I'd export an SVG (Designer Edition or above) or as DXF (Basic) from Illustrator and then import them into Silhouette Studio. You can turn on the registration marks and arrange your labels from there.
DeleteI'm trying my first Print and Cut! When I click on print, it only shows a print preview and it is blank. What am I doing wrong?
ReplyDeleteHey there! Check out this blog post: https://www.silhouetteschoolblog.com/2016/05/why-isnt-text-printing-from-silhouette.html
Delete