With vinyl you have one shot to get it right and if you don't...what a
waste because we all know you're not pulling it off and trying again.
So today I'm going to share a trick for applying vinyl called the "Hinge Method".
This technique to apply vinyl for your Silhouette projects works for
adhesive vinyl and stencils whether you're applying to the wall, a wood
sign, or another piece of vinyl! Keep in mind this is different than layering and does not use registration marks.Preparing, Cutting, and Weeding Vinyl
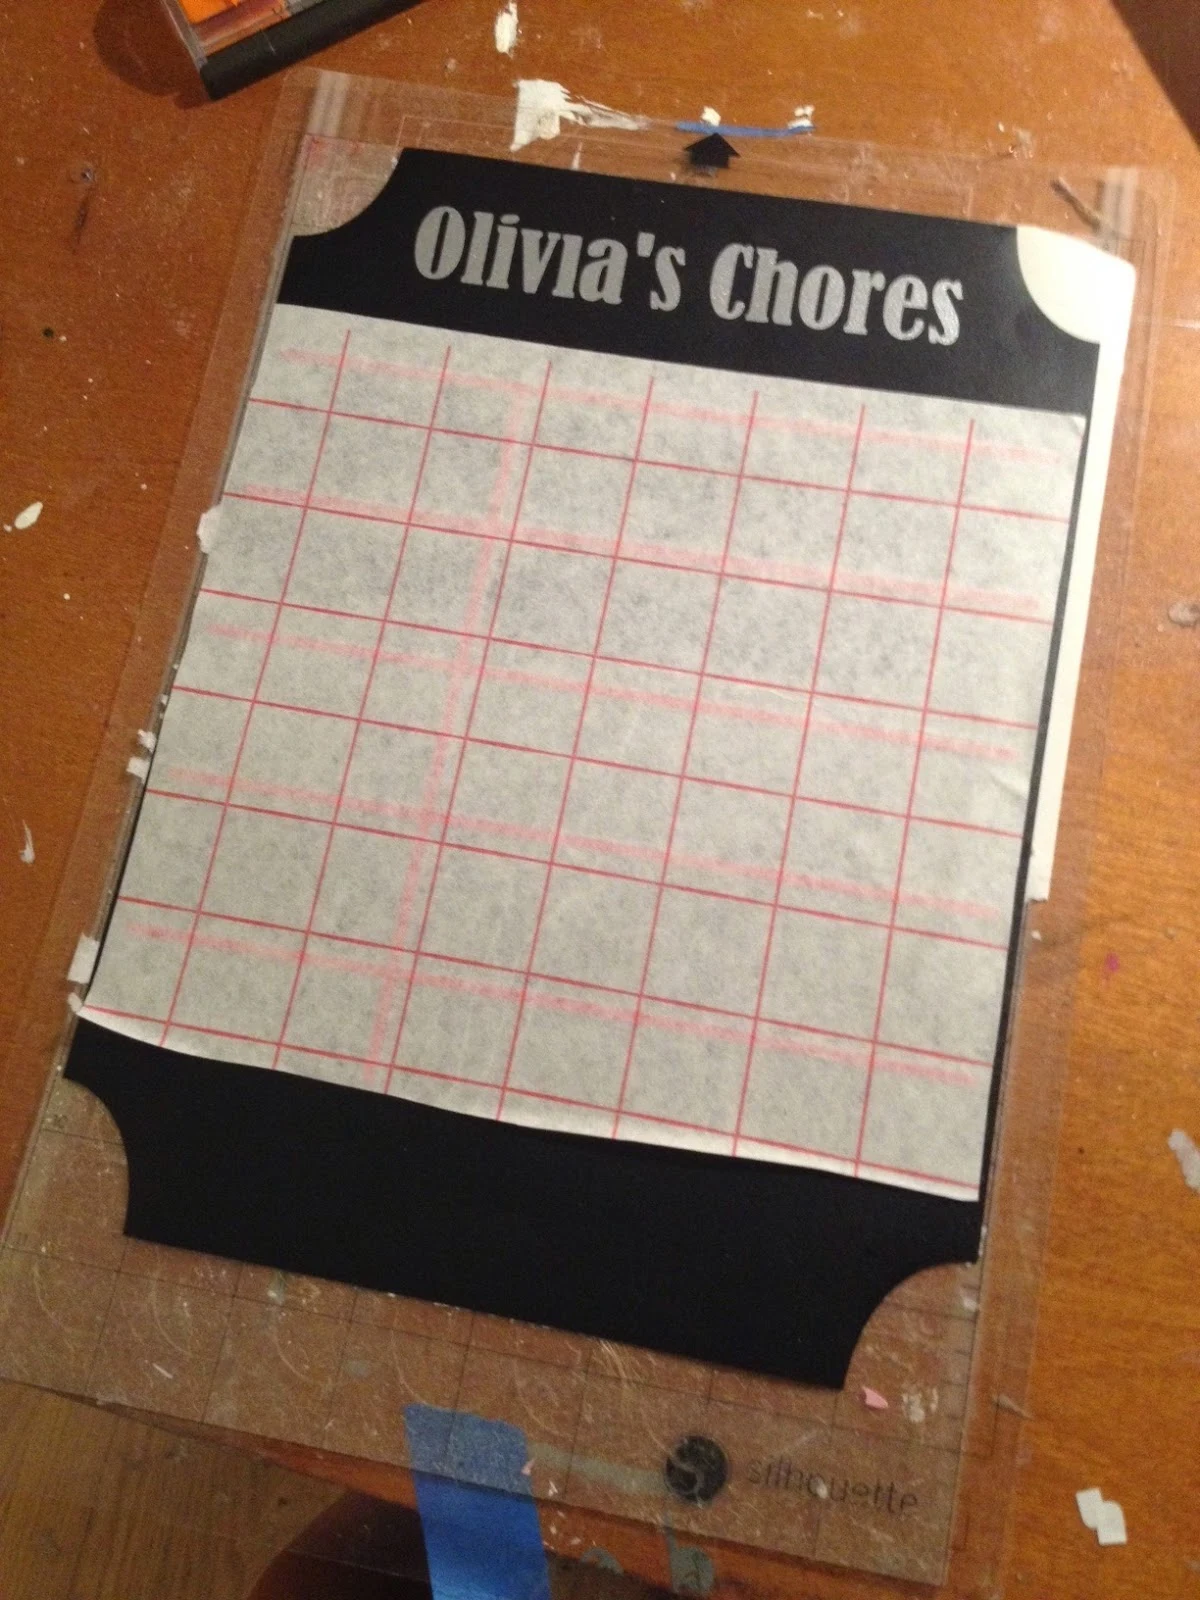
Cut your vinyl like you normally would with your Silhouette cutting machine. I am using a combination of Oracal 651 and Chalkboard vinyl for this project.I'm making a chore chart for my daughter, which I'll fully detailed in this Silhouette tutorial. What I need is to ensure that the red divider lines go onto the black chalkboard vinyl exactly straight. I have a keen eye for crooked text and designs and it drives me bonkers if anything is even a fraction of a millimeter off.
Weed the vinyl after you cut it and then lay the vinyl design - still on the backing - on the cutting mat. This just keeps it from curling and keeps it from moving too much. So much easier to work with like this.

Now cut a piece of transfer paper or transfer tape and lay it over your vinyl, again like you normally would. Use a scraper to rub all over it so it's nice a flat. DO NOT PEEL UP THE TRANSFER PAPER.
Right now you should have a vinyl sandwich....vinyl backing on the bottom with vinyl in the middle and the transfer paper on top.
If any transfer paper hangs over the edge (as you can see mine does, along the bottom, in the picture above), just trim it so it's the same size as the vinyl backing.
Pull your vinyl sandwich up off the mat and move it to the side. (I've now put my chalkboard vinyl -with the backing still on- onto the mat to steady it as I add the red vinyl on top)
Alright here's where the magic starts to happen. Working on a flat surface, like a table, lay the vinyl sandwich onto the material where your vinyl will be placed. Again, in my case it will be another piece of vinyl...but this would work for on a piece of wood, a canvas, glass, paper, or a glass frame.
Position it so it's exactly where you want it. Then use a sewing gauge if you have one, or a ruler, and measure it from whatever side or top/bottom you are working against. In my case, I wanted my design exactly centered and even on both the left and right sides so from the left most side of the design, I used a ruler to measure down from the top edge of the material to the top edge of where the vinyl design starts.
Now repeat on the other side...making any slight adjustments so that the distance is exactly the same. Once you've got the vinyl or stencil straight...put a large strip of painters tape stretching across the entire middle of the design. Try to make it as straight as possible...unlike me :/
The tape should be taped down to the left side of the table, go over the transfer tape, and then taped down on the right side of the table. After you do this, double check that your design has not moved at all by remeasuring.
If it has moved, just peel up ONE side of the tape and adjust that side up or down slightly so it's even again with the other side.
Now....are you ready for this? Grab a pair of scissors and keep them close. Peel back the transfer paper from the top half.
Hold it back, while you cut the vinyl backing away right along the top of the tape line. (Sorry for the blurry photo, I could have used an extra hand here).
See why this is called the 'hinge' method now?
After the backing is removed, you can place the top half of your vinyl/transfer tape down.
Remove the hinge piece of painters tape now. You don't need it since the top half is now holding everything in place.
Fold the bottom half up so you can remove the vinyl backing and then fold the transfer tape and vinyl back down.
Use your scraper one more time to rub the vinyl onto the surface and then carefully peel away the transfer paper.
Magic...!
And here's how this chalkboard vinyl project turned out!! Super cute, right?!
Note: This post may contain affiliate links. By clicking on them and purchasing products through my links, I received a small commission. That's what helps fund Silhouette School so I can keep buying new Silhouette-related products to show you how to get the most out of your machine!
Thanks for coming to class today at Silhouette School. If you like what you see, I'd love for you to pin it!


.JPG)


.JPG)


.png)


I started doing something somewhat similar. After headaches, trashed vinyl and tears, I started scoring the backing of my cut vinyl maybe an inch from the top or from the side, then I could peel back just the small portion, center it and attach just that small part then finish peeling and attaching the rest of the vinyl. Does that make sense? Much easier for me!
ReplyDeleteIs it normal when applying vinyl to glass that it is raised and not flat if not how do you accomplish a flat transfer.
ReplyDelete