I'm not a numbers person and for the life of me I can never remember what the cut settings should be. So after wasting a decent amount of my precious glitter HTV today I finally broke down and manually added Glitter HTV to my materials list with the settings I found to work perfectly.every.time.
You can do this with any material that doesn't come pre-loaded with recommended settings such as freezer paper or, in my case, glitter heat transfer vinyl.
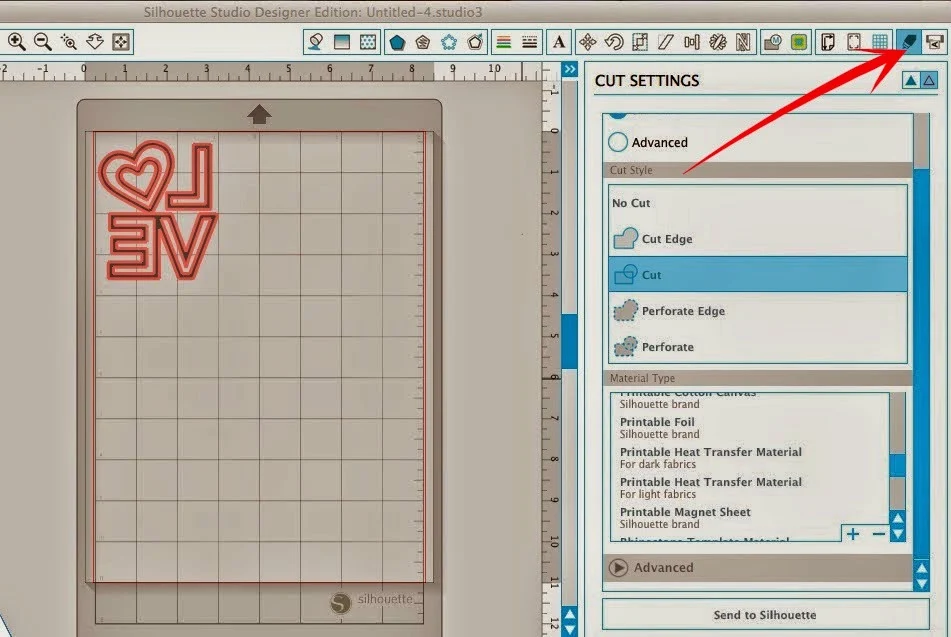
Once you have found the settings that work for your medium, what you want to do is open up Silhouette Studio. Click on the Cut Settings Icon.
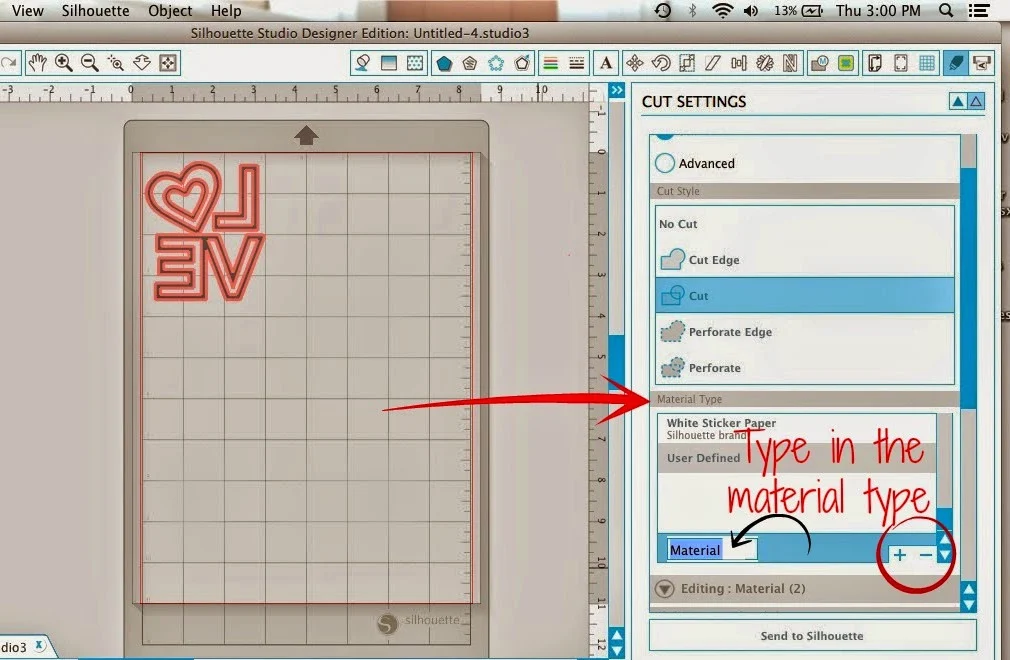
To the bottom right of the Materials Type window you'll see a little +/- signs. Click the plus sign to add a new material and type in the name of the material.
All of your custom material cut settings can be found at the bottom of the materials list under "User Defined." If you want to delete a material in your User Defined list, simply click on it and hit the minus symbol.
By adding custom cut settings, you will avoid wasting materials once you find the perfect settings...especially if you're like me and you can't remember what you had for breakfast let alone the cut settings for 148 different materials.
Note: This post may contain affiliate links. By clicking on them and purchasing products through my links, I received a small commission. That's what helps fund Silhouette School so I can keep buying new Silhouette-related products to show you how to get the most out of your machine!
Thanks for coming to class today at Silhouette School. If you like what you see, I'd love for you to pin it!


.png)


Excellent! Thank you...I really really really appreciate your tutorials!
ReplyDeleteDo you know if there is a way to export the custom cut settings and import them on a new computer?
ReplyDeleteThank you for all of your tutorials! I believe I deleted one of the preset materials from my Studio software (HTV Smooth)...is that possible and how do I correct it?
ReplyDeleteI had all mine put in but my laptop ran updated and restarted and all the settings were gone! 😭
ReplyDeleteI entered the 3 I really use all the time just the way you said but when I close the program and start it back up they are gone. Any help?
ReplyDeleteI see several comments above about the setting disappearing after closing out program - any idea why this is?
ReplyDelete