It's an exciting day here at Silhouette School! Not only do I have a really cool tutorial on how to make custom Rhinestone designs for you...but it's Silhouette Challenge Group day and that means....
Before we get to all their awesome projects let's talk Rhinestones. Today's is the second lesson in the Rhinestone Series. The Rhinestone 101 lesson covered how to Rhinestone using pre-made rhinestone designs that you can purchase from the online store. But what's really cool about the Silhouette Studio Designer Edition (and why it's one of my favorite things ever) is that you can turn ANY design or any font into a Rhinestone design very easily. So while you don't need DE to rhinestone, if you want to make custom designs you will need it. Oh and in case you're wondering what other features the upgrade gives you (or if it's even worth it) check out the 13 reasons why I say Silhouette Studio Designer Edition is definitely worth it.
Before we get to all their awesome projects let's talk Rhinestones. Today's is the second lesson in the Rhinestone Series. The Rhinestone 101 lesson covered how to Rhinestone using pre-made rhinestone designs that you can purchase from the online store. But what's really cool about the Silhouette Studio Designer Edition (and why it's one of my favorite things ever) is that you can turn ANY design or any font into a Rhinestone design very easily. So while you don't need DE to rhinestone, if you want to make custom designs you will need it. Oh and in case you're wondering what other features the upgrade gives you (or if it's even worth it) check out the 13 reasons why I say Silhouette Studio Designer Edition is definitely worth it.
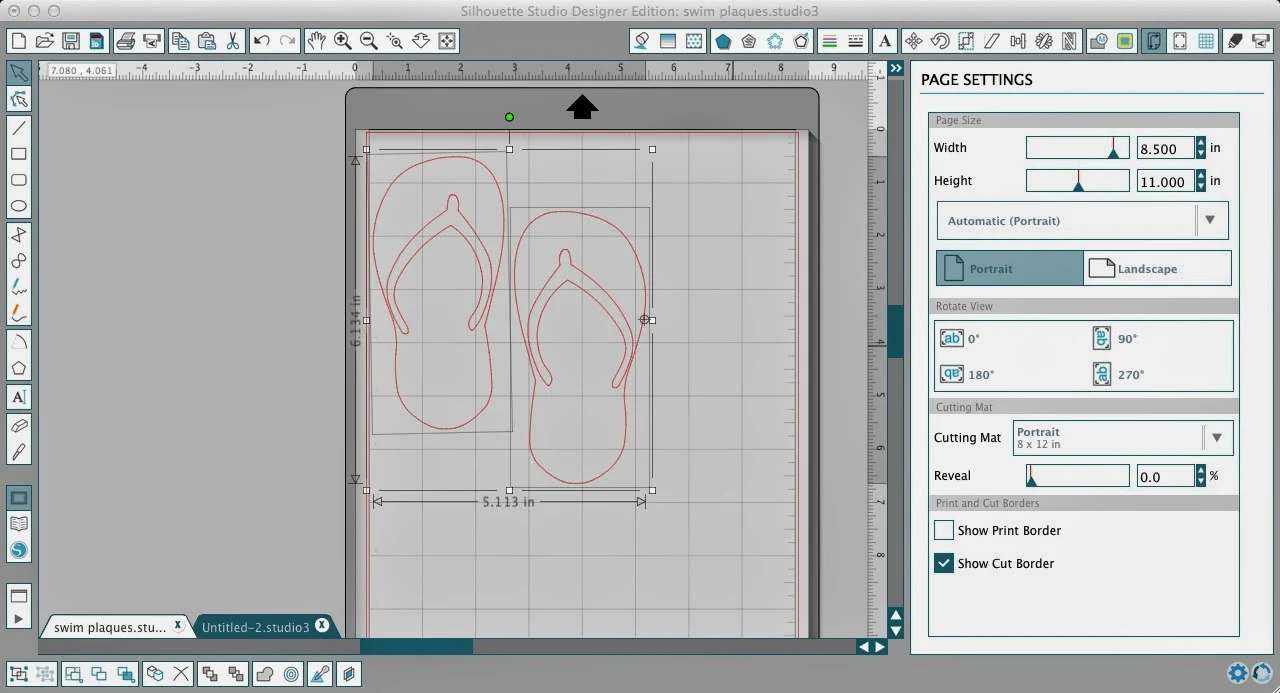
Okay so let's say you have Designer Edition and you have a design in your library or you imported a jpeg, traced it and now want to make it a rhinestone design (as is the case with this pair of flip flops).

What you're going to do is open your design in Silhouette Studio. I'm using this pair of flip flops which you can see just has regular cut lines. To turn it into a rhinestone cut file I'm simply going to select both the flip flops and then click on the 'Open the Rhinestone Window' icon at the top. Clicking on the icon brings up this window with lots of different options.
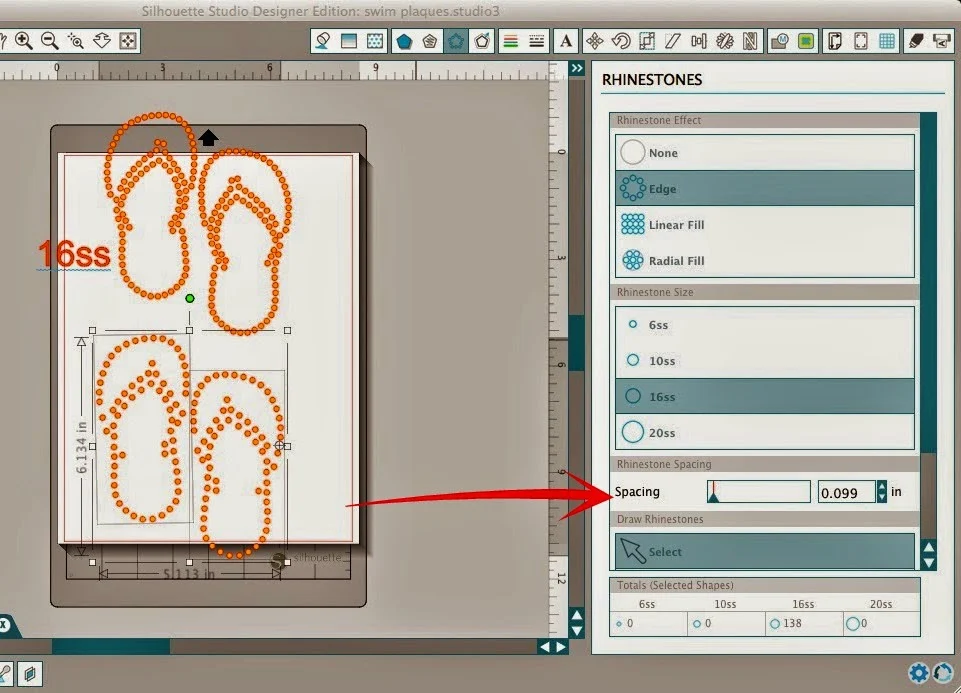
I always start by picking 'Edge'. This will turn all the cut lines into circles - each representing a different rhinestone.

You can see that my circles are set to fit size 10ss rhinestones. They're pretty small and I honestly can't imagine working with the 6ss. But if you click on the different sizes, you can see how the template changes. The flip flops designs are all the same sizes only the rhinestone size has changed.
(Click on radial and linear to see how they each fill in the design differently with rhinestones).
Let's say you decide to go with the 16ss and just want the outlined edge rhinestoned...but ehhh the rhinestones are a little too close together for your taste. No problem, you can makes them slightly further apart, by using the spacing slider bar.
By using the 'single click' function you can add single rhinestones (those I've added are in green)... or use the free hand rhinestone tool to get a trail of rhinestones (blue).
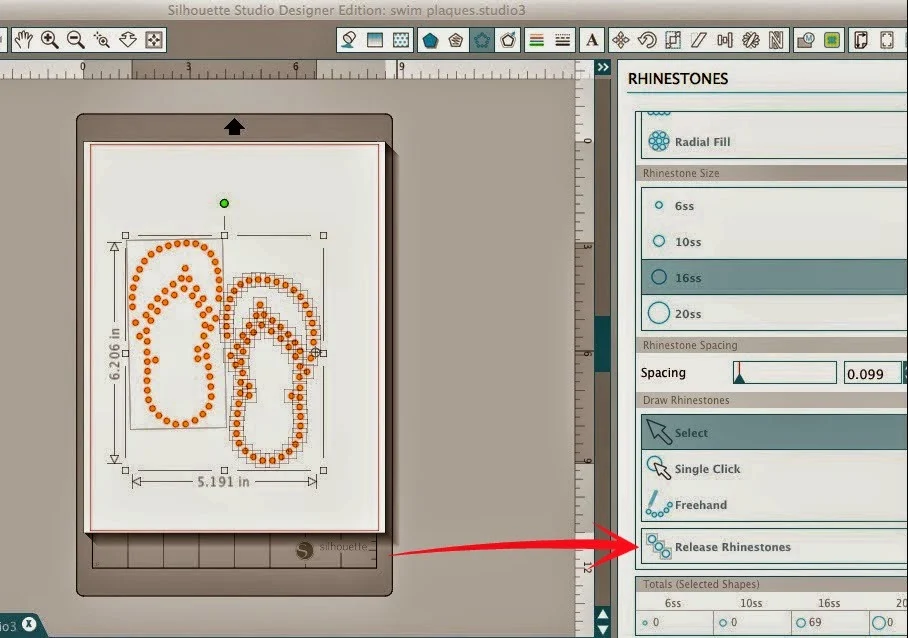
And I can't leave you without showing you what I made with my little rhinestone flip flop. Would you believe that after all that I decided to only rhinestone the strap or 'thong' of the flip flop? (Simply released the compound path and turned the strap into a rhinestone design while leaving the rest a cut line).
Instead of cutting on the rhinestone template material I cut on vinyl. Just like I would have been had I cut on rhinestone material, I was left with circles for my rhinestones right in my vinyl.
Then I used my rhinestone setter (not a big fan, honestly) to set and heat each individual stone on the wood sign I made for my daughter.
And don't worry, the third part of the Rhinestone Series will be on rhinestoning alternative mediums...including wood, paper, and plastic so I'll have lots more ideas for you!
But until then...since summer, flip flops and rhinestones are a few of my favorite things, I thought this project would be perfect for this month's Silhouette Challenge post! So...don't go anywhere yet because my Silhouette Challenge buddies and I are all sharing projects on our blogs today, so peruse the projects below for a wealth of Silhouette inspiration!

1. Just a Girl and Her Blog // 2. The Frill of Life // 3. A Time For Seasons // 4. The Thinking Closet // 5. Ginger Snap Crafts // 6. Grey Luster Girl // 7. Simply Kelly Designs // 8. Home At Eight // 9. Please Excuse My Craftermath... // 10. My Paper Craze // 11. Mama Sonshine // 12. Practically Functional // 13. Adventures in All Things Food // 14. Two Purple Couches // 15. Dragonfly & Lily Pads // 16. Sowdering About // 17. Cutesy Crafts // 18. My Mom Made That // 19. Pitter and Glink // 20. Pineapples And Pinecones // 21. Dream a Little Bigger // 22. McCall Manor // 23. TitiCrafty // 24. unOriginal Mom // 25. Persia Lou // 26. Lil Mrs Tori // 27. Home. Made. Interest. // 28. Sandpaper and Glue // 29. Silhouette School // 30. Creative Ramblings // 31. My Favorite Finds
Note: This post may contain affiliate links. By clicking on them and purchasing products through my links, I received a small commission. That's what helps fund Silhouette School so I can keep buying new Silhouette-related products to show you how to get the most out of your machine!
Thanks for coming to class today at Silhouette School. If you like what you see, I'd love for you to pin it!


.png)


This comment has been removed by a blog administrator.
ReplyDeletevery nice post! can you help me ?
ReplyDeletePlease Help me 1. CLICK HERE
Please Help me 2. CLICK HERE
Please Help me 3. CLICK HERE
very nice post! can you help me ?
ReplyDeletePlease Help me 1. CLICK HERE
Please Help me 2. CLICK HERE
Please Help me 3. CLICK HERE
Hi. Can you scan in a pic with letters, let’s say from a shirt, that you need to outline the letters and make a template? I ask because I don’t know the font so I cannot just make the template myself that way, and the exact sizing will already be set once I scan in. So I didn’t know if DE had a trace option to be able to do this.
ReplyDeleteAlso, do you have to have a silhouette to use DE or can you just purchase DE, convert into an SVG file once made, and cut on a circuit?
Thanks in advance for your help