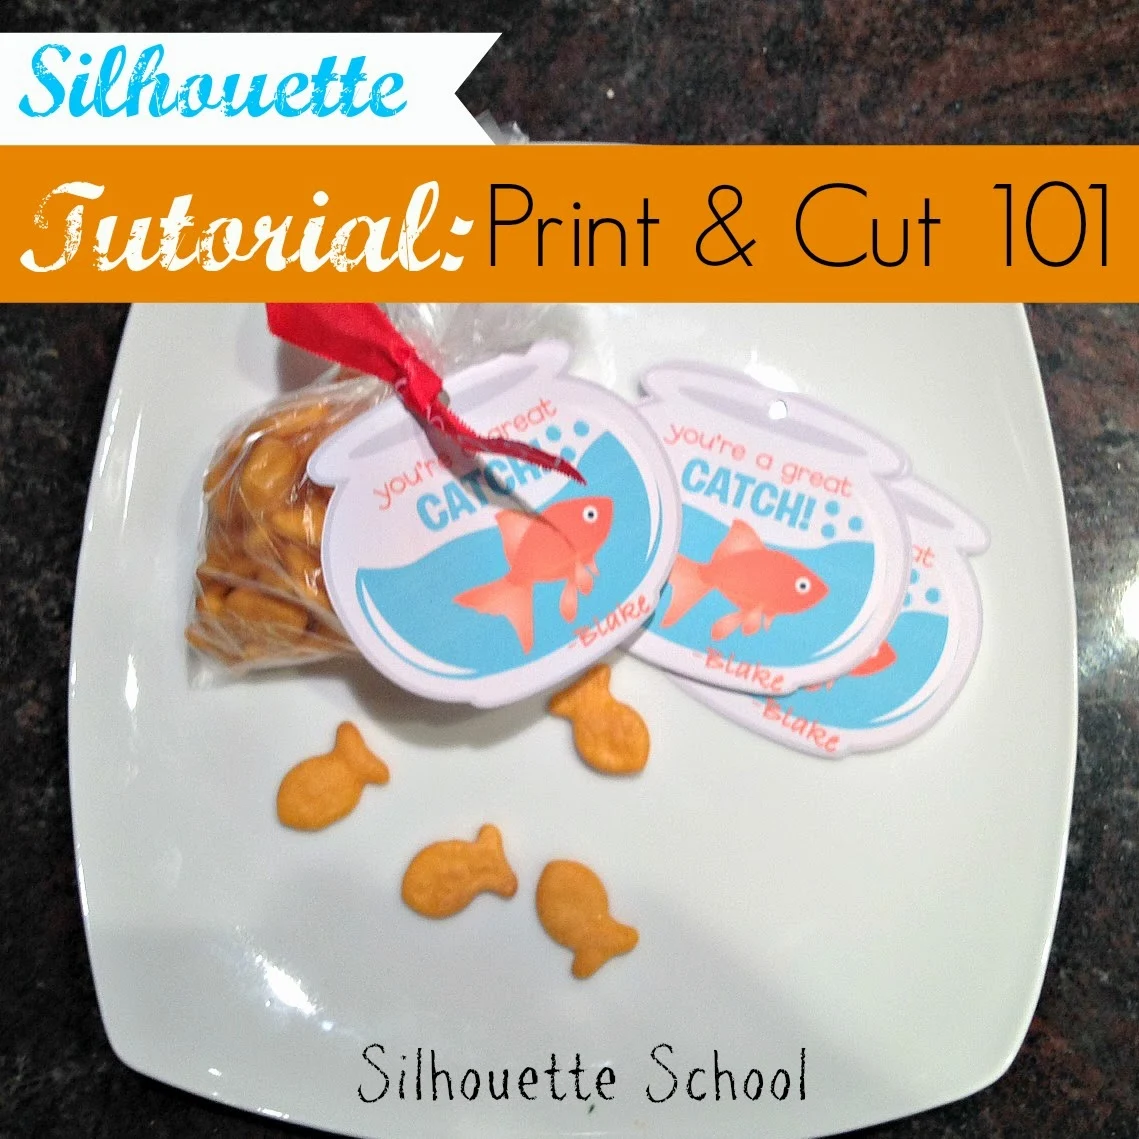
I promise you once you do one Silhouette cut and print project, you'll feel more comfortable and confident. Because Printing and Cutting can be intimidating, I'm going to walk you through the Silhouette Cut and Print tutorial one step at a time and break this into four parts.
1) Setting up your Print and Cut file in Silhouette Studio
2) Registration Marks
2) Registration Marks
3) Printing Your File
Setting up Your Silhouette Print and Cut File
First things first: open up Silhouette Studio and pick your design from either the free library or the Silhouette Online Store. The first project you do I would highly recommend using a design that's specifically designed for print and cut (you can search 'print & cut' in the Silhouette Online Store's search box). There are several free options that come in the Silhouette Library or you can buy one in the Silhouette Online Store.NOTE: If you want to make several of the same design, we will duplicate the original after we get it all set up for print and cut.
Open your design into the Silhouette Studio work area.
We're actually going to start by going to the Send panel so we can adjust our cut lines.
For a Silhouette Print and Cut you typically only want the edge of the design to cut so you'd pick "Cut Edge." In this case I am making a tag so I need the ribbon hole to be cut out as well. For that reason I have to ungroup the design (right click > Ungroup) and select the ribbon hole circle and the outside edge and click "Cut".
All other cut lines - including any internal text - should remain off or as "No Cut."
Now you can resize your design and move it around the Silhouette Design Studio work area to where you want it to print and cut. If you want to cut more than one you can duplicate the image by selecting it > right click > Duplicate or by using one of the other methods to replicate in Silhouette Studio.
Adding Registration Marks
Now comes one of the most important parts: setting up your page size and adding registration marks!
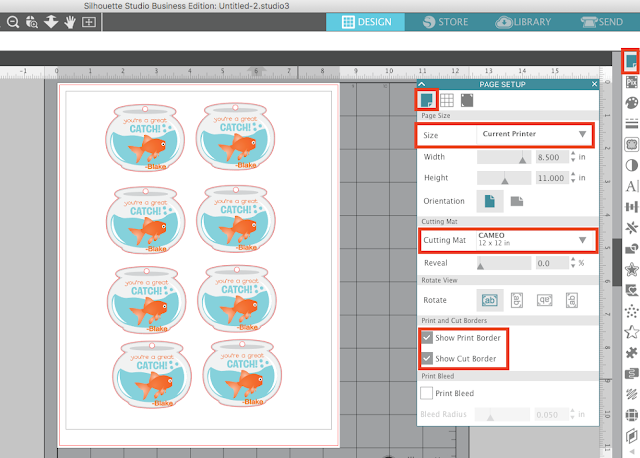
Open the Page Set Up Panel.
Start by changing the material size to Current Printer.
Further down you'll want to make sure to pick the correct size cutting mat based on the machine you are cutting with.
Finally check the boxes to show both the cutting area and the print area.
Once you do this three black marks will appear on your work area along with a hashed area. Be sure none of your designs are touching the any of these areas. If they are move, them slightly making sure all designs and all parts of designs are inside the Cut border and the Print border.
And now we're ready to print...
Printing from Silhouette Studio
Be sure your computer is connected to your regular printer and that you have paper in the paper tray.From along the top tool bar, click the 'Send to Printer' button and your design will print. I had mine print on cardstock. Here's what it looked like once it printed.
You can see Silhouette Studio places some markings on the top corners and the bottom left corner. These are the registration marks and they are what tells the Silhouette where to cut the design.
That was easy...and now we're ready for the fun part: Cutting!
Cutting with Silhouette Print and Cut Function
Take your printed sheet and place it on the cutting mat so the top edge of the paper is in line with the top edge of the grid on the mat. For this Silhouette print and cut project, I was cutting with my Silhouette Portrait.When your mat is prepared, load it into your cutting machine.
Once the mat is loaded, return to the Send panel in Silhouette Studio.
Change the material type to match the material you are cutting - in this case Cardstock.
You'll also want to double check the Tool. I am cutting with an original Portrait so I have to use the Ratchet Blade, but if you are cutting with a Silhouette CAMEO 3 or Portrait 2 your tool will default to Autoblade.
Finally, click "Send." This will begin the cutting process.
Once all three of the registration marks have been successfully scanned, the cutting will begin.
This is where the magic happens! So sit back and wait for your printed file to be cut to perfect...
Check this out. How amazing is that?!
Let me see 'em! Share a link to your first Print and Cut project in the comments below or upload a picture to our Facebook wall!


.png)


Hi, this bit of kit looks really great! I'm thinking about making a purchase to make my wedding stationary. I have a question, I'd like to make printed tags on quite thick card (too think to go through my printer). I think my best bet is to print onto paper/labels and stick it onto the card and then cut them out. Do you think that the Sillhouette would cut cleanly through both the paper and the card together? Or would the paper get scrunched up?
ReplyDeleteMany thanks, your tutorials are great!
Louise
Just to clarify, by card, I probably mean cardboard (do you call it chipboard in the USA?) it's probably the thickness of two cereal boxes. Having just looked at other tutorials on your site, would the silhouette be able to cut through this at all? Many thanks, Louise
ReplyDeleteCan this be printed? I tried to subscribe to newsletter, but I was sent to Mail Chimp with missing page message.
ReplyDeleteI would like to know how to print and cut on vinyl please.
ReplyDeleteDo you have a tutorial that deals with print and cut color? My colors are way off from my screen? Do you have any suggestions?
ReplyDeleteHello
ReplyDeleteI am wanting to do a print and cut file. However, I cannot find the 'free' examples you are talking about. I clicked on the left hand side that looks like a book and my library came up saying there are 153 files. There was nothing there. I then went into the store and could not find it there either.
I am sure I am doing something wrong- please help! Thanks so much
I got my image printed, but I don't see the "print image" screen you have pictured above that takes you through the rest of the steps for print and cut. I have the new Silhouette Cameo. Thank you!
ReplyDeleteHere's the updated version http://www.silhouetteschoolblog.com/2015/02/silhouette-print-and-cut-tutorial.html
DeleteI used 8 1/2 by 11 and my images got cut off, how do you set the page size?
ReplyDeleteUse 'Current Printer'
DeleteWith the upgrade my registration lines do not look right and silhouette says registration failed. Please help. Thank you
ReplyDeleteCan a print and cut design be used for just cutting?
ReplyDeleteHi, what is the maximum print and cut area that can be used, 12x12 or will it work for anything that can fit on a cutting matt?
ReplyDeleteHi I had emailed you about mis aligned print and cut last night but ive since sorted it....I was using registration marks but not the correct ones for my machine! Love the school and if ever i get stuck hubby tells me to log into school :) Thank you I have learnt so much from here
ReplyDeleteMy silhouette did not cut along my tag edges. The shape was made but it cuts into the design. Any thoughts from anyone?
ReplyDeletei dont own a printer so how to transfer a file to other computer with cutting marks
ReplyDeleteDo you have to use the same size mat as the paper? I've tried this several times and I'm not getting it to line up :(
ReplyDeleteI am having the most frustrating time trying to do this with the new software. Could you possibly update your tutorial to show where everything is in version 4.1? It's driving me nuts that there isn't a separate cut style window!
ReplyDeleteOmg thank you so much for this tutorial! I was going crazy trying to get my machine to work and all I needed to do was change it to printer size!!
ReplyDeleteWill a laser printer work or does it have to be inkjet?
ReplyDelete