The materials you will need are:
- 813 Vinyl-This is my preferred vinyl when making all of my wood signs. You can grab it from Swing Design by clicking HERE. They ship any order over $35 FREE and you get to pick a pack of FREE DESIGNS by clicking on this link. (If you do not have 813 on hand, feel free to try this method with 651, 631 or even contact paper. Experimenting is the best way to see what works well for you.)
- Transfer Paper
- Squeegee (Old Credit Card or whatever tool you prefer to adhere your design.)
- Painters Tape
- Wood Blank
- Paint
- Small Container to Mix Paint
- Calcium Carbonate
- Weeding Tool
- Design. I am using one from the Wood Sign Bundle on So Fontsy.
- Scissors
- Condiment Cup to Mix Paint
Let's get started. The first step is choosing the designs you want to cut with your Silhouette machine. I'm using the Be Still and Know design from the Wood Sign Bundle currently available on So Fontsy!
After you download your design, open it in Silhouette Studio.
Size your design to fit your piece of wood then cut it with your Silhouette machine. If you're new to cutting stencils on Oramask 813 with your Silhouette, you can check out this beginner wood sign tutorial for tips on cutting, cut settings, and transferring.
Weed the stencil that you've just cut on the Oramask 813.
Then apply the transfer paper.
To apply the stencil to the wood blank, we are going to use the hinge method. This allows you to evenly place your design exactly where you want it to be.
Lay your design on your wood blank.
Do not remove the backing or the transfer paper at this point. Line the stencil up where you want it placed and apply a piece of painters tape to hold it in place.
Once you apply the painters tape, peel the transfer tape from one side of the painters tape up removing the stencil material from the backing. Use scissors to cut off the backing.
Use your squeegee to lay the design down on your wood blank. The sticky transfer tape will now hold the design in place while you peel the painters tape up and continue to pull the backing off the other half of the design.
Use the squeegee to lay it down and then remove the transfer paper from your design.
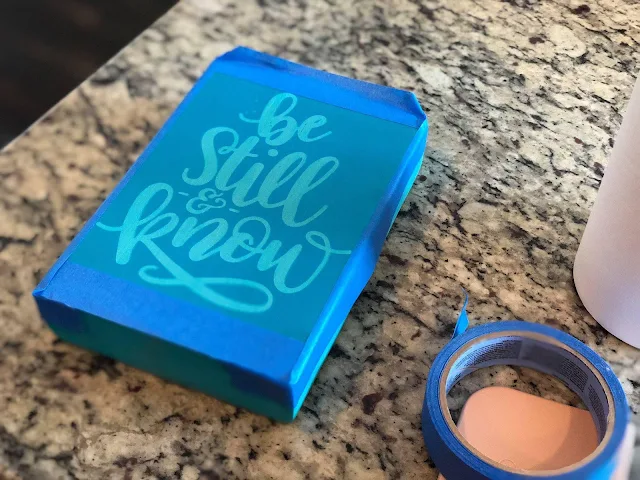
Using the painting method I am about to teach you can possibly be a little messy. Because of this, I try to protect my background from paint. Use painters tape and lay it around any part of bare wood to protect your project.
I am using Wise Owl Chalk Synthesis Paint. You can use any type of paint for this project. I am using a 2oz condiment cup and adding calcium carbonate to make the paint thicker. Keep adding the Calcium Carbonate until you have the consistency of greek yogurt.
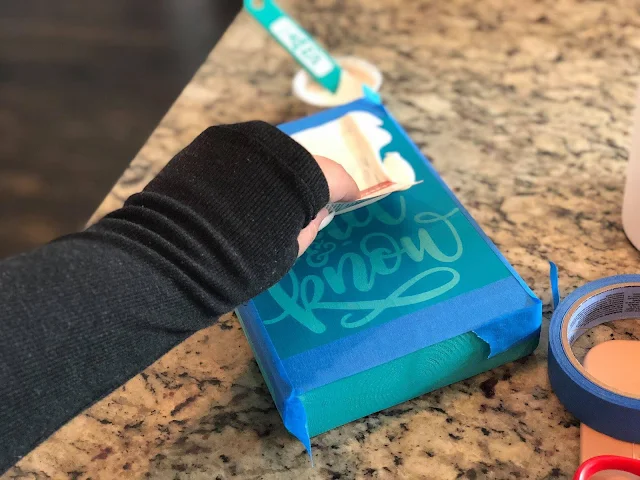
Grab your old credit card and scoop a little paint on your sign. I like to place it all over the outside of the design so I have plenty of paint to distribute across the stencil.
Begin to drag the paint down at an angle and place all excess paint back in the 2 oz condiment cup.
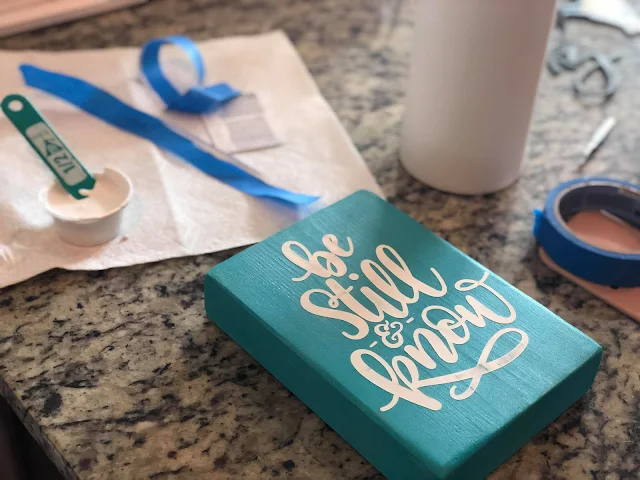
Once you have achieved good coverage and have removed excess paint, peel your stencil up.
Allow your sign time to dry and then seal with your preferred sealer. If you prep 5-10 of the same signs you are able to mass produce quickly once all the prep work is done.
Thank you all for following along with this tutorial today. You can find me on Facebook by following Milissa Martini Designs. I look forward to seeing your projects in the comments of this post.
Note: This post may contain affiliate links. By clicking on them and purchasing products through my links, I receive a small commission. That's what helps fund Silhouette School so I can keep buying new Silhouette-related products to show you how to get the most out of your machine!
Get Silhouette School lessons delivered to your email inbox! Select Once Daily or Weekly.


.png)


I absolutely love Wise Owl Chalk Synthesis Paint and their products!!! So easy to work with and amazing, high pigment colors!! Thanks for the tutorial. I can't wait to try it 😊
ReplyDeleteNo response needed, just, THANKS! Love your site and all the knowledge!!
ReplyDeleteCan you reuse the stencil?
ReplyDeleteNo, it would be one time use
Delete